|
Welcome to Mod Monday! One of the best ways to make your force stand apart from the rank and file and attract new players to the table is with creative and unique game pieces. While Battletech and Alpha Strike aren't WYSIWYG (wee-see-wig, "What you see is what you get") like other games, modifications, reposes, and creative construction enhance the gaming experience. In Mod Mondays, we look at cool modifications and tutorials to build dynamic poses! This week, we'll look at an easy repose and modification to make the Jenner JR7-C. Although this tutorial uses a metal model, it is just as easy with the plastic models-maybe even easier!  This Jenner has seen several coats of paint and at least one dip in paint stripper. Through all of that, the greenstuff sculpting has remained solid! SuppliesJenner Model Hobby Saw or X-Acto Saw Greenstuff Sculpting Tool Files Pen Drill Antenna Wire (floral wire or toothbrush bristles) Making the JR7-C ModelThe major change from a JR7-D to a JR7-C is the same as many of the early C3 refits: the removal of a medium laser and the addition of a C3 slave. In this case, one of the left arm lasers is dropped. Pick a weapons port and apply a small bit of greenstuff. Squish it into the port. With a sculpting to or X-Acto knife, scrape away the excess. You may find it easier to do this with a blade dipped in water (this helps prevent the putty from stucking to it). Let it cure over night. Once set, gently file the spot until it is flush with the rest of the surface. To help emphasize the C3 computer, be sure to add an antenna. While there isn't a nice guide hole in the mini, the panel lines on the back of the cockpit make a T shape that works nicely. With an appropriately small drill bit, drill a small hole in the T lines. Glue in your choice antenna. 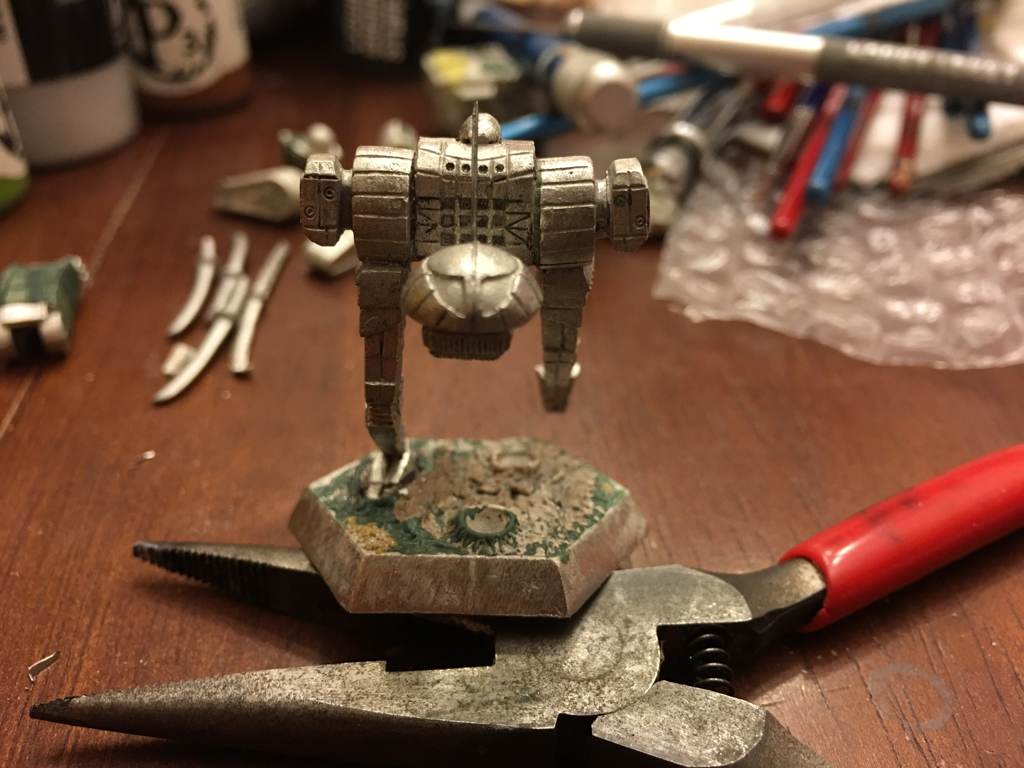 Reposing the Jenner Bonus Mod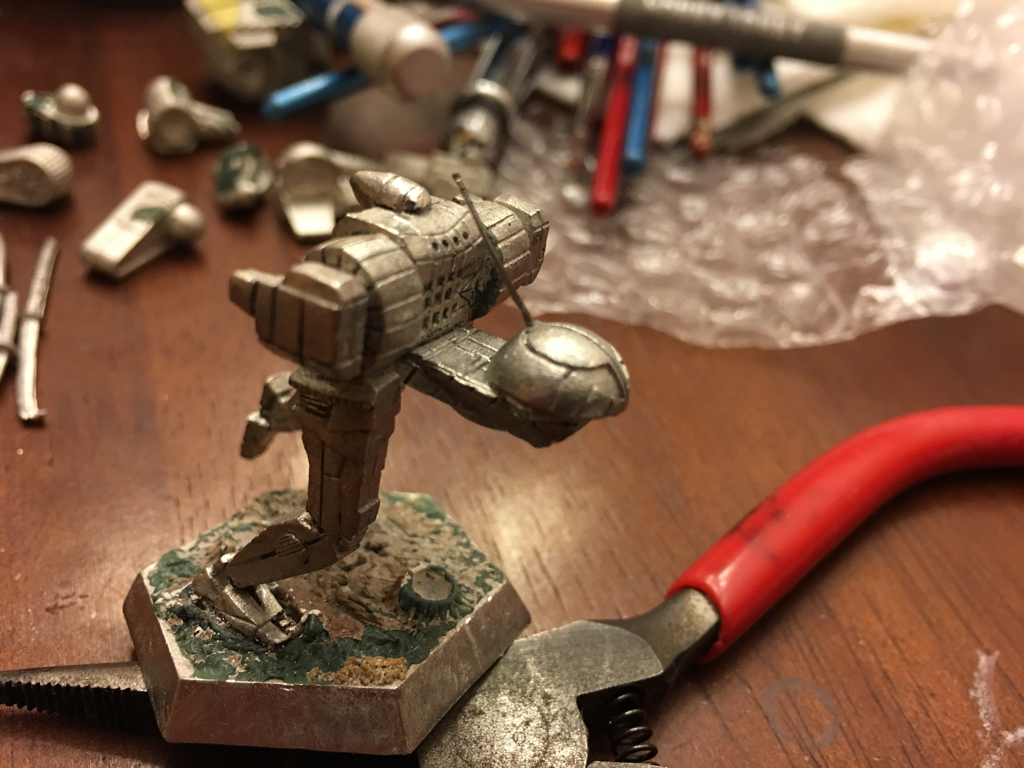 Look closely to see the greenstuff between the left leg and the torso. To repose the Jenner takes a only a little bit of time but makes for a repose more inline with the model's stats. It is easier with the metal miniature becuase it allows for bending the piece in a few places. Start by removing one foot and the corresponsing leg from the base and the torso with a hobby saw or X-Acto saw. Cut slowly and carefully to preserve as much detail as possible; this will save you from having to resculpt details later. Remember, the thicker the cutting tool, the more material you will lose. To keep model proportions, this may require you to rebuild lost material with greenstuff. On this miniature, I had to resculpt the horizontal panels on the inside of the hip because the saw removed them. To make the foot appear as if kicking back in stride, remove a small triangle from above the heel. File down the excess material. Apply a small dot of glue and gently bend the foot into place. Wipe away the excess glue and file when dry. If you would like to add simple treads to the foot, scour and file a few lines across the bottom. To keep the weapons pods aligned forward, remove and reposition the one from the leg. Simply remove the pod as close to it as possible to leave the joint in tact. This js a good time to get at pesky, hard to reach mold lines. Once the weapons pod is removed, find the desired angle and reglue the leg. There is enough sueface area that pinning the joint isn't necessary. It doesn't hurt, however, to pin it in place. Find the desired angle of the weapons pod and reglue it. To give the piece a bit more of a running pose, gently bend the leg on the base at the ankle and the knee. This will distort the panel lines a bit. To clean up the curved lines, carefully reform them by scraping an X-Acto or files through them. 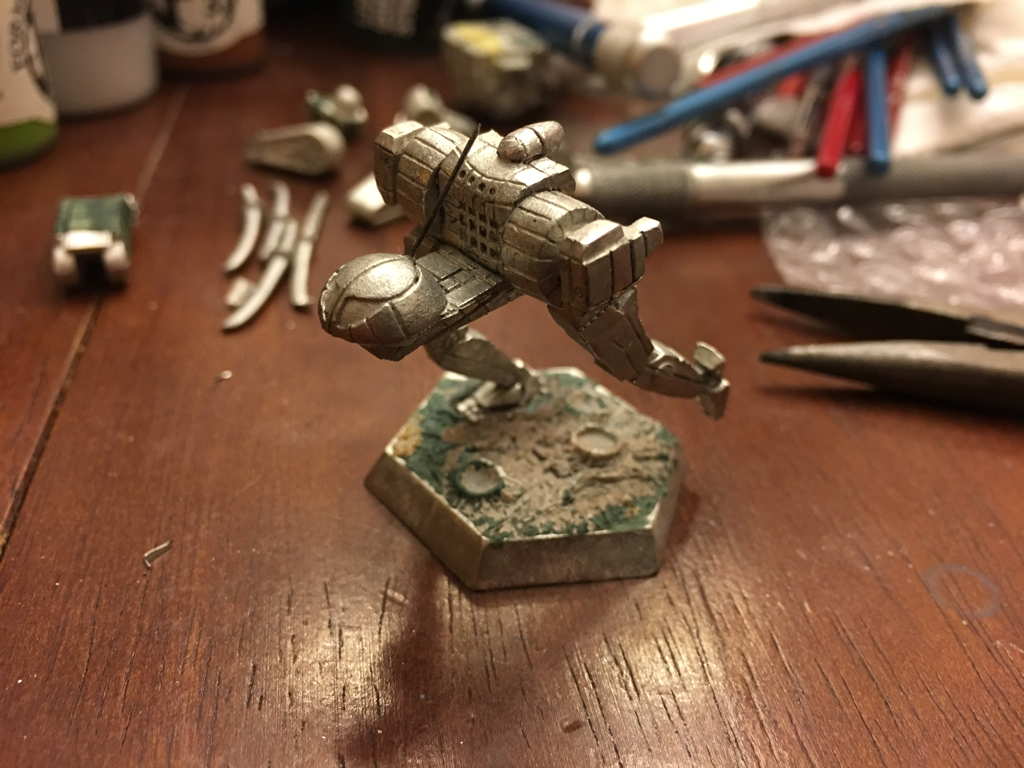 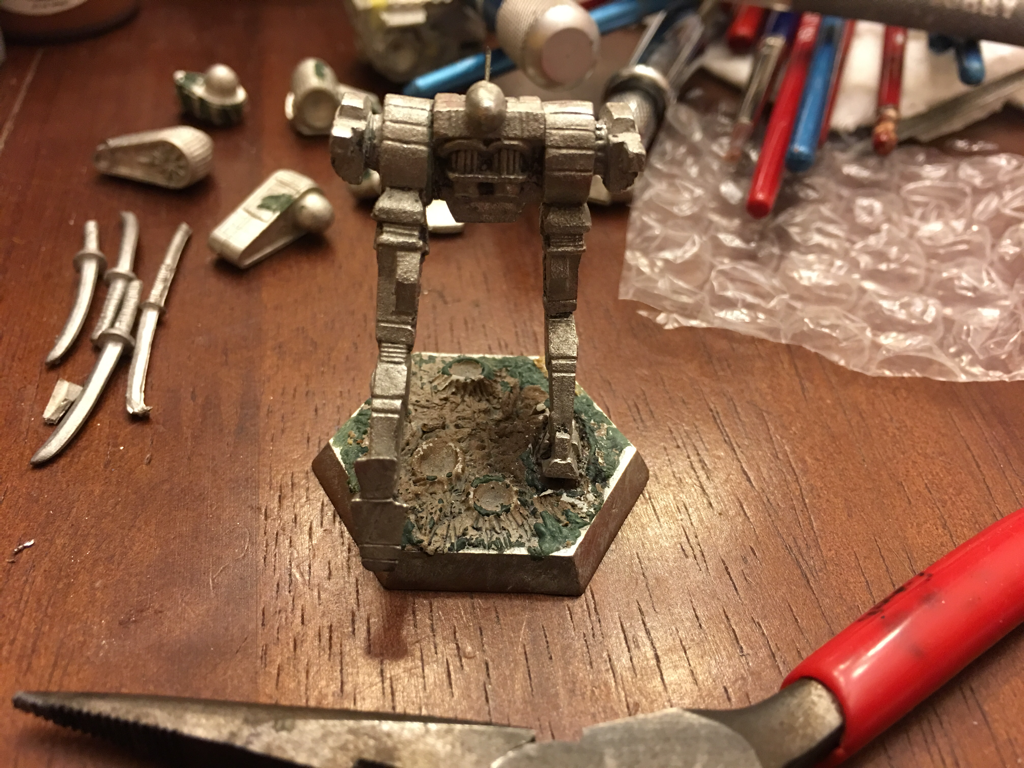 In about an afternoon, you too can have an simple and awesome reposed Jenner. What's more, the fundamental skills used in this job apply to nearly all levels of reposing and modding. From files to saws and drill bits to greenstuff, developing and refining these techniques opens an infinite world of new and interesting models. Have your own Jenner modification? Tell us about it in the comments! Hanger Crew Supporters
1 Comment
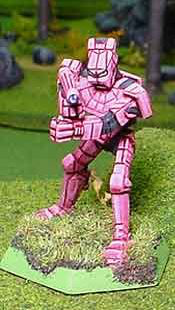
Welcome to Mod Monday! One of the best ways to make your force stand apart from the rank and file and attract new players to the table is with creative and unique game pieces. While Battletech and Alpha Strike aren't WYSIWYG (wee-see-wig, "What you see is what you get") like other games, modifications, reposes, and creative construction enhance the gaming experience. In Mod Mondays, we look at cool modifications and tutorials to build dynamic poses! This week, we'll look at a relatively easy repose on a Panther. Though this example is metal, it is just as easy (or easier) with the new plastics!
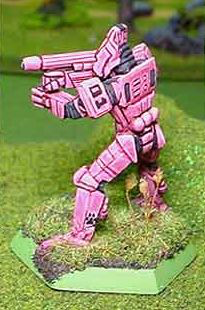
Panthers are all over the place-- and not only if you're a DCMS player. Issued in three metal pieces (walking, jumping, and the beginner set of a jumping piece made to walk) and at least three plastic editions (the old City Tech box, the Not Named box set, and the most recent, glorious box set and Alpha Strike Lance Packs) Panthers abound in collections. With Combat Manual: Kurita, DCMS players have new formations like the Horde Lance and faction exclusive variants like the PNT-CM, this venerable light 'Mech has new life. Fortunately, it is an easy model to modify and repose. As far as minis are concerned, the Panther is one of the easiest to work with. The legs have a natural bend from the start, making most reposes easy to complete. The arms have clean, straight lines between the shoulders and the torso that make removing and reposing a simple cut. Even the head, with sufficient ribbed material in the neck comes off with a few careful cuts of a hobby knife or saw. This build used the jumping model. To start, I sawed the peg from the feet, sawed the feet apart, and then removed the legs at the hips. (Were I going straight to the base, I may not have needed to remove the peg from the jumping base stand. Because I wanted to build a dynamic base with interesting terrain, however, I removed these.) To get an appropriate bend in the ankles for the standing pose, I made little incisions at the front and back of each ankle and carefully bent the foot to the correct position. Where the gap created by the cut closed, I filled it with glue and sanded it down when dry. Where the gap opened, I added a bit of greenstuff to fill it. After the putty set, I cut away the excess material with an X-Acto and sanded it flush. Wanting a natural stance, much like an archer or standing rifleman, I lined up the spine of the 'Mech between the head and pelvis (already in a decent pose) with the knees and ankles. To keep the legs balanced and in the correct placement, I added a hip pin that went through the pelvis and into both legs. A bit of filing was required to make each joint flush. BAM! Legs are done! After the legs, I moved on to the arms. Two easy and straight cuts with a razor saw removed the arms at the shoulders. Keeping the pose, I sighted an approximate line of sight down the arm from the position of the head. The right arm required a bit of straightening-but not too straight-by carefully bending it. The left arm required a bit more work. After separating the upper and lower arms at the elbow, I sculpted a bracket around the pin in the newly reposed arm. This bracket also made up for some lost material and lengthened the arm to the spot I wanted supporting the hand. I avoided rotating the arm 45* to put the PPC on top because that's extra work. Once fitted, each arm received a pin at the shoulder to the torso. To get around the chest piece, the shoulders had to extend and flare out to the side. Using greenstuff, I sculpted accordion style joints like the neck to both match the aesthetic and justify the expansion of the arms outward. This isn't the best match of how the 'Mech would function in the real world, I imagine. In retrospect, I should have shaved a bit of the chest piece down, cut the arms out from under the shoulder pauldrons, and positioned forward from there. BAM! Arms are done! All together, this build required about a 24 hour turnaround--and most of that time was for greenstuff to cure. Modding with a plastic Panther, that time can be cut down ever further. (Yes, that was a Mod Monday pun.)
Have your own Panther mod or build you'd like to share? Be sure to add it in the comments below! Welcome to Mod Monday! One of the best ways to make your force stand apart from the rank and file and attract new players to the table is with creative and unique game pieces. While Battletech and Alpha Strike aren't WYSIWYG (wee-see-wig, "What you see is what you get") like other games, modifications, reposes, and creative construction enhance the gaming experience. In Mod Mondays, we look at cool modifications and tutorials to build dynamic and different models. By popular demand, I'll share with you my tool kit for mod work. Like Dad always says, "Use the right tool for the right job!" 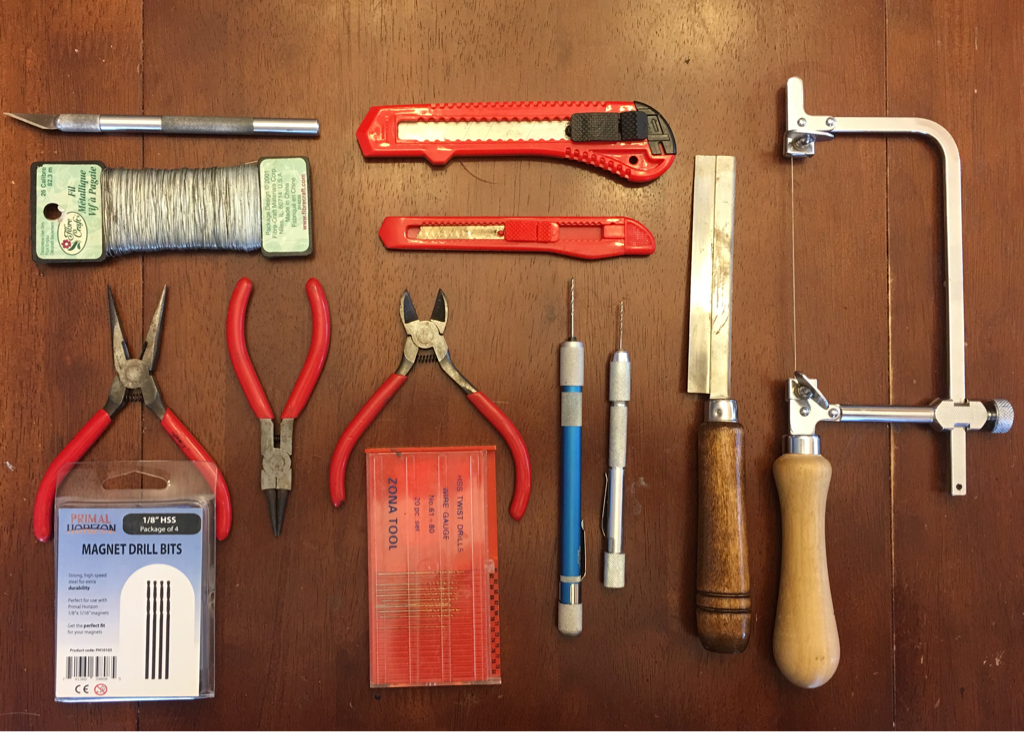 Many of the tools in this kit serve to either sever parts of models or pin them back together! The Kit--sans dremmel. It includes: X-Acto with spare blades and saw blades; floral wire: needle nose pliers and snips; various sizes drill bits; retractable box cutters; hand drills; hand pull saw/razor saw; jeweler's saw. 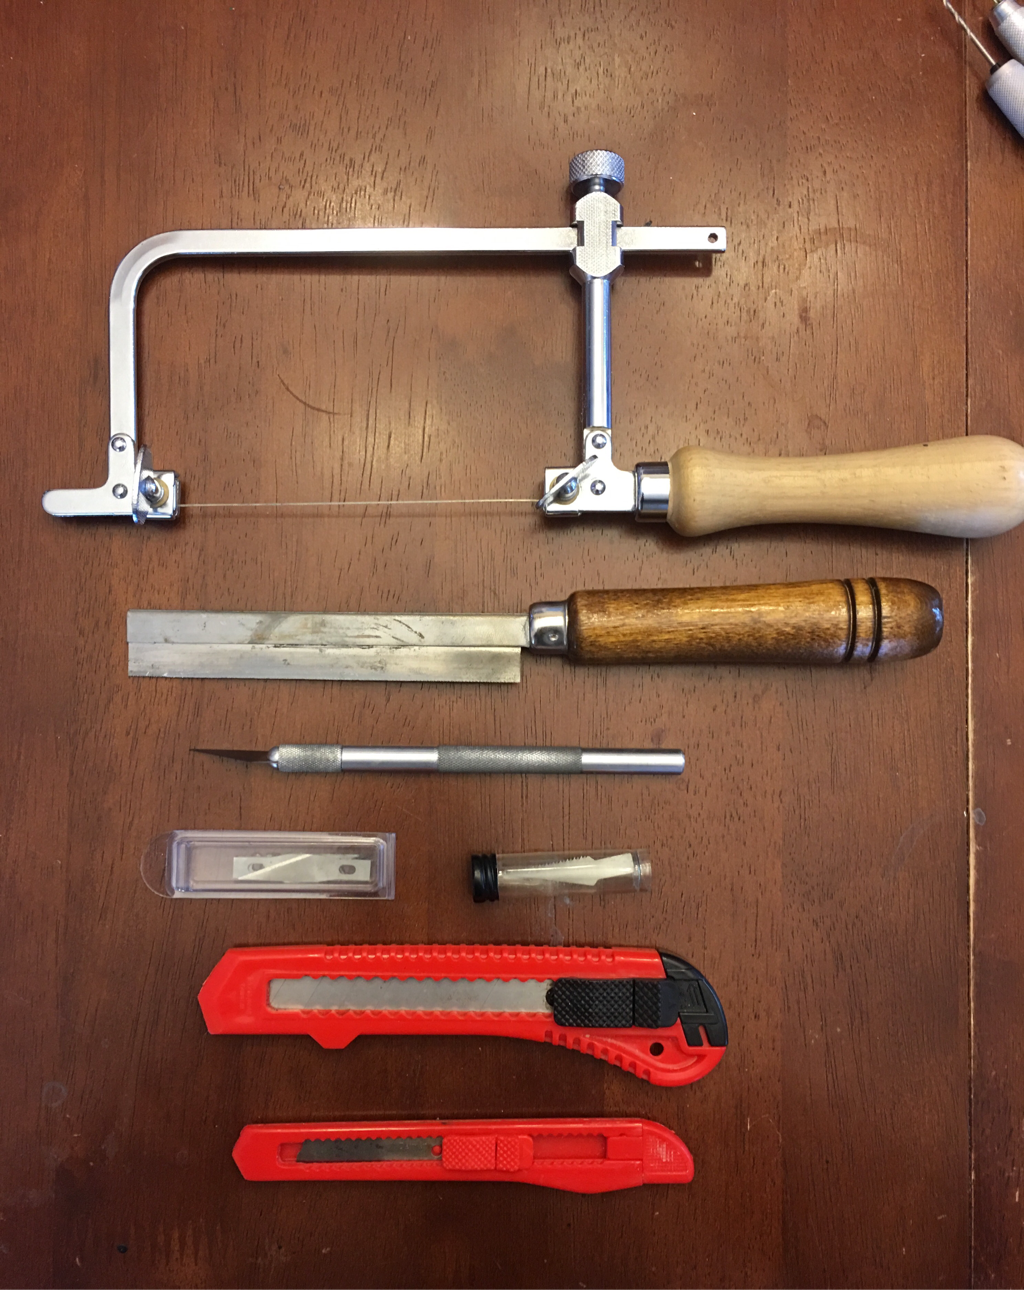 CUTTING TOOLS Must Haves:
Each of these tools serves a singular purpose but in a different way--they cut things. For general miniature work from cleaning mold lines to making simple cust and reposes, a good X-Acto with spare blades will meet nearly every need. The find tip of an X-Acto is great for cleaning and preserving small details like around rivets, vents, and joints where a filed would otherwise erase the details. When dealing with thicker sections of, or more dense miniature materials, consider upgrading to heavier X-Acto handles and blades. Alternatively, considering investing in some X-Acto saw blades (in the tube with the black cap). These work much like any other hobby saw. To make sure your cut stays where you wish, use a standard X-Acto blade to create a guide line. With the cut started, switch to the saw to finish your mod. Regractable blades are great for working with terrain modifications. Because materials such as foam and cork can dull blades quickly, snap-off blades allow you to work quickly and relatively cheaply. In some instances, you can use these to clean out panel lines that have mold lines or deformatives in them; the larger blade thickness helps to clean and preserve details. When diving into more complicated modifications or needing to cut through a moderate or greater amount of material, use a razor saw or a jeweler's saw. The razor saw, one of my favorite tools, have varying sizes and thicknesses of blades. What makes these especially cool, these tools work best on the pull stroke of the cut--hence the alternative name "pull saw". When needing to make careful cuts in small places, use the jeweler's saw. This is also a great tool for maneuvering your way into complicated curved cuts. Make sure to have spare blades on hand--these break...a lot. BE MINDFUL! THE WIDER THE BLADE, THE MORE MATERIAL YOU WILL LOSE DURING THE CUT! Always use the safest and thinnest blades possible to preserve details.  This is definitely not an Error 404 situation! FILES Must Haves:
ALL THE FILES! For general miniature assembly and modifications, keep on hand different sizes, shapes, and thicknesses of files. Files generally clean miniatures more quickly than X-Actos, though some of that time disappears when switching between file shapes to fit different surfaces. These are especially best to use on more complicated mold-lines that don't require careful preservation of details or to smooth out a connecting surface--especially to remove saw marks. 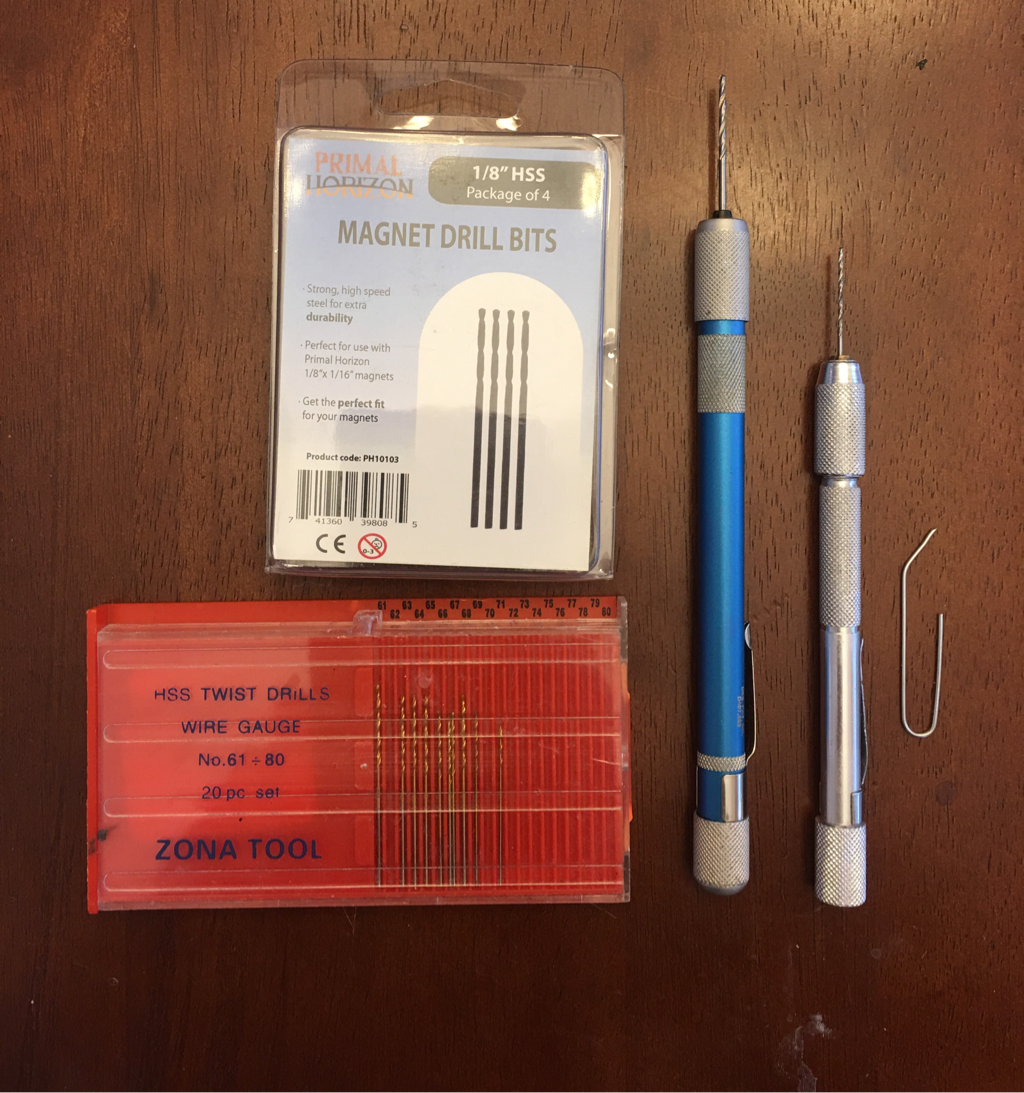 Yes, that's a paper clip. Yes, it is essential. DRILLS, BITS, AND PAPERCLIPS Must Haves:
Zona Tools Drill Bits These are essential parts for any kit--from basic assembly to complex modifications. With a pen drill and the included bits from a hobby store, a set of sturdy paperclips, and snips (not pictured), the possibility of more sturdy models with greater dynamic poses suddenly become a possibility. By drilling a small hole in either side of a joint and adding a "pin" cut from a length of paper clip, then gluing the assembly together, joints and assemblies are now considerably stronger and more resialient to transportation, use, and more durable for more dynamic poses! Congratulations--you can now pin your miniatures. In addition to this, with smaller and smaller bits, addint details like antenna becomes easier. My drilling out the appropriate sized hole, adding a bit of floral wire, electrical wire, or toothbrush bristle, and a small dab of glue, your minis can now sport intense communications arrays! If it seems a bit overwhelming, remember that it has taken over a decade to build it to this level. You can begin to make awesome mods with a few, simple, and easy to find tools. Remember, for a basic kit, start with:
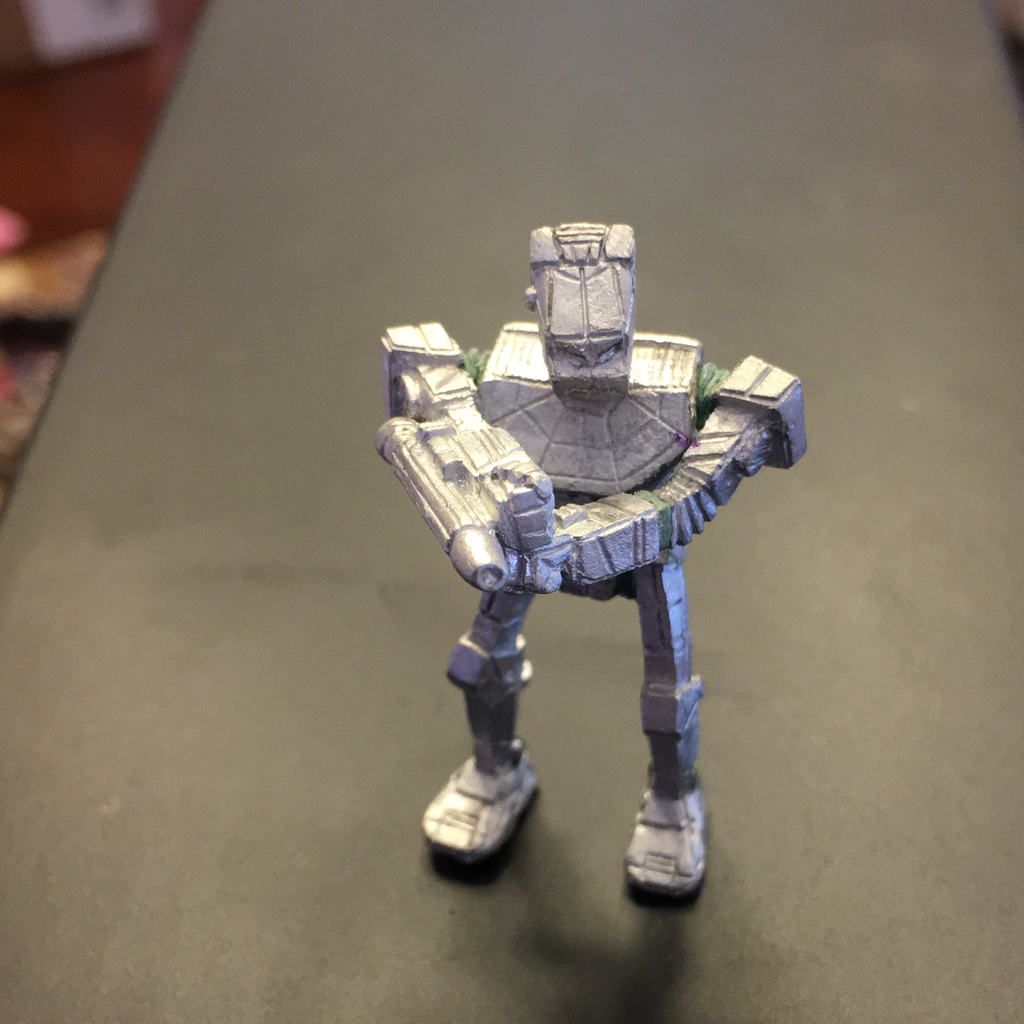
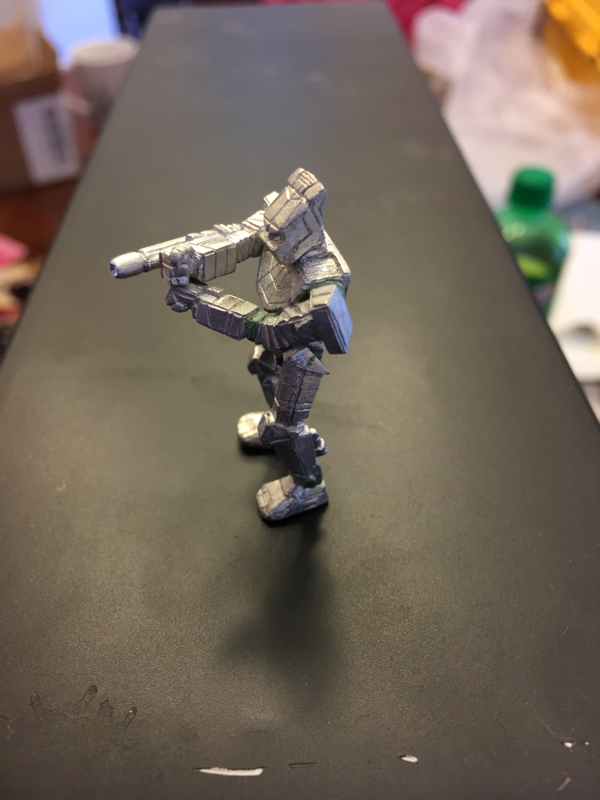
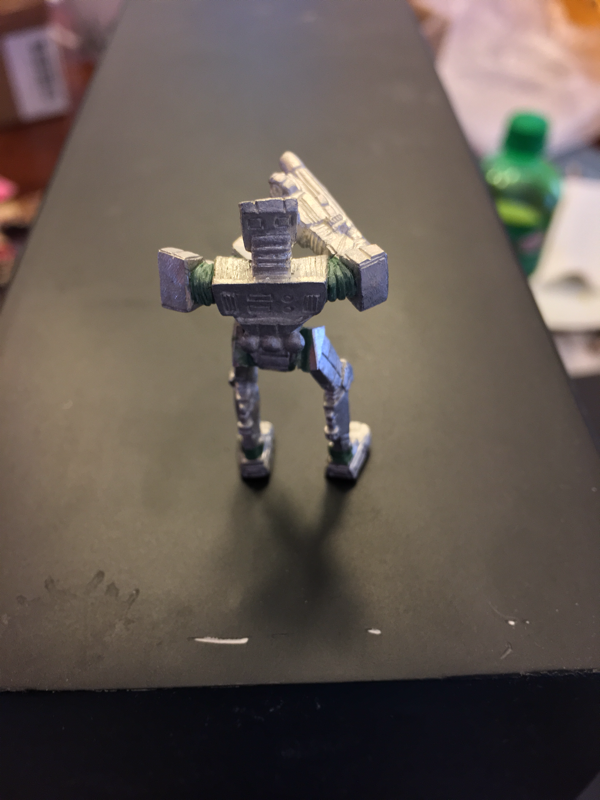
With this kit you can clean and assemble miniatures and even make some amazing mods and reposes of your own! HAVE YOUR OWN MOD TOOL KIT? ANY ADDITIONS, SUBSTITUTIONS, OR DELETIONS? SHARE THEM IN THE COMMENTS BELOW! Welcome to Mod Monday! One of the best ways to make your force stand apart from the rank and file and attract new players to the table is with creative and unique game pieces. While Battletech and Alpha Strike aren't WYSIWYG (wee-see-wig, "What you see is what you get") like other games, modifications, reposes, and creative construction enhance the gaming experience. In Mod Mondays, we look at cool modifications and tutorials to build dynamic and different models. For this post, I'll walk you through the build of a work in progress, moderately challenging, Nyx with a C3 slave. 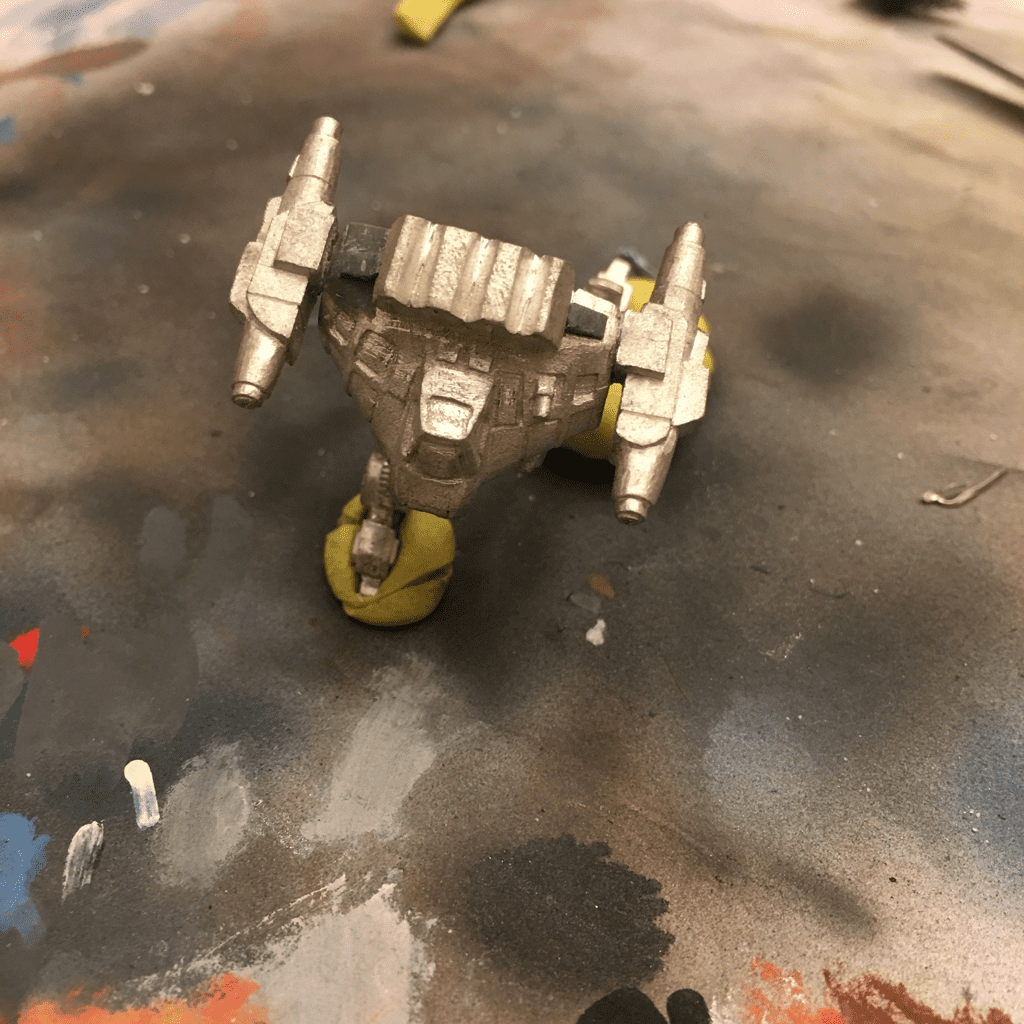 Looks like he stepped in something... Something reminiscent of a Jenner II, the Nyx is a speedy Strike and fade unit. With a shared aesthetic and similar performance Profile, the most noticeable diffference is the lack of jump jets. What is looses from being grounded, however, it makes up for with a significantly increased ground speed. Add a C3 computer to its load out, like the NX-80C, and you have a tough to catch spotter. 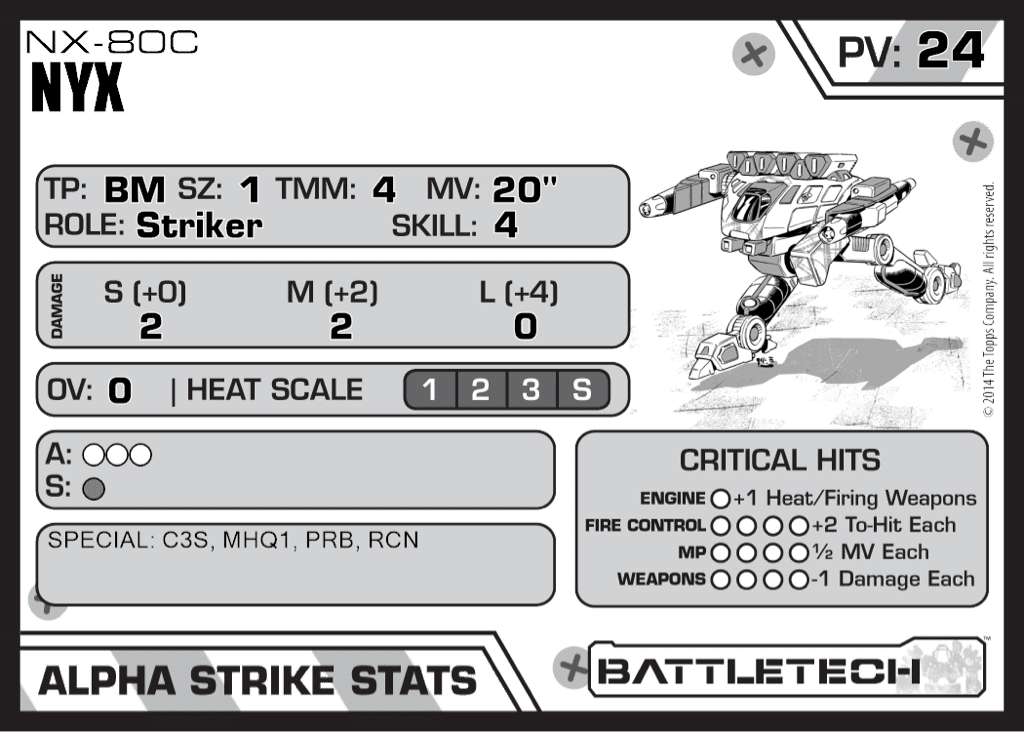 This is another case where record sheets are very helpful. The standard NX-80 carries a top-mounted SRM6. To make room for the C3 computer, the -80C downgrades this to an SRM4 system. This mod is relatively easy, with a few cuts of a razor saw and a little bit of greenstuff. 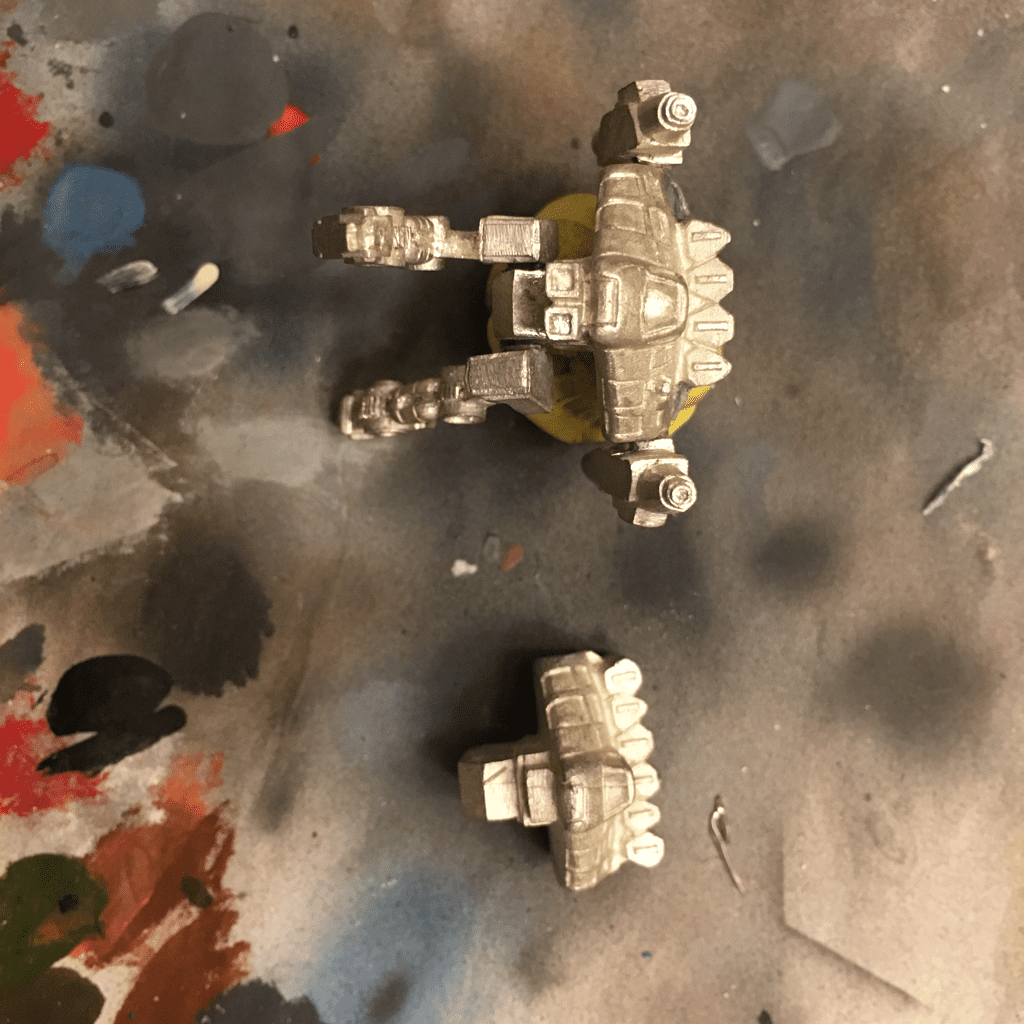 With a razor saw, cut across the top of the torso, under the nibbly bits that hold the missile rack in place and theory to under the first tube on either side. Tracing the slope of the tubes, the cut down the space between the outermost missiles and their closest neighboring tubes. (Keep these for your bitz box.) Wi h your files, file thee surfaces smooth. If you preserved the nibbly bitz, carefully align and reglue onto the torso. If you didn't--like this guy--you'll need to whom out and mix up some greenstuff to sculpt these. Don't worry if you're not familiar with greenstuff. The relative ease of sculpting two slightly slopped blocks is easy and a good starting point for your adventures into sculpting!  If you're also sloppy with your saw work, you may need to reconstruct some of the torso--like this guy.
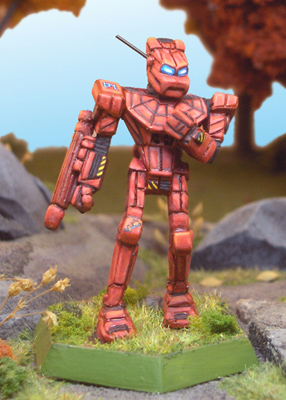
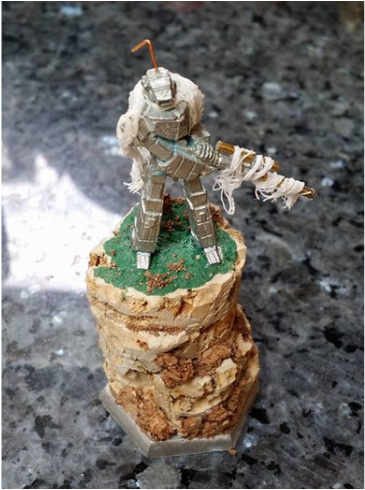
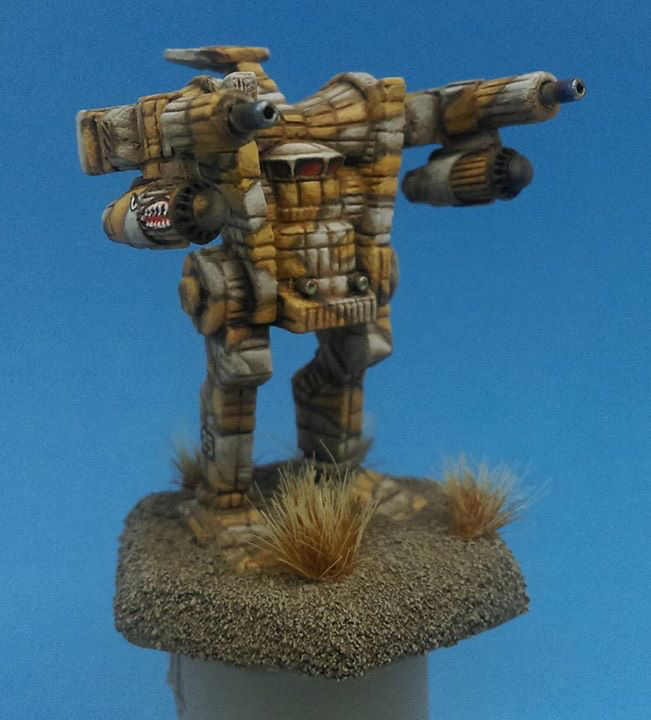
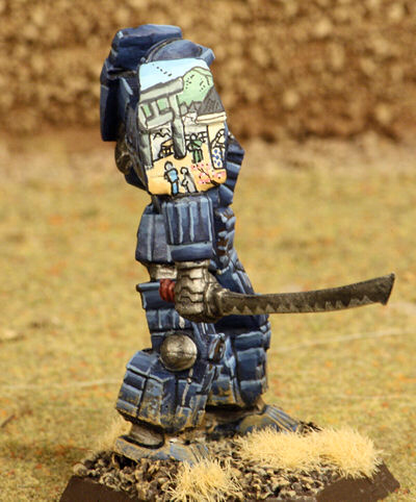
With a little more work, you can turn a Nyx into a swift, C3 spotter to accompany your C3M Komodo from last week. Have Nyx mods of your own? Share them in the comments! 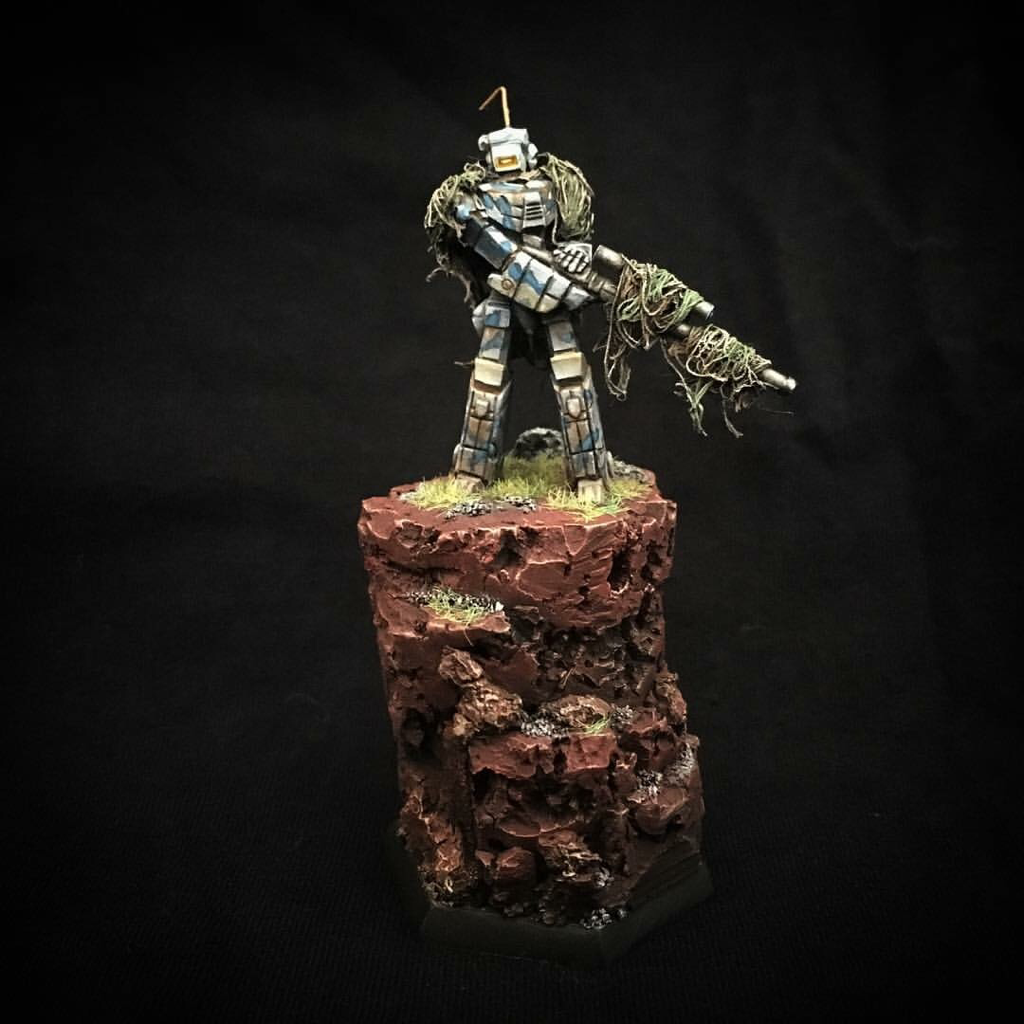 Welcome to Mod Monday! One of the best ways to make your force stand apart from the rank and file and attract new players to the table is with creative and unique game pieces. While Battletech and Alpha Strike aren't WYSIWYG (wee-see-wig, "What you see is what you get") like other games, modifications, reposes, and creative construction enhance the gaming experience. In Mod Mondays, we look at cool modifications and tutorials to build dynamic and different models. For this post, I'll walk you through the build of my Long Shot Stinger that was featured on Battletech Painting and Customs. Tools & Supplies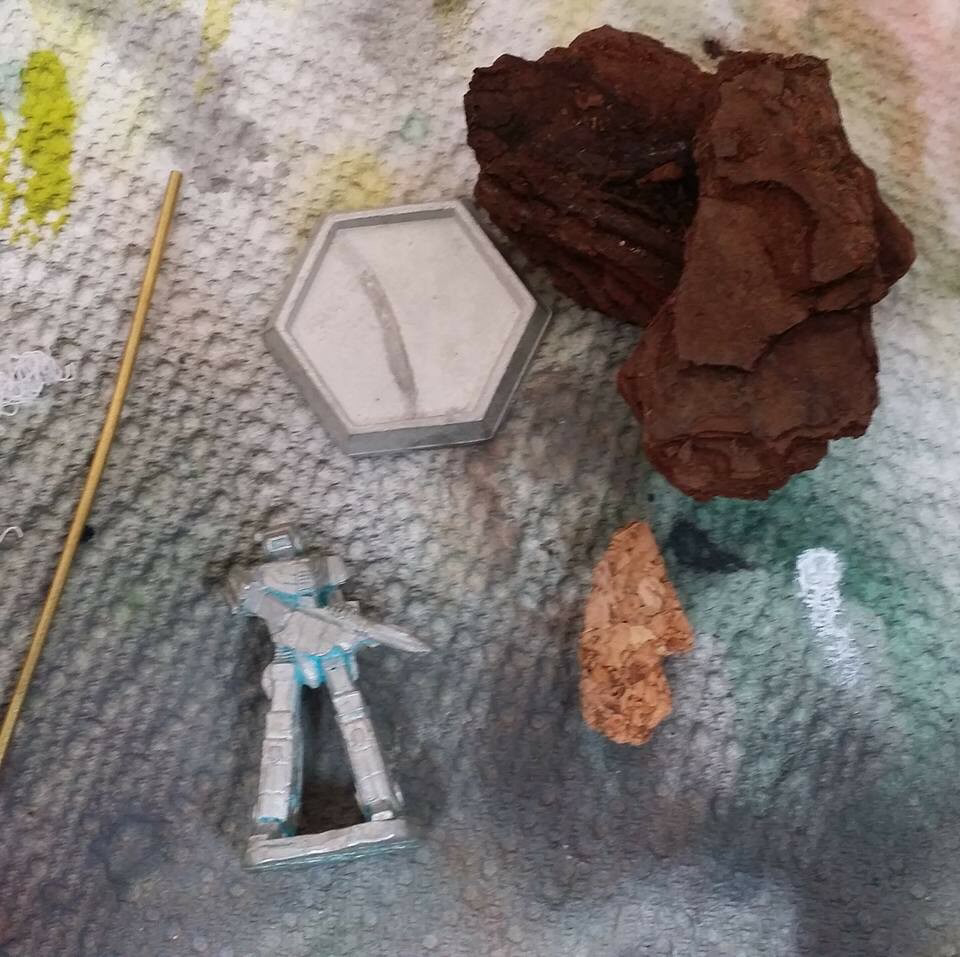 One reason I chose the unseen Stinger miniature for this build was because of the already interesting pose, the one-piece of the model being easier to work with, and the fact that I gave myself a 48 hour turnaround window from start to finish.
Initial Assembly
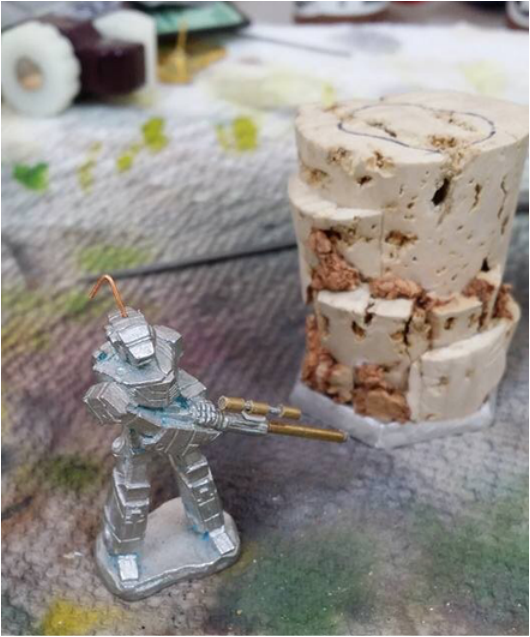
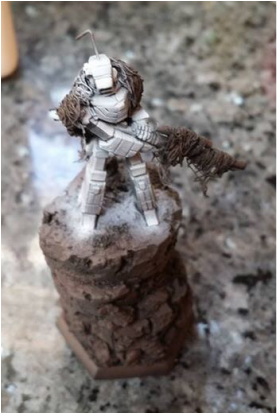
Building the Miniature Start by cleaning the mold lines and flash from the miniature with an X-Acto and files. This is one detail that I am very meticulous about and so I have several sets of files and sizes of razor blades. This piece was relatively easy to get into all of the recesses, fortunately, so I didn't use many of my special tools. Do be careful, however, when removing mold lines to not gouge and scrape lines into the piece. I drilled a small hole in the guide on the cockpit to add a piece of copper wire. Prior to gluing it in, I gave it a slight bent towards the top to resemble the antenna on Vietnam-era military radios. This, I hoped, with the final piece would give it an "in the bush" feel. To build the extended range laser, I first sawed the muzzle off the barrel very carefully. After that, I drilled a guide hole into both pieces. With the tube cutter, I cut a selection of brass tube to the length I wanted--not too long so as to not fit on the base, but not too short. With the section cut, I passed a paperclip through it to fit into the base of the laser and the muzzle--this was the pin to hold the assembly together. Once fitted, I clipped the clip with wire cutters and used superglue to glue the assembly together. The scope was built in much the same way: brass rod and paperclip. To give the scope a rail to mount onto the laser, I used a small scrap of plasticard. Finally, to give the appearance of lenses, I added small drops of superglue into the ends until filled. Building the Base The base was a relatively simple matter. First, I cleaned the mold line from the base--because all mold lines must go! To get the appropriate inverted cone look I was going for, I used the bottom of the base to trace a rough outline of the hexagonal dimensions.To make sure when trimming I didn't trim away the area the miniature would sit in, I also traced that footprint of the Stinger on the top of the cork. Next, to trim away the excess cork and shape it into a hexagonal cliff, I used the razor saw. After this, I used an X-Acto and other tools to hollow out the space for the miniature to fit. This may take a couple tries to get it deep enough. It was very important to save the scraps from all of this scraping and trimming--I glued these on lower setions to give a stair-step appearnce. With more scrap cork and modeling sand, I filled in the cracks and created an interesting, mixed media look. I filled in the space in the hex base with green stuff. Before it had time to set completely, I began pressing the cork into it to set. Once the base was set, I used superglue to glue the base of the miniature in the setting I created for it. With greenstuff, I filled the area between the base and the cork then spread a thin layer over most of the top of the piece. To create an uneven, earth effect, I pressed and removed pieces of cork into this. Finally, I added a touch of superglue to the top, dusted it with modeling sand, and scrapped away the excess before it was completely dry. 'Mech Sized Camo Net
Giving it Color
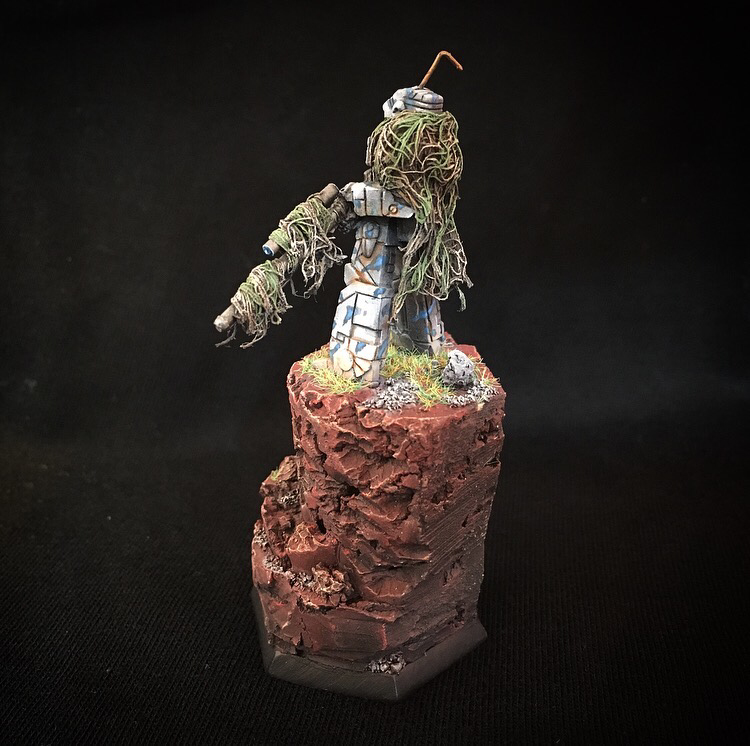
The method of the net was similar, but from dark brown to tan (45*), to bleached bone (0*). I used a series of dark to light greens for the camo stripes. To bring out some of the volume, I drybrushed some of the raised areas a bit with egg-shell white (whiter than bleached bone, but not white). It is important with every layer to make sure you leave a bit of the previous color layer visible in each subsequent layer to create a pleasing fade. Details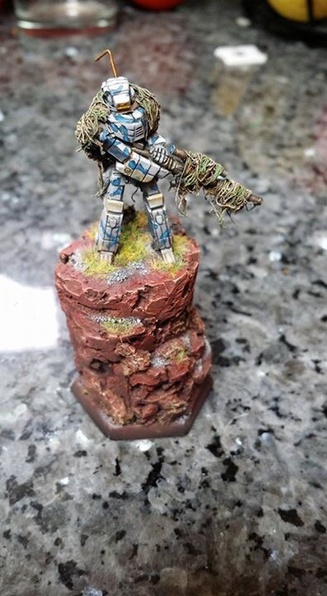 To justify the camo net, and make the piece overall a bit more interesting, I chose to work with a blue on grey camo apttern. The camoflauge was done by painting roughly-shaped striped in dark blue. On top of those, I layered medium and light blue. For the metallics, I reprimed the spot with brushed on dark brown for a gritty look. On top of the laser, I drybrushed gun metal, highlighted with a drybrush of steel. For the joints and moving parts, I used steel. To finish off the metallics, I washed the laser with black and the joints with sepia. The antenna is bronze becase it's bronze, that's why. It was an interesting compliment to the blue, so it gave the piece a bit of a pop--albeit not a field-approved pop. To complete the cockpit, I experimented with a glowing color. This was achieved by washing and painting thin glazes of successive layers of yellow to white over a white brush primed screen. For the base, I airbrushed successive layers of dark brown, deep red, and bright red. On top of that, I drybrushed an orange-tan color and a fine bit of bleached bone. The interesting gravel and outcropping, I made grey with layers of drybrushed dark grey, medium grey, and bleached bone. These touches of grey help to create an interesting and varied piece. A bit of static grass pulled it all together and justified the tan and green camo net. As a final touch, I added a bit of dust to the knees, legs, and elbows to give the look that the machine had been in a prone position--fiting for the overall pose. This was done with a mixture of Tamiya weathering pigments, very drybrushed paint, and careful washes in areas that would collect rust (like around the knees). Finished PieceThis was a fun piece to finish. In it, I put a lot of experimental techniques designed to push my skill and make an interesting, different, unique work. The thrill of competition painting is one of the surest ways to improve techniques. I have walked away from each event a better painter, no matter where I placed in the running. HAVE YOUR OWN COMPETITIVE PAINTING STORY? SHARE IT BELOW IN THE COMMENTS!
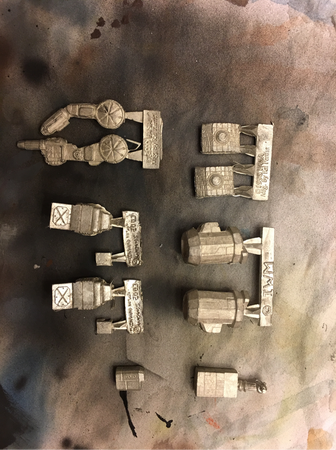
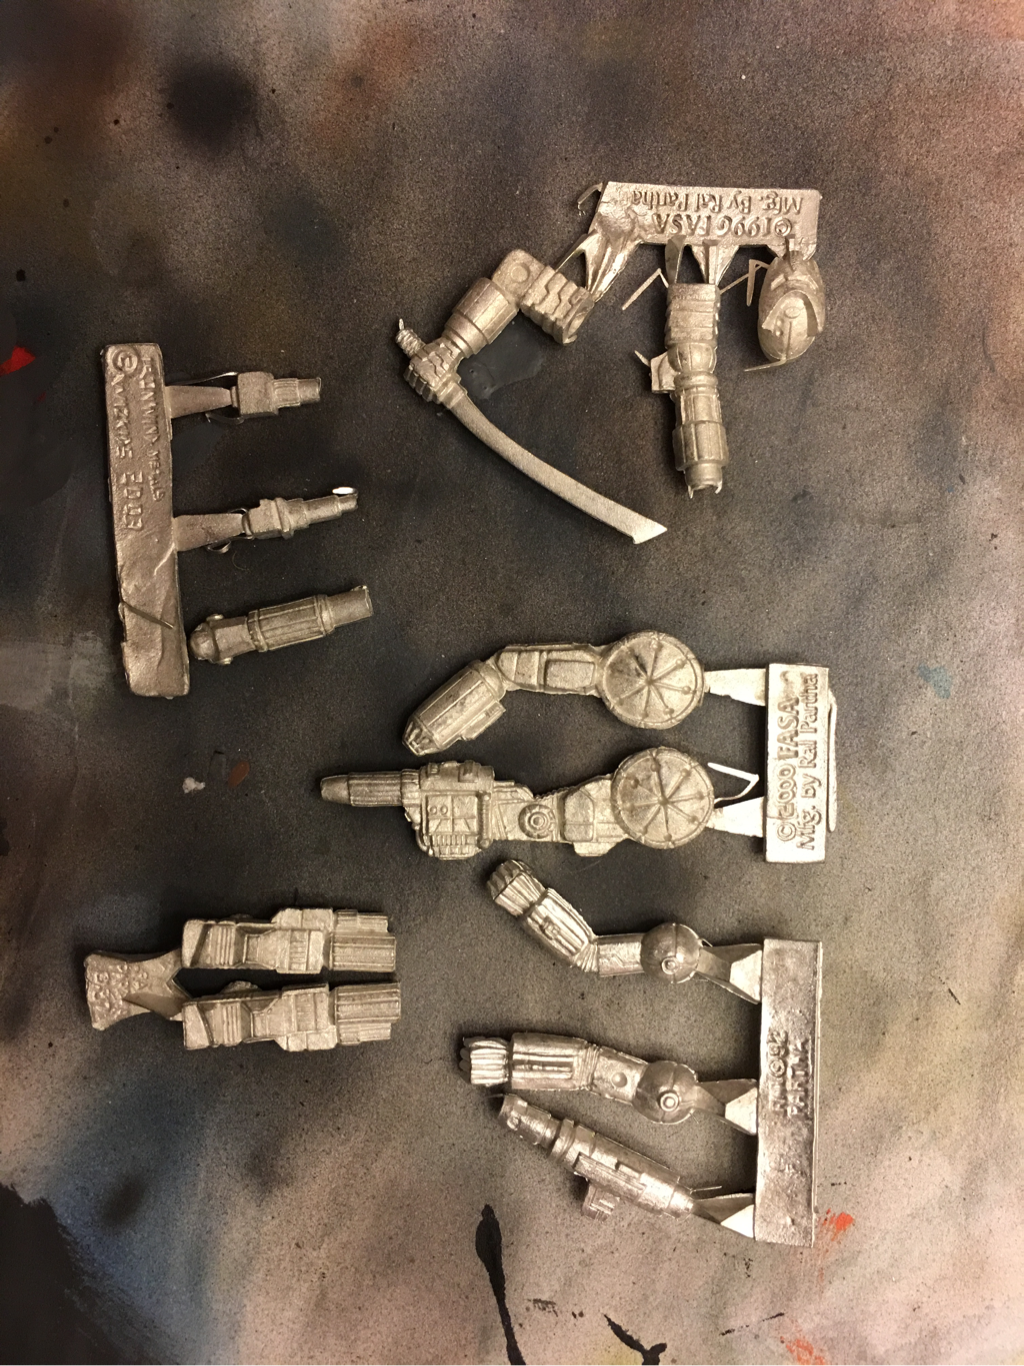
Welcome to Mod Monday! One of the best ways to make your force stand apart from the rank and file and attract new players to the table is with creative and unique game pieces. While Battletech and Alpha Strike aren't WYSIWYG (wee-see-wig, "What you see is what you get") like other games, modifications, reposes, and creative construction enhance the gaming experience. In Mod Mondays, we look at cool modifications and tutorials to build dynamic and different models. For this initial post, I'm sharing some of my favorite bitz that I keep stocked in the box. These are my go-to for their flexibility with sizes, aesthetics, and ease of use. We'll look at common pieces, their use, and finally how to order these from Iron Wind Metals. Missile Bitz
Not Pictured Primitive Thunderbolt Missile Pod (from IWM 20-5076 Thunderbolt TDR-1C) Thunderbolt TDR-10M Missile Pod (from IWM 20-5032 Thunderbolt TDR-10M) Primitive Griffin Missile Pod (from IWM BT-346 Griffin GRF-1A) Reseen Griffin Missile Pod (IWM 20-200 D Griffin Gun/Missile Pod) Primitive Shadow Hawk Missile Pod (from IWM CE-001 Shadow Hawk SHD-1R) Missile pod upgrades and modifications are one of the easiest to make. Whether it's customizing your merc company's fire support lance or adding a bit of lrmageddon from MWO to your table top, these long-range death-dealers and short-range cris-seekers make for interesting modifications. Missile boxes come in a variety of shapes and sizes to meet your individual needs. The Viking missile boxes, for example, are a great addition to make a long-range, indirect fire beast variant of the Legacy, like this example from Camospecs Online artist, DAK, or this up-gunned Jagermech by B1BFlyer.
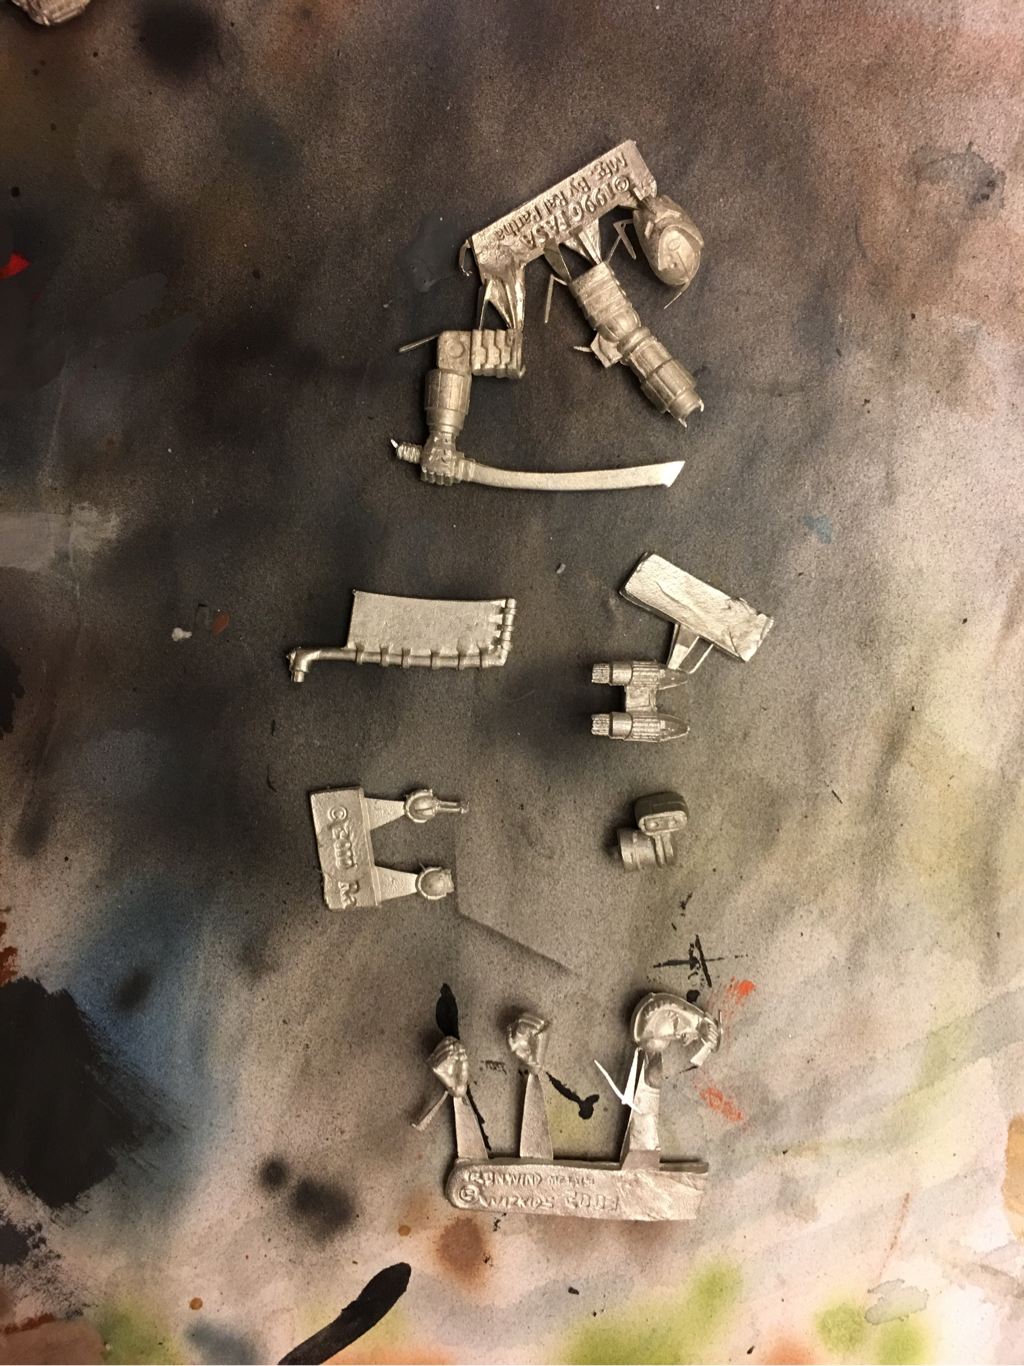
Cannons, PPCs, Etc.
Other Useful Bitz
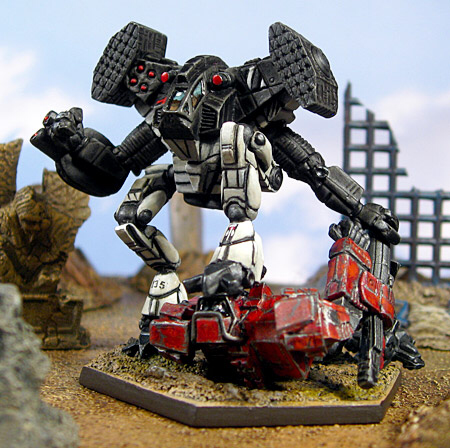
One modification sitting on my workbench to be completed is upgrading a standard Kintaro to the jump-capable KTO-K. By adding the jump jets from a reseen Ostscout onto the back of the Kintaro, you have a quick switch to make a dangerous C3 spotter. If you're into using magnets to make easily-changable variants, you can have two mods for one model by magnetizing the jump jets and the miniature. Although it makes the miniature a magnet for incoming fire, adding pitz and pieces to show a C3 Master piece is one of my favorite mods. This is also one of the most challenging--how do you show on the outside of a piece equipment mounted on the inside? One of the easiest methods to do this is add extra antenna or a satellite dish from the Crab or Mobile HQ models. If you're wanting a more robust bit, then use the top turret from an Owens to represent the computer suite. 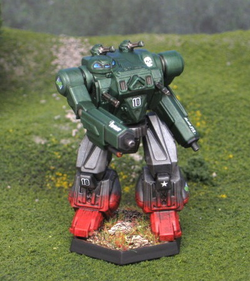 This modified Thor by Camospecs Online artist Master Gunz has AMS from Fenrir, beefed-up arms, and machine guns, to create an alternate model. This modified Thor by Camospecs Online artist Master Gunz has AMS from Fenrir, beefed-up arms, and machine guns, to create an alternate model. Being harassed by lrmageddon from the first bitz picture? Then strip a handfull of Fenrir turrets to use for antimissile systems! These little bitz are just the right size to mount on nearly any miniature to swat down incoming fire! This piece by Master Gunz is a great example of using these turrets as AMS and other added pieces to make a dynamic, interesting, and unique piece (I know, it's Jade Falcon, but otherwise, it's an awesome model). Ordering Bitz from Iron Wind MetalsMost of the bitz here, and many others, are available directly from the Scrapyard at Iron Wind Metals online store. If you're a clan player and want to make sure that your Thor Prime and your Thor D are clearly different, the use the Onmi Mech Parts page to order variant pieces to make nearly all of the 3050 omnis. If you love omnis and Jerone Blake and his writings, and think that the rest of the Inner Sphere needs to love Blake or suffer their transgressions in nuclear fire, then be sure to outfight your rightesous army with Word of Blake Omni Mech Parts. There is also a small selection of very special variant parts for the Koschi and Hammerhands located in the Mech Variant Parts section. 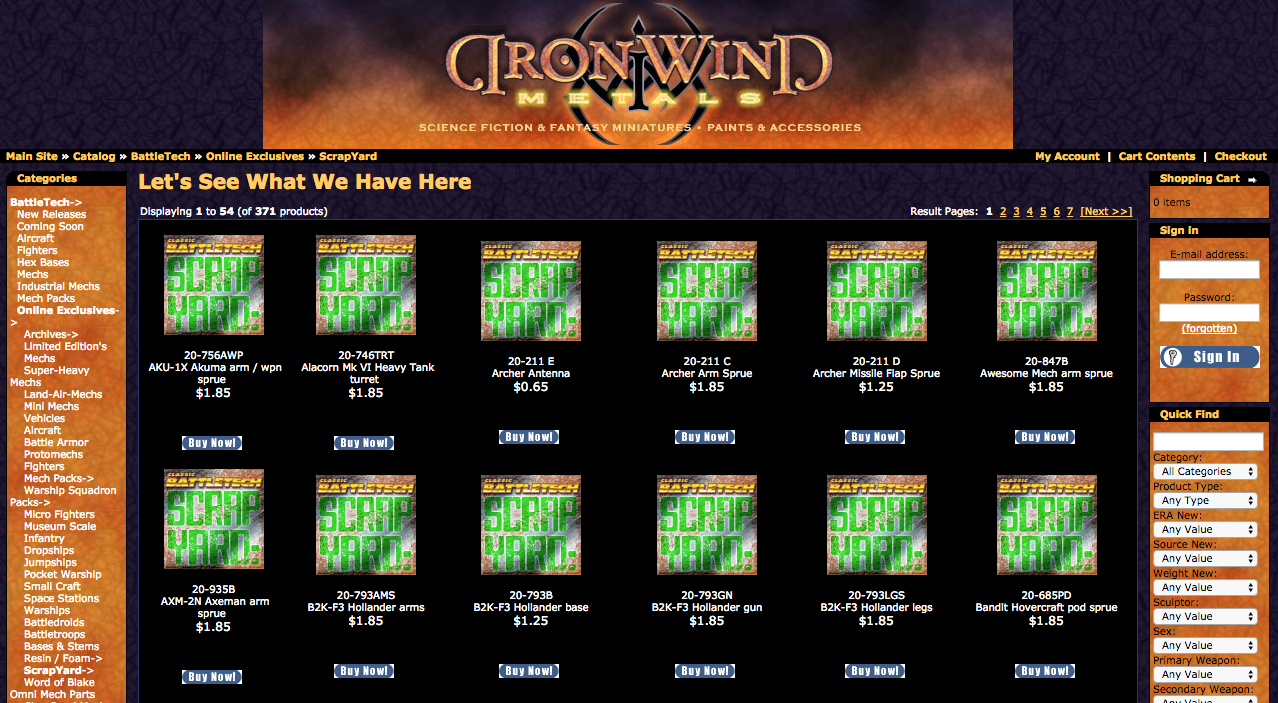 Iron Wind Metals Scrapyard--for most of your bitz, this is the first place to look. If you can't find the part you're looking for, use the Iron Wind Metals Contact Us page to ask, very nicely if they can spin it up for you. This is a great company, and they are always happy to work with Battletech fans and the community. 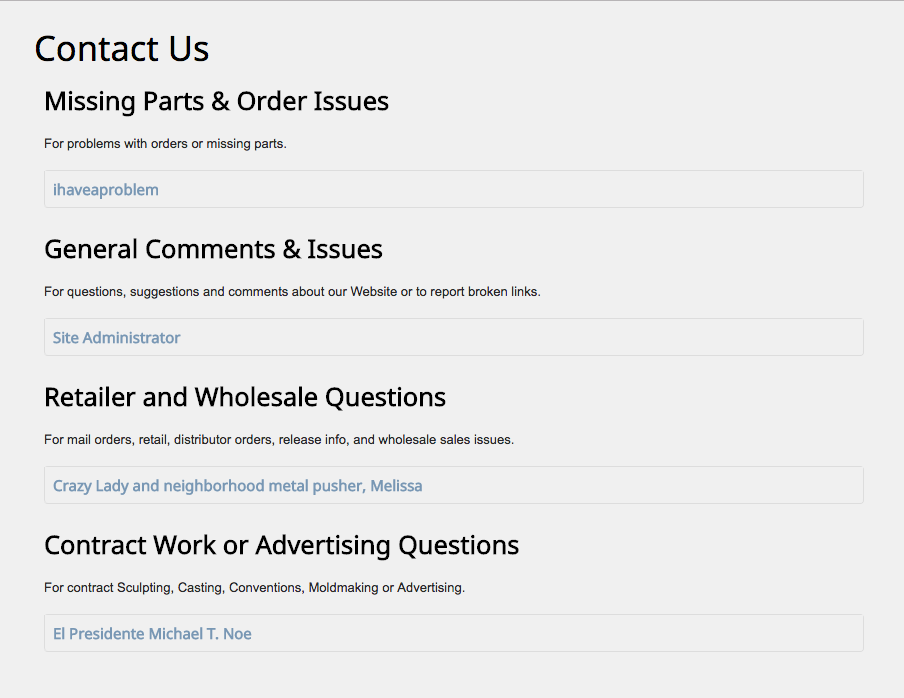 With the infinite possibilities of customizations, salvage, and field repair in both Battletech and Alpha Strike, you'll never be without an opportunity to build unique, new, and interesting models. Want to see more great modifications, reposes, and custom work? Check out Camospecs Online for amazing work!
Have your own go-to bitz, favorite pieces, or boss mods? Share them below in the comments! |
Cap'n EdTutorials and Projects Archives
January 2018
Categories
All
|
Cap’n Ed’s ’Mech Hangar


 RSS Feed
