|
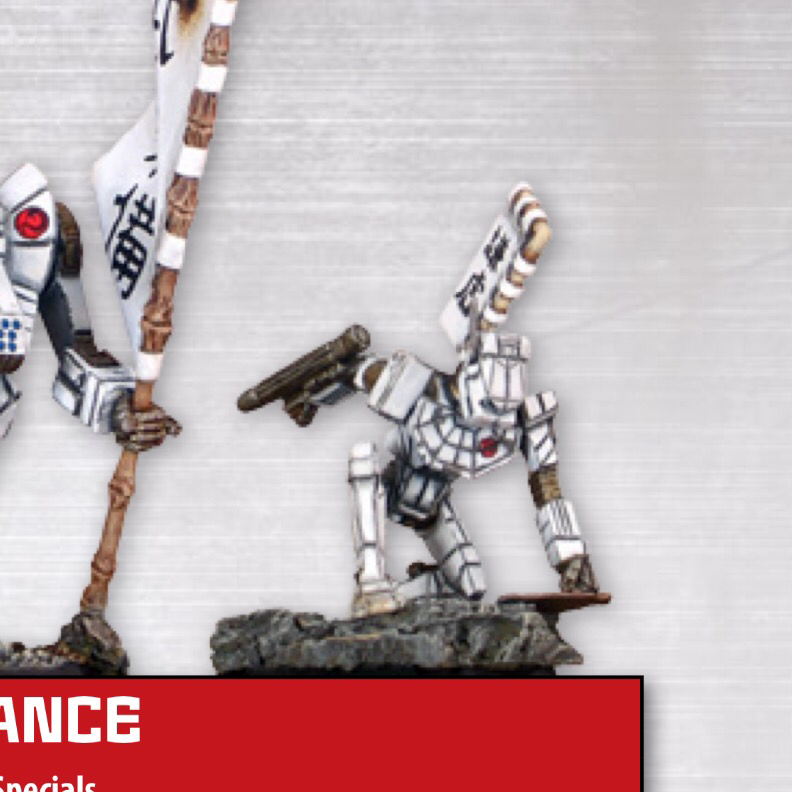
This series is designed to help players design multi-era lances for use with Battletech and Alpha Strike. Each entry will attempt to build a functional lance with faction-flavor for the Succession Wars, Clan Invasion, FedCom Civil War, and Word of Blake Jihad. In some cases, an entry will have substitute options to add some variety. If you have your own substitutions or suggestions, post them below in the comments! In this edition, we'll build a ferocious Comstar, Blessed be Our Order, Pursuit Lance. Soon shall the Glorious Word of Jerome Blake, may His Light shine upon all mankind, bring peace to the Inner Sphere! 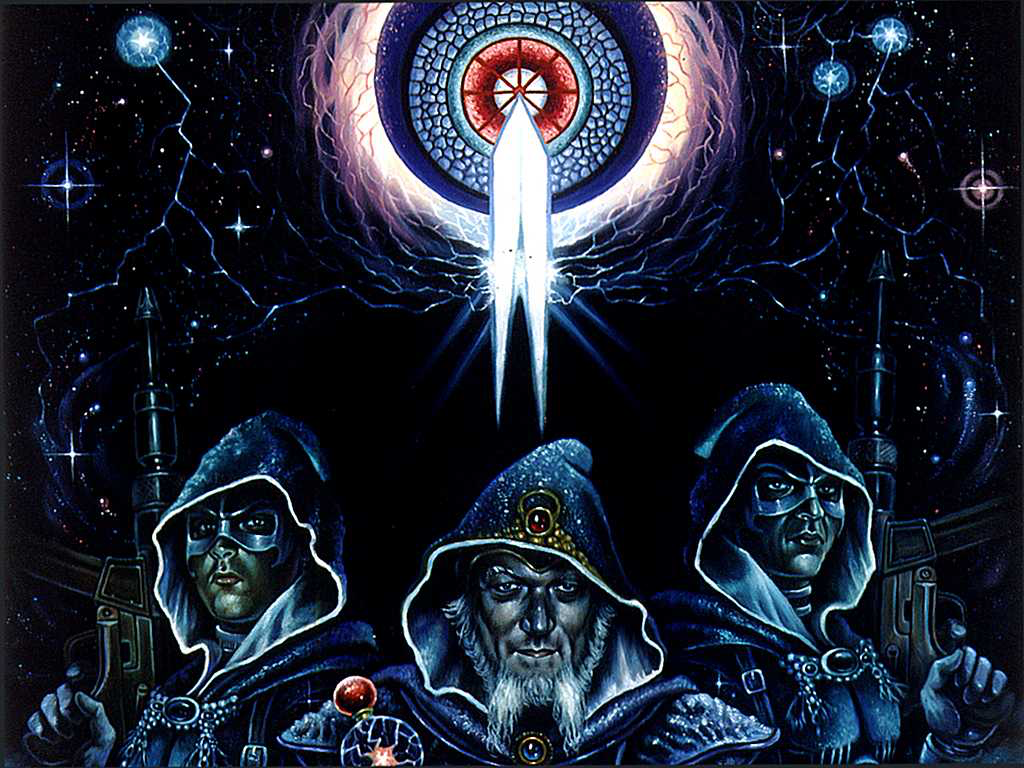 Love that retro Comstar, Blessed be Our Order, art! ObjectiveBuild a Comstar, Blessed be Our Order, that can be played across eras, from the Succession Wars through the Jihad. Restrictions
ModelsComstar, Blessed be Our Order, has access to a lot of toys from across the Inner Sphere and eras. In itself, this can create a motley appearance of formations. To overcome this, however, I opted to focus on units that had a distinctive Comstar, Blessed be Our Order, feeling to them - that is to say, one's from TRO:2750. As much as this is designed as a munchkin unit, the size restrictions and point limits prevent it from being overwhelmingly overpowered. Click the images below to purchase TRO:2750 as well as these and other miniatures! (Miniatures supplied unassembled and unpainted.) 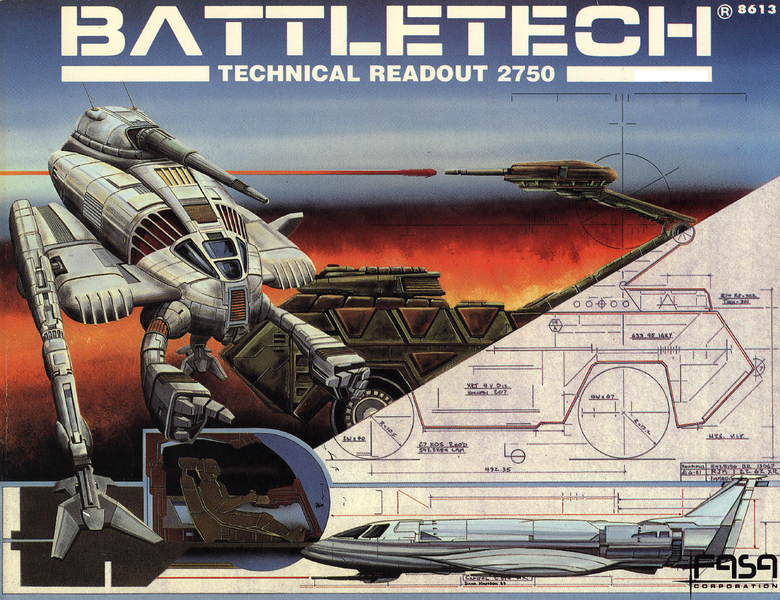
 Background When working with Comstar, Blessed be Our Order, era limits prevent the widespread use of this faction. The good news is, throughout most of that time, Comstar, Blessed be Our Order, has access to some great toys that other factions can only dream about-at least until the Clan Invasion. However short Our light shone upon the undeserving filth of the Inner Sphere, rest assured it burned brightly with a blinding light! To build a standard Pursuit Lance: - All units must be Size 2 or less - 75% must move 12" or more regardless of jump - At least one model must have a medium range attack value over 1 - The ideal role is Skirmisher The major benefit of building a Pursuit Lance is that 75% of the models gain the Blood Stalker SPA. This confers a -2 to hit modifier against a designated target. This can be quite a bonus; with careful target selection and tactics the -2 from Blood Stalker can equal or surpass other to hit modifying SPAs. The new errata for Alpha Strike makes units, especially the Pursuit Lance, awesomely powerful! The major benefit of the pursuit lance is the -2 to hit number against a designated target. With the errata addition, this benefit applies to a targeted unit (as in targeted lance, targeted level II, targeted star, etc.) and not a single model. Because the Pursuit Lance applies this benefit to 75% of the models in that unit, a Comstar Level II, Blessed be Our Order, meaning five of the six models receive a -2 to hit when targeting a designated unit formation. Yes, this is a munchkin unit. Blake's righteous might will incinerate the unbeliever and the heretic in holy fire! No shadow nor fortress shall guard them against our fury! early succession war (PV 127)
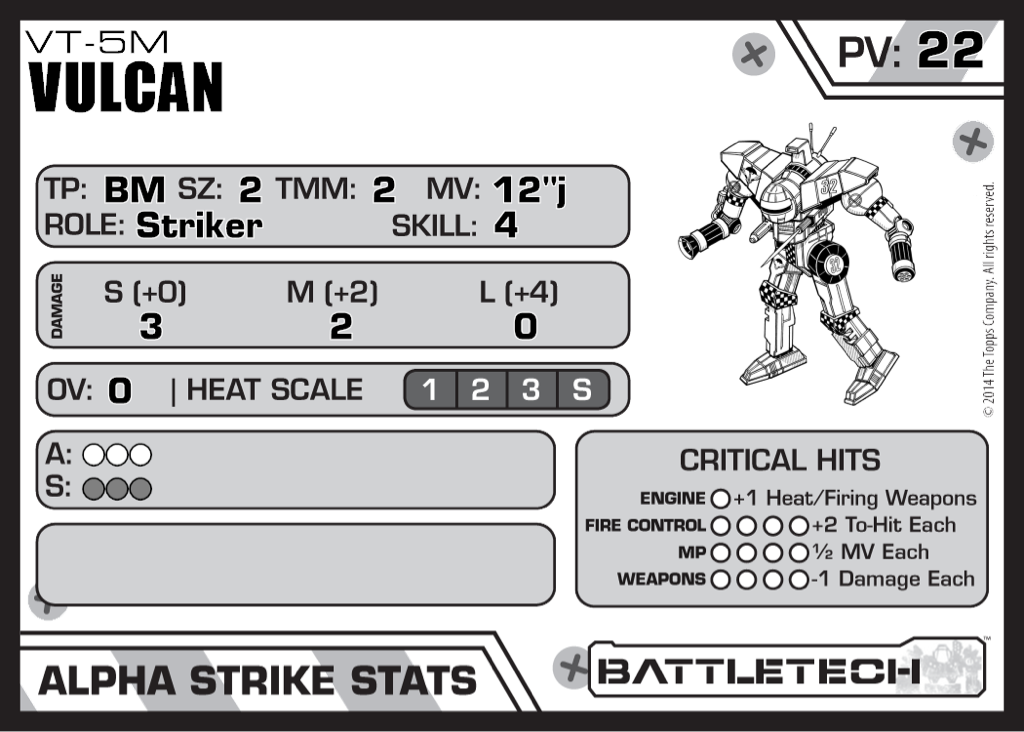
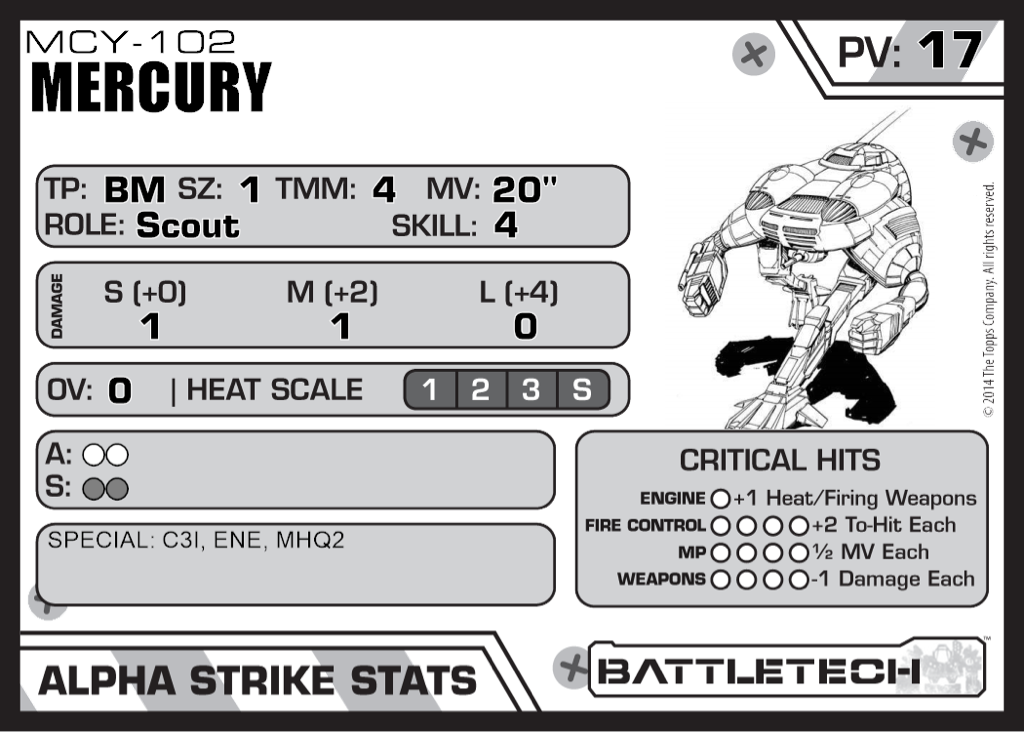
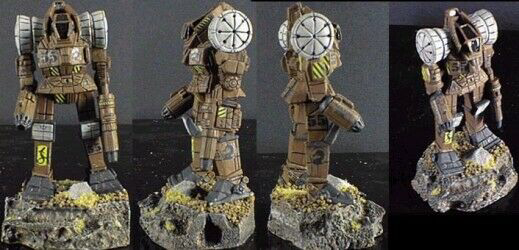
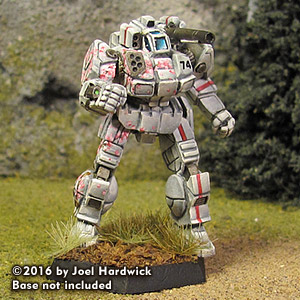
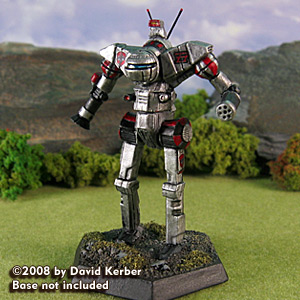
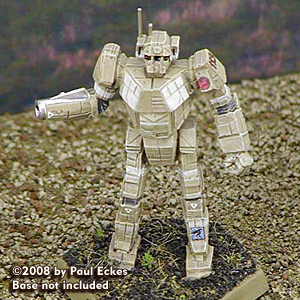
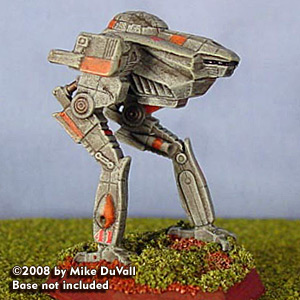
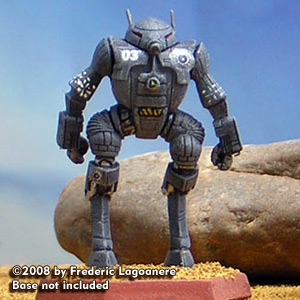
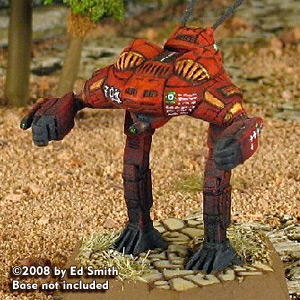
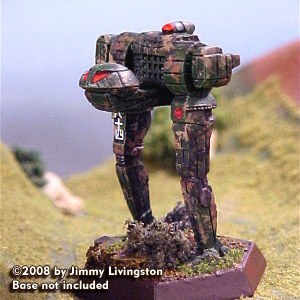
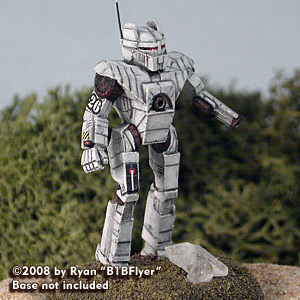
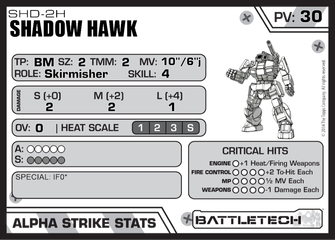
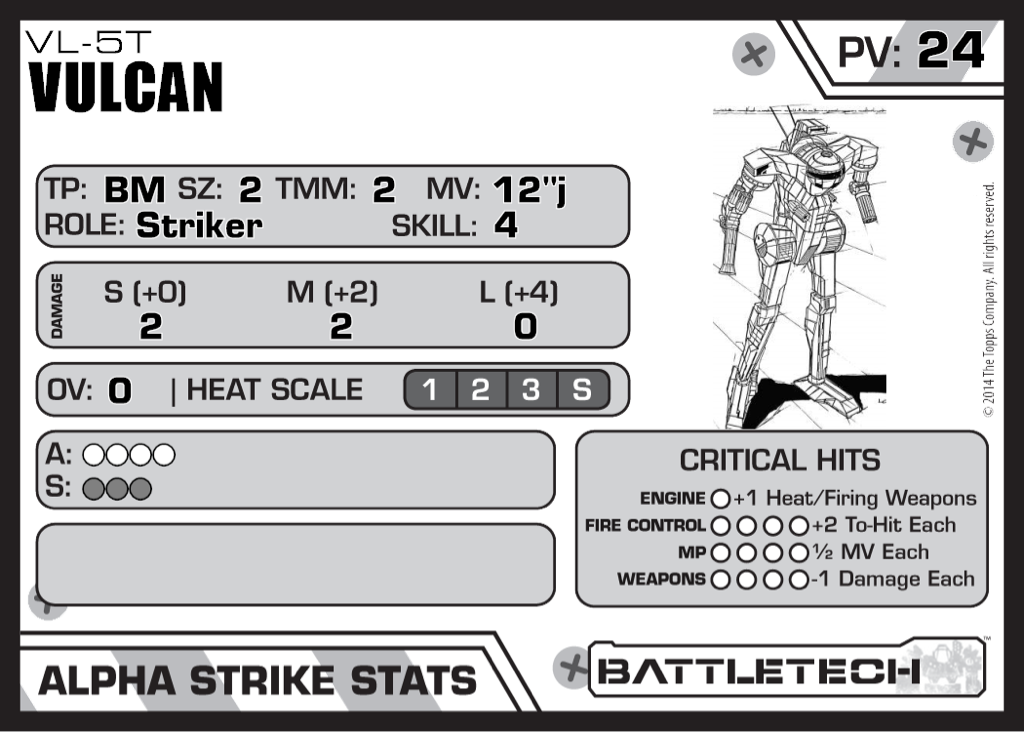
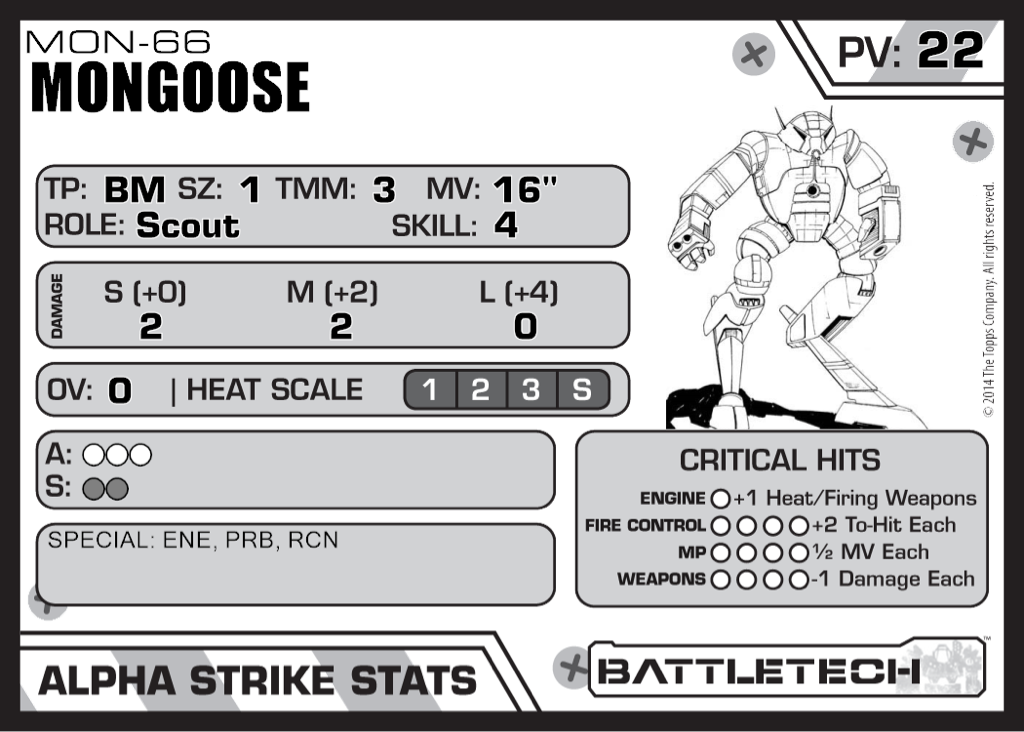
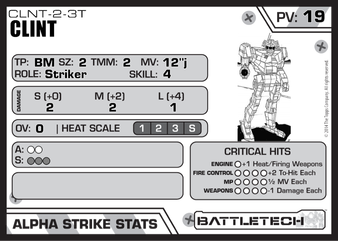
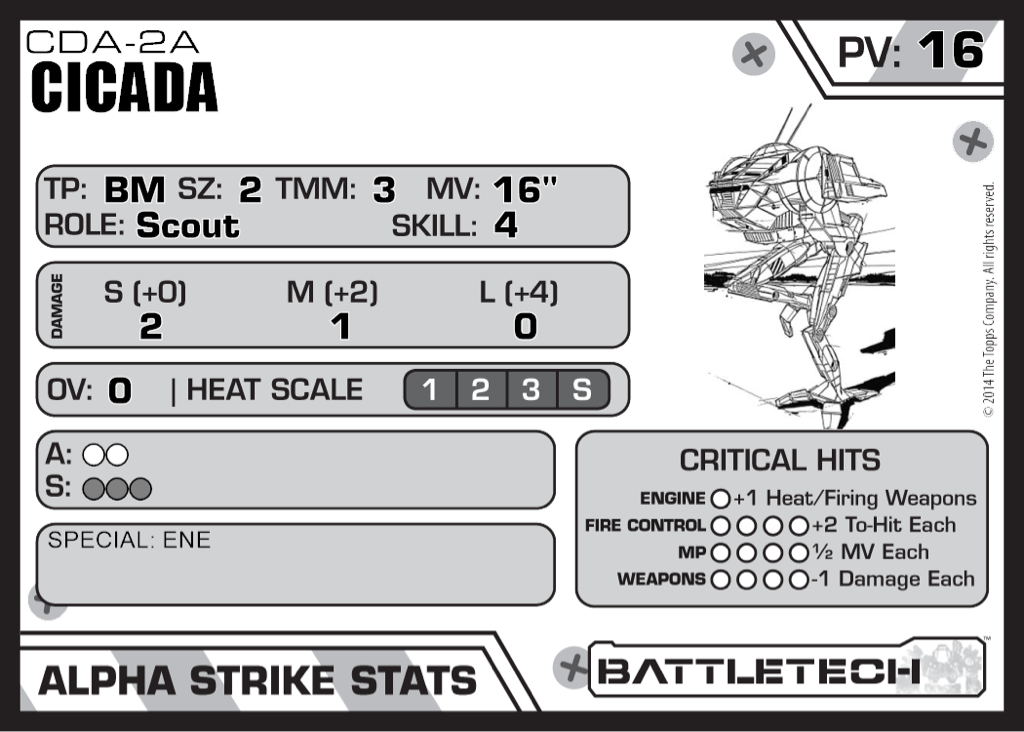
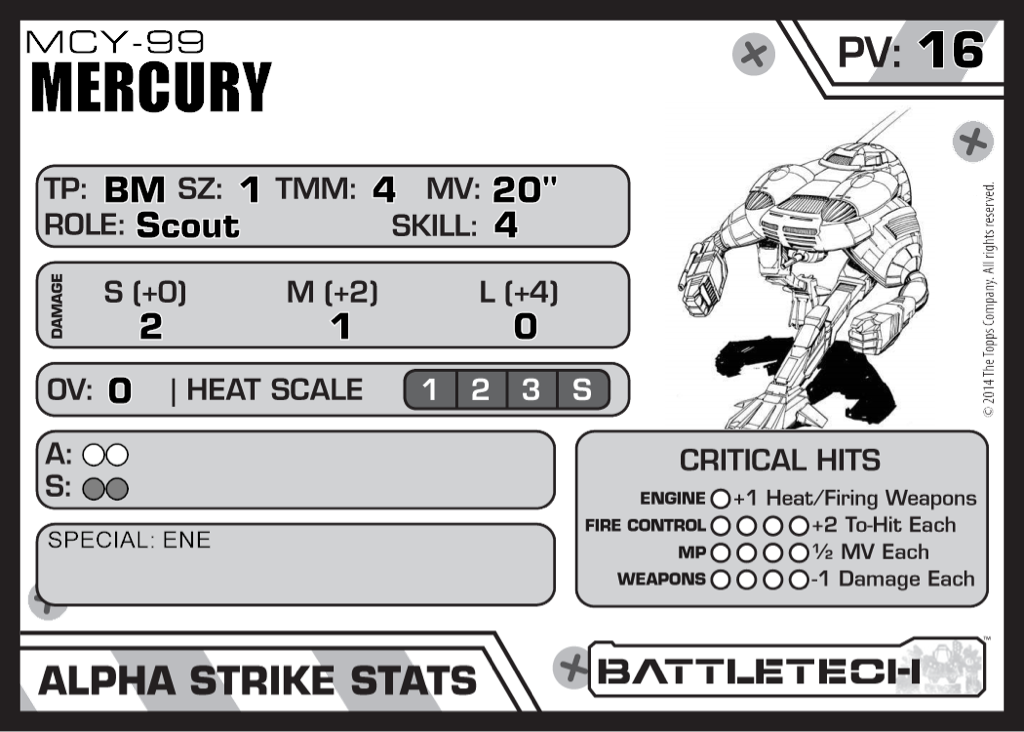
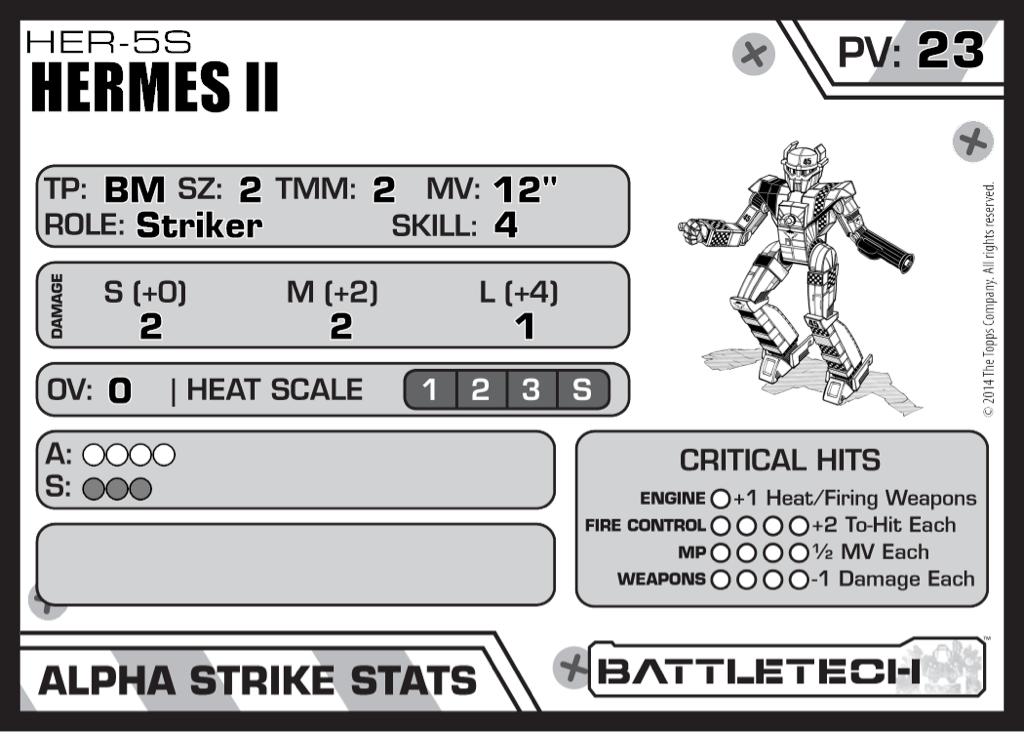
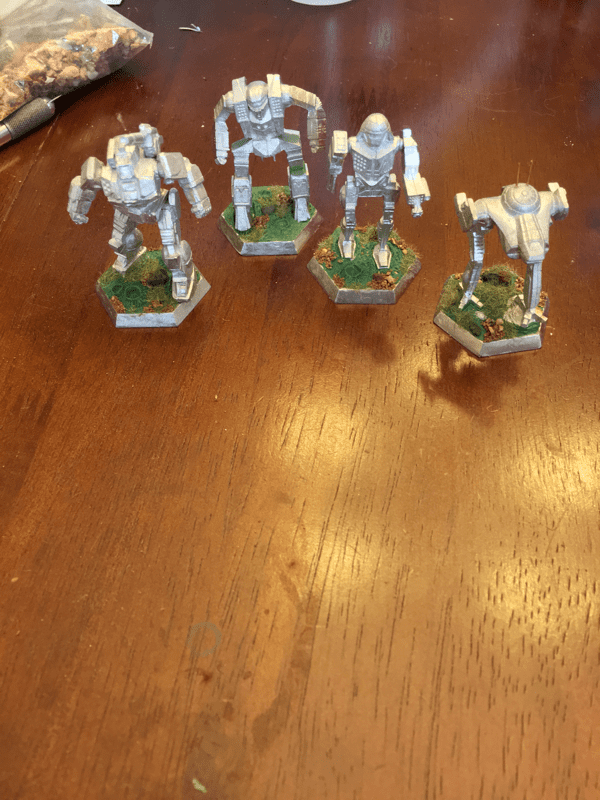
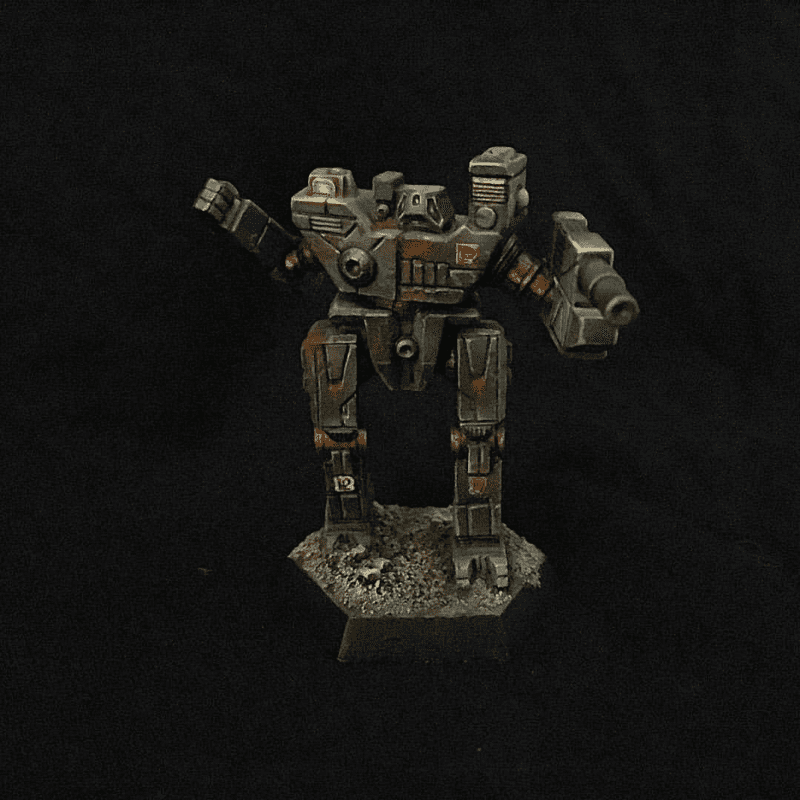
The SHD-2H Shadow Hawk fulfills the role of the Centurion from the Alpha Strike lance pack. With long range attack, armor and structure, as well as a bit of jump ant 10" of movement, it serves as the anvil of the level II while not slowing it down too much. (This model seems to keep ending up in my builds!) Carrying straight over from the lance pack, the CLNT-2-3T Clint provides some more medium and long range support. The respectable jump keeps this piece able to move from cover to cover in support of the other acolytes. Good thing, too, because this model needs all the cover and movement modifiers to make it as hard to hit as possible. With only two points of armor and three of structure, keeping this 'Mech at range and moving will keep it on the field and fighting longer. The VL-5T Vulcan is a new addition from the Alpha Strike lance pack. Chosen to fill the role of the role of the WLF-1 Wolfhound, this model carries the same armor and structure profile, similar damage profile (minus the Overheat option), and gains jump, all at an increased cost of +2PV. It's worth nothing this is the -5T model and not the standard -2T. The CDA-2 Cicada is another new addition. Though not overly impressive, it does move quick and carries only energy weapons. Use this fast-moving knife fighter to flank enemies and attack their rear arc for +1 damage and critical hit check. The major two additions are the MON-66 Mongoose and the MCY-99 Mercury. Adding both of these units provides both speed and a Comstar, Blessed be Our Order, feel. Either can easily assume the role the JR7-D Jenner from the lance pack fulfilled, sans jump. If rules permit, the Mongoose's PRB and RCN specials will help provide targeting acquisition information to this and other units. To increase survivability of this lighter level II, three of the units have the ENE special. Though still fragile, the potential to avoid an ammo explosion helps keep these pieces on the table a bit longer. These same three pieces also have the highest base TMM, increasing their survivability. For the remaining pieces, they are best used as distance with movement and cover. At 127 PV for regular pilots, there is plenty of room to adjust skills and add an additional SPA to the unit.
Late Succession Wars (PV 131)
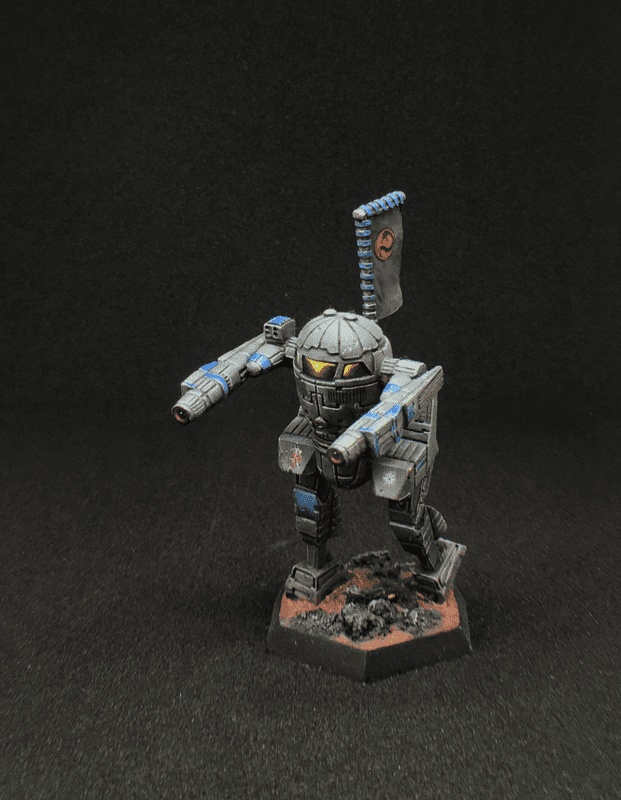
Ideally, this would be better used as a JR7-F Jenner. This model carries enhanced survivability with a combination of greater armor and the ENE special. To do this, however, could cost up to +6 FP to add it as a storied unit. The remaining models from the Early Succession War carry over. 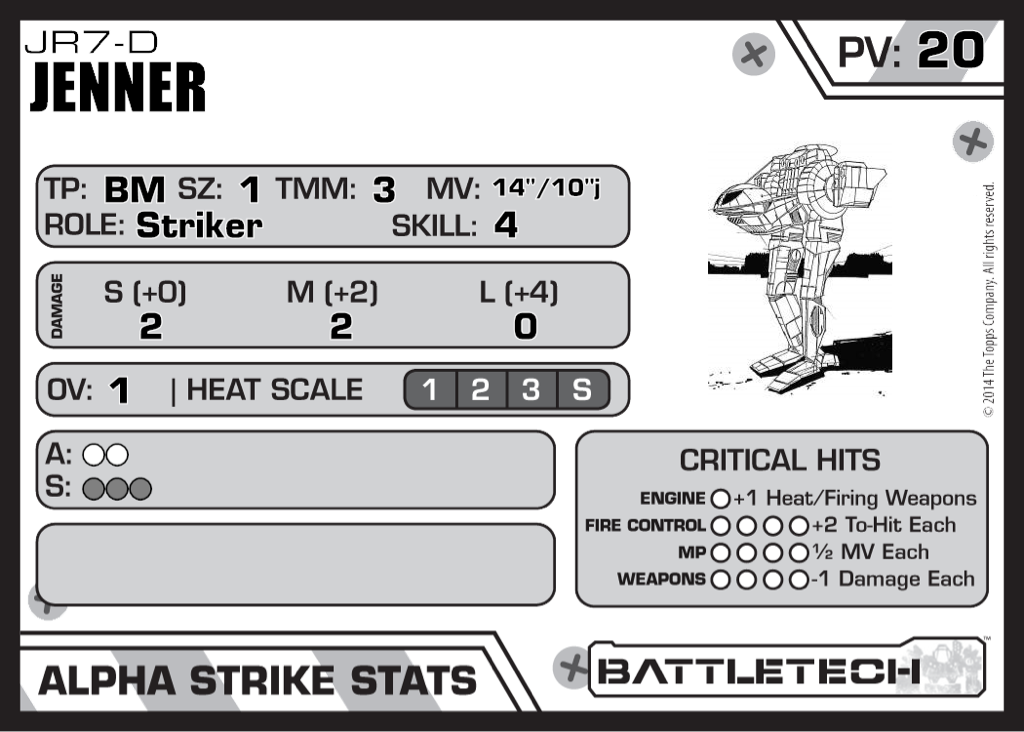 Clan Invasion - Fed Com Civil War (PV 143)
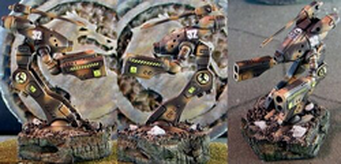
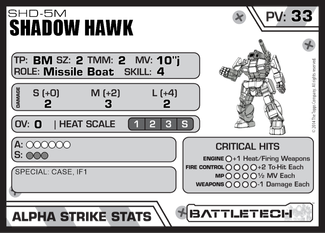
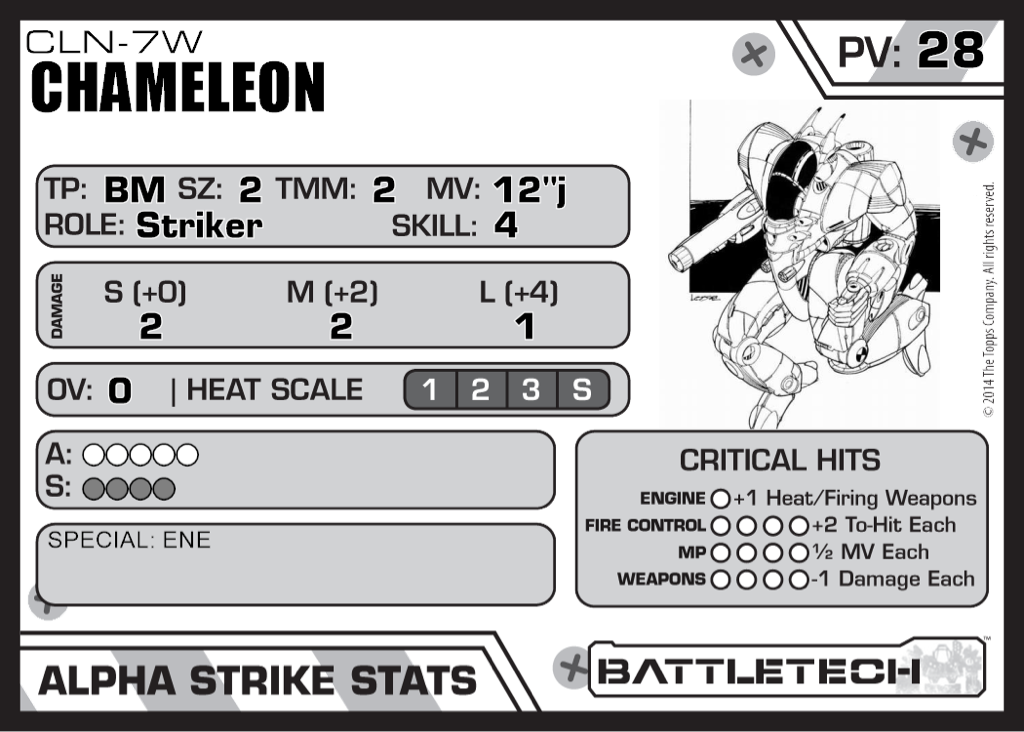
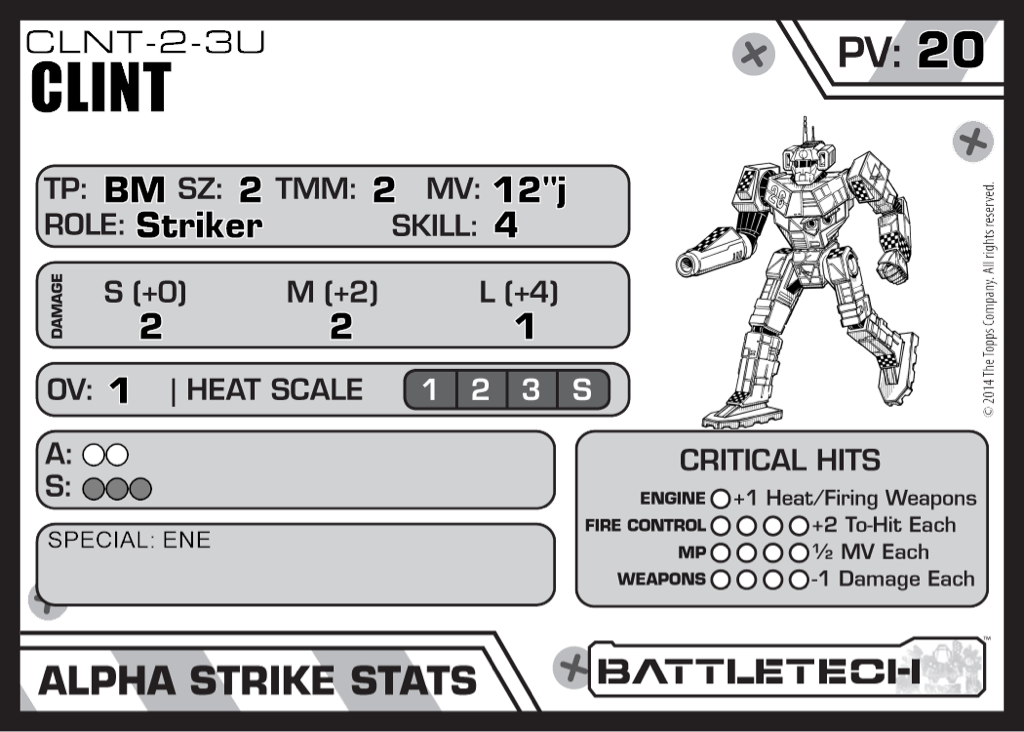
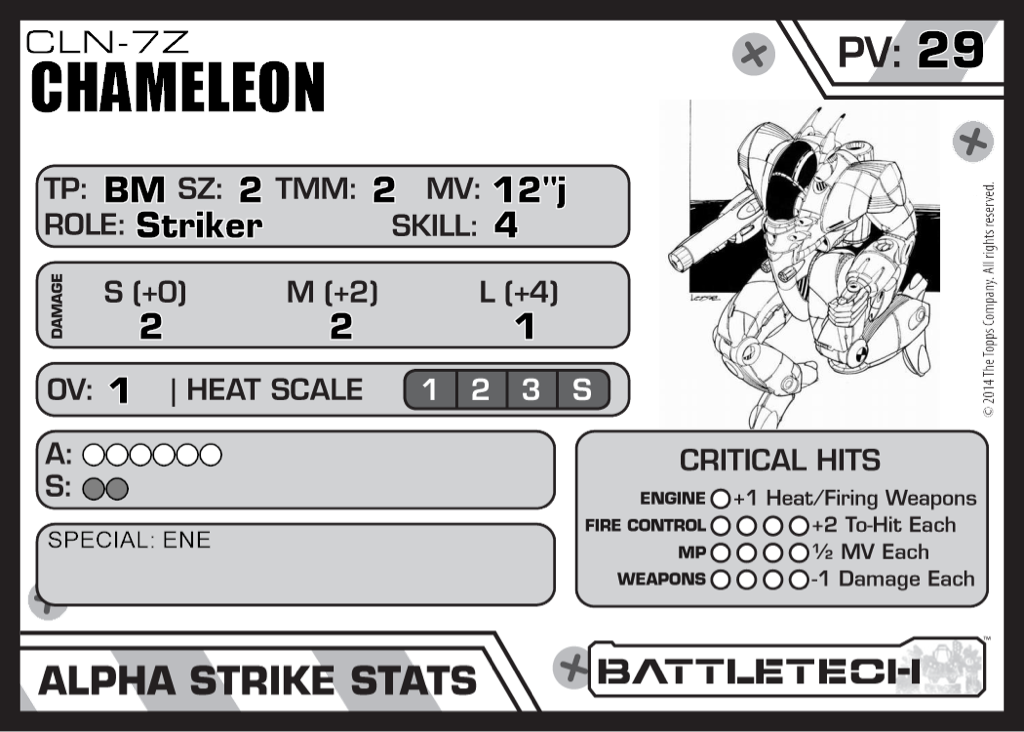
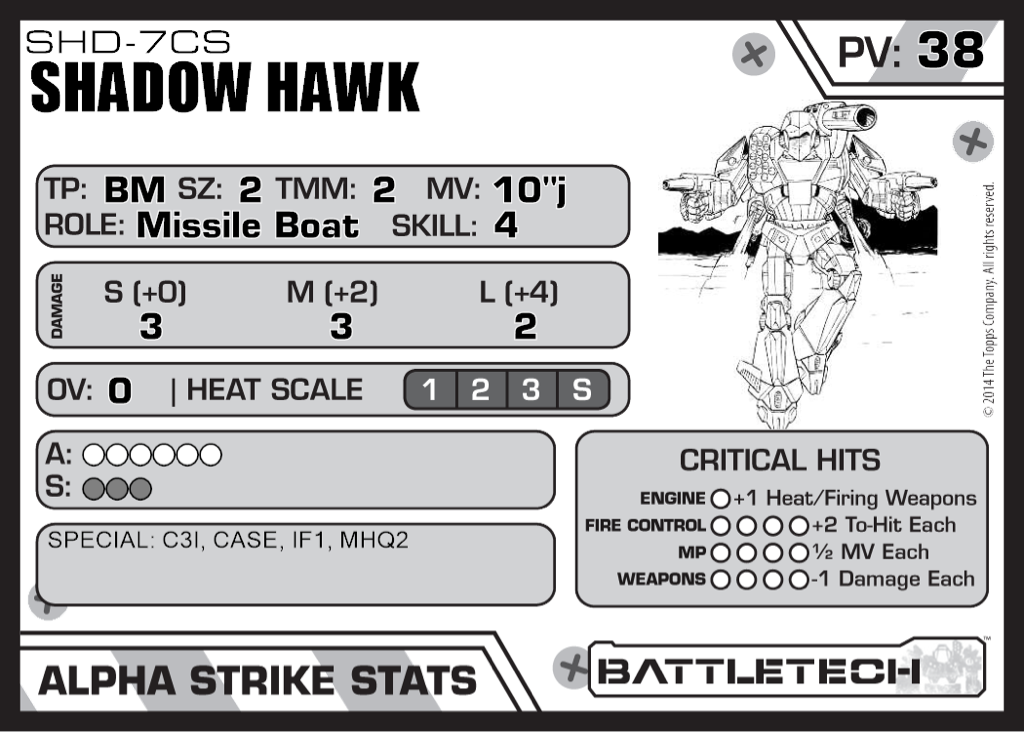
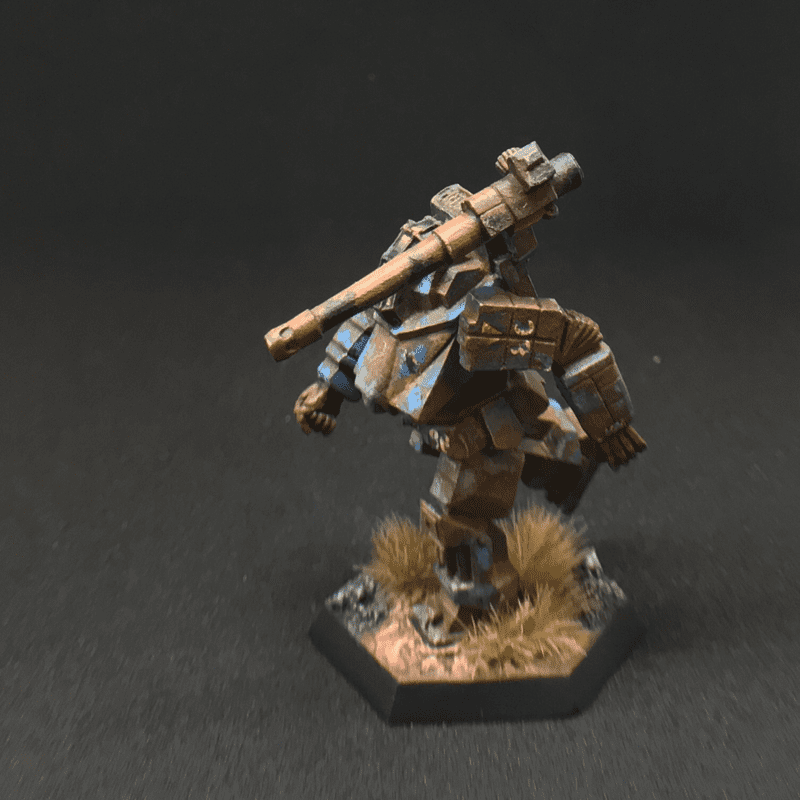
With the Clans come new toys as well for Comstar, Blessed be Our Order! The first major improvement is the upgrade of the SHD-2H to the SHD-5M Shadow Hawk. With this alteration, the model gains a full 10" of jump and an upgraded damage profile from 2/2/1 to 2/3/2. With the addition of CASE, this machine is no longer threatened by ammo explosions - bringing it right in line with the overall idea of survivability of the formation. It does, however, sacrifice some armor and structure to accomplish this. From A:5 S:5 to A:6 S:3, the SHD-5M loses one point total. With the added armor and increased jump, as well as CASE and the reduced structure, this unit can fight in the midst with less opportunity for critical hit destruction. When he's dead, he's dead. Continuing on survivability, the Clint upgrades in this era to CLNT-2-3U. More or less identical to its predecessor, this model does gain the ENE special. Even though ammo explosions aren't a threat to this piece anymore, it still carries paper thin armor and little structure under that. This era does have the resurgence of the Chameleon. Either the CLN-7W or CLN-7Z can stand as competitive formation mates to the other units. At 12" of jump, 9 and 8 points of armor and structure (respectively), 2/2/1 damage profiles, and ENE special for both (and Overheat for the 7Z), these units possess similar movement profiles, maneuverability, damage brackets, and limited critical hit dangers. Need more long range firepower? Replace the Vulcan. Need more survivability? Replace the Clint. The upgraded CDA-3F Cicada is a beast of its predecessor. Movement explodes to 16" with jump, making the threat of being outflanked by this bug even greater - and at all ranges too. The up-gunned Cicada can hit targets for 2/2/1, a +0/+1/+1 improvement over older models. With one more point to armor and structure and holding onto the ENE special, this light-pretender can change a game. The final major improvement is the MCY-97 Mercury. This model gains the PRB and RCN specials at a cost of -1/0/0 damage. Depending on the additional rules used in play, other units, and tactical preferences, this may or may not be the best change. Regardless, the PV remains much lower than the 150 point goal. At 143, sufficient points remain to improve skills and boost SPAs.
Word of Blake Jihad (PV 143)
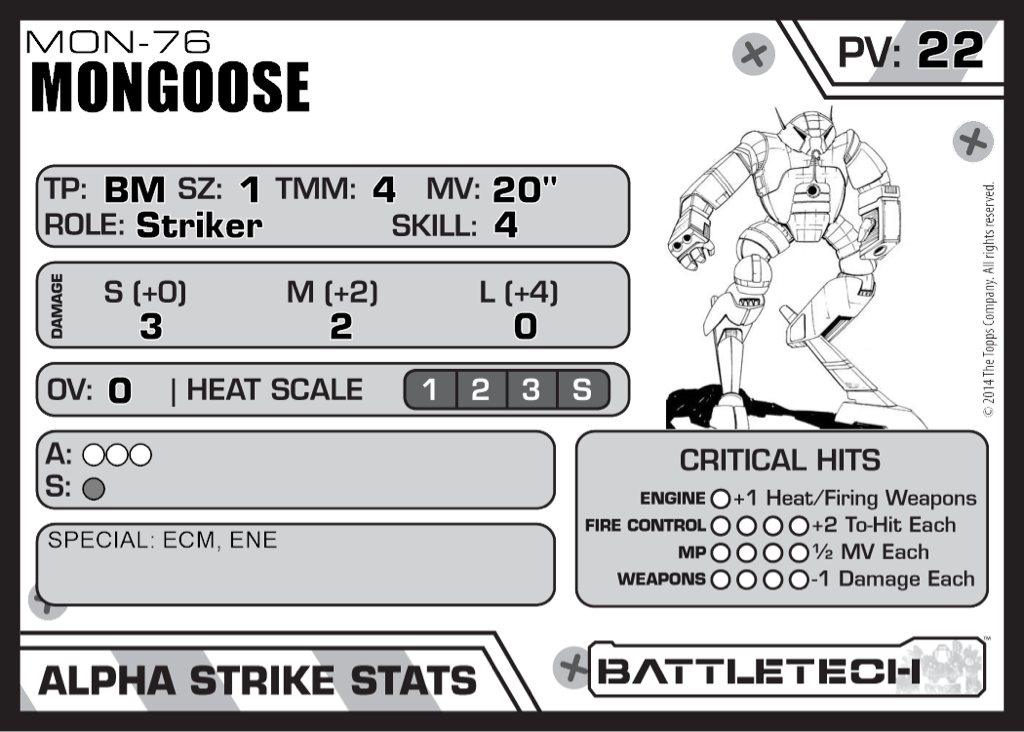
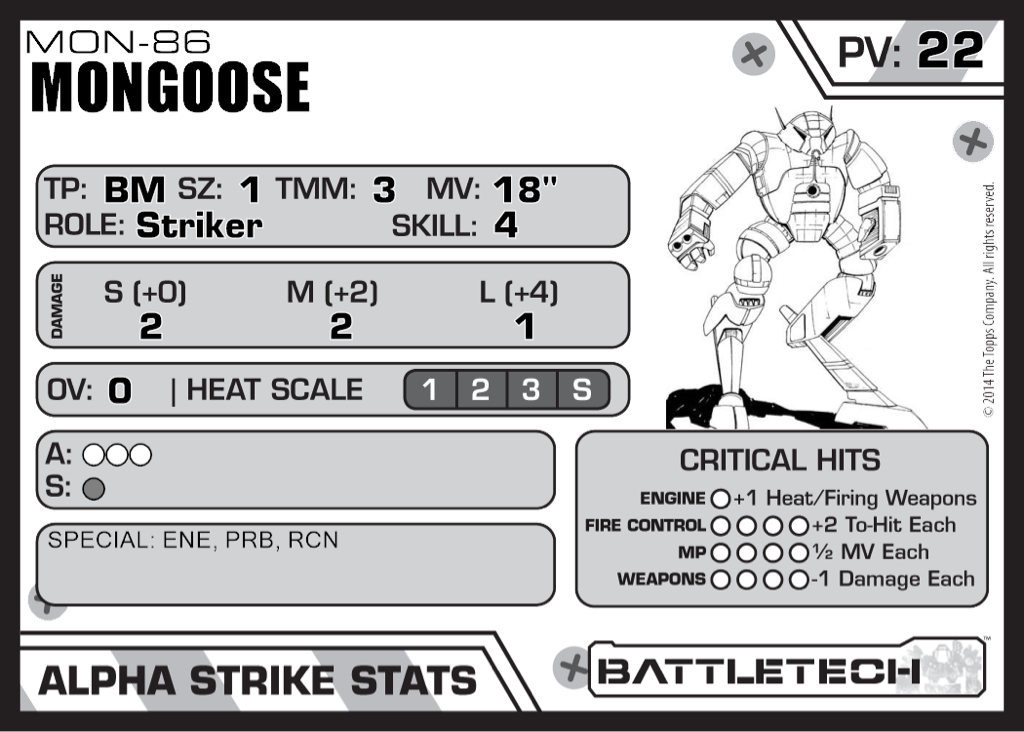
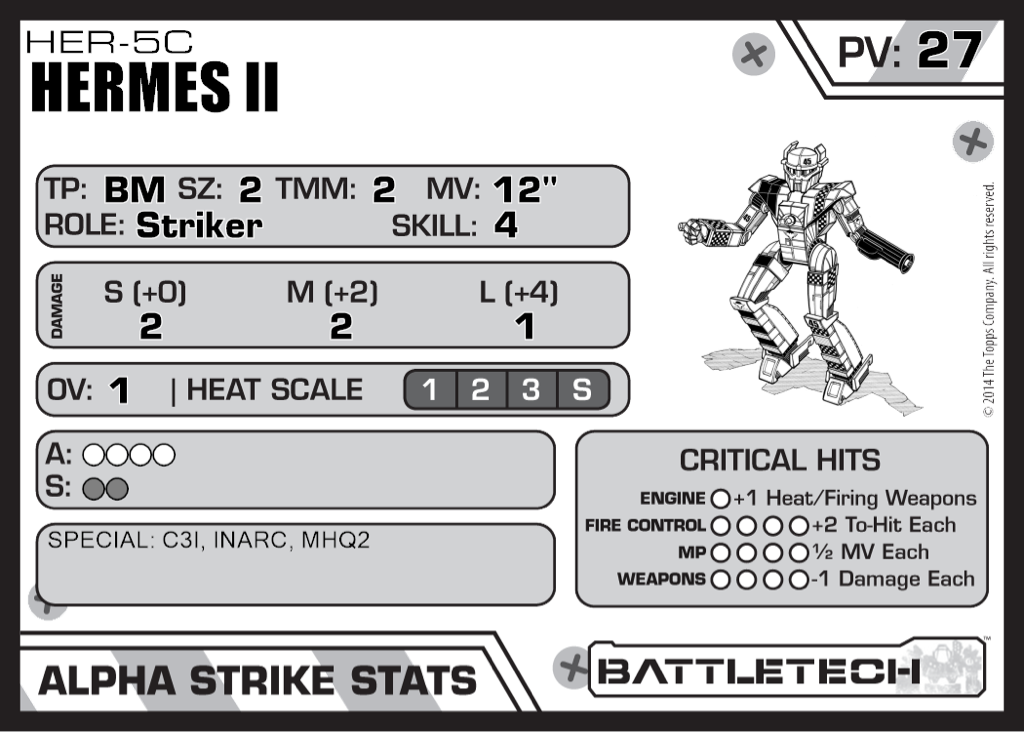
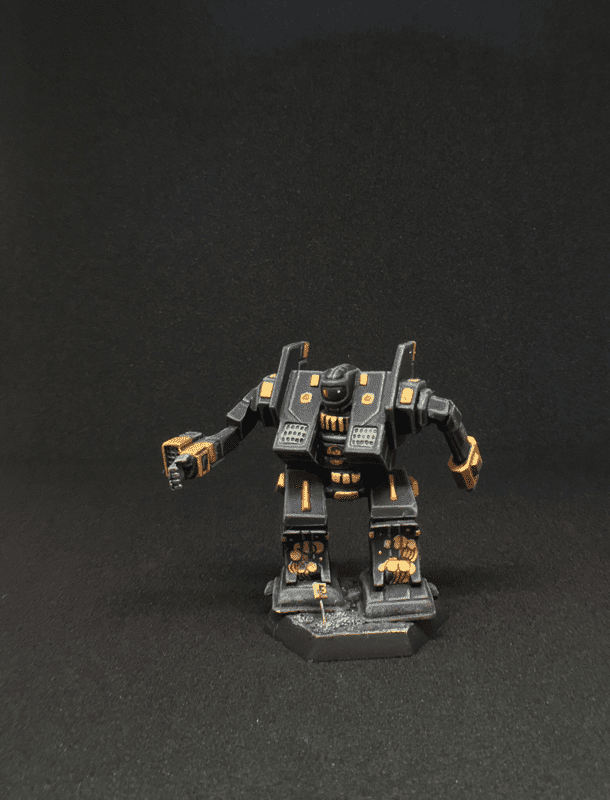
When stomping out the fires of fundamentalism, Comstar, Blessed be Our Order, gains a few notable models in this build. The most important is a question of play style. If, on the one hand, C3i networks of the fallen and lost followers of Jerome Blake will be a threat, the MON-76 Mongoose can fill the gap. With upgraded speed, enhanced damage, and ECM, this piece can disrupt enemy communications networks. If, however, ranged attack with PRB and RCN is the way to go, the MON-86 Mongoose fits in with the other ranged attackers. These benefits, however, come at a cost of one point of armor/structure.
Peace of Blake be With You Should the Light of Jerome Blake, Peace of Blake be upon you, illuminate your path and guide you to salvation, a bounty of blessings abound for you. Your armory will overflow with tools of righteousness to bring all of mankind under the benevolent governance of The Word. Choosing to follow the true light of mankind will arm you to stand triumphant above all of your enemies! [Redacted] Want to follow the Word of Blake, Peace of Blake be upon you? Find a few alternative units below! Clan Invasion
 Fed Com Civil War
 Word of Blake Jihad
Long Live the [redacted]!An interesting faction that flares up then puffs out, Comstar, Blessed be Our Order, or the Word of Blake, Peace of Blake be upon you, provide some interesting tools for play. Although these units only begin to examine some of these, like C3i and ECM, these formations will serve to provide an all-around Pursuit Lance for these factions' use throughout the eras of play (where they existed). Notes
HAVE YOUR OWN MULTI-ERA LANCE YOU'D LIKE TO SHARE OR SUBSTITUTIONS TO THIS ONE YOU'D MAKE? SHARE THEM IN THE COMMENTS BELOW!
5 Comments
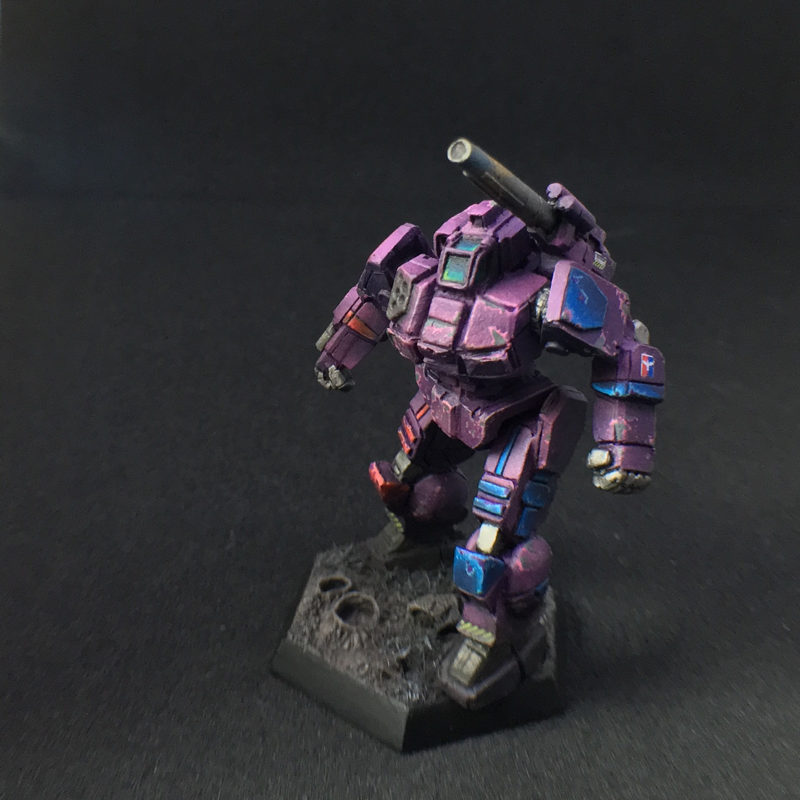
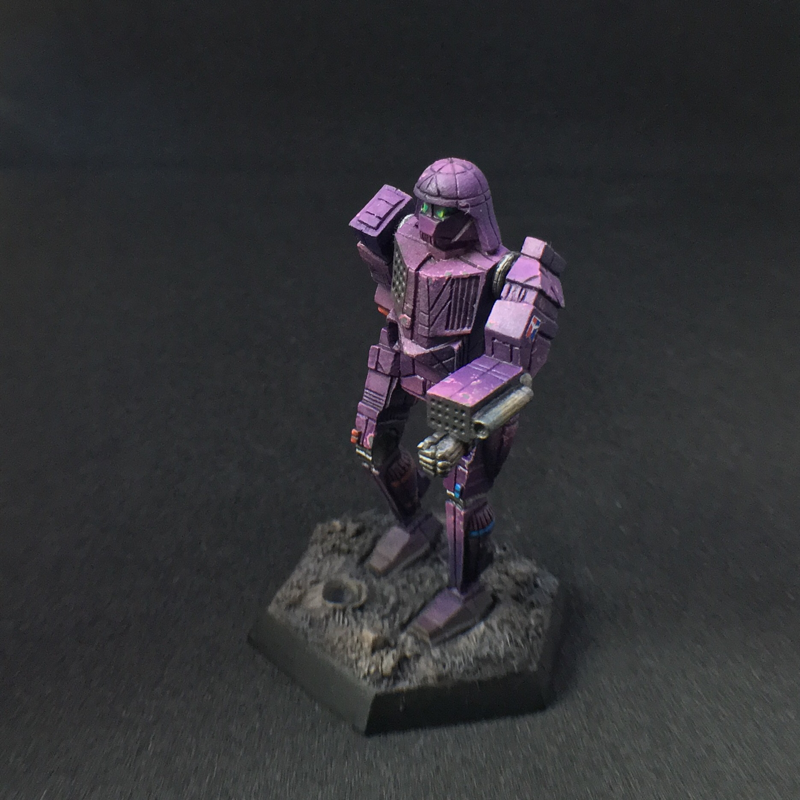
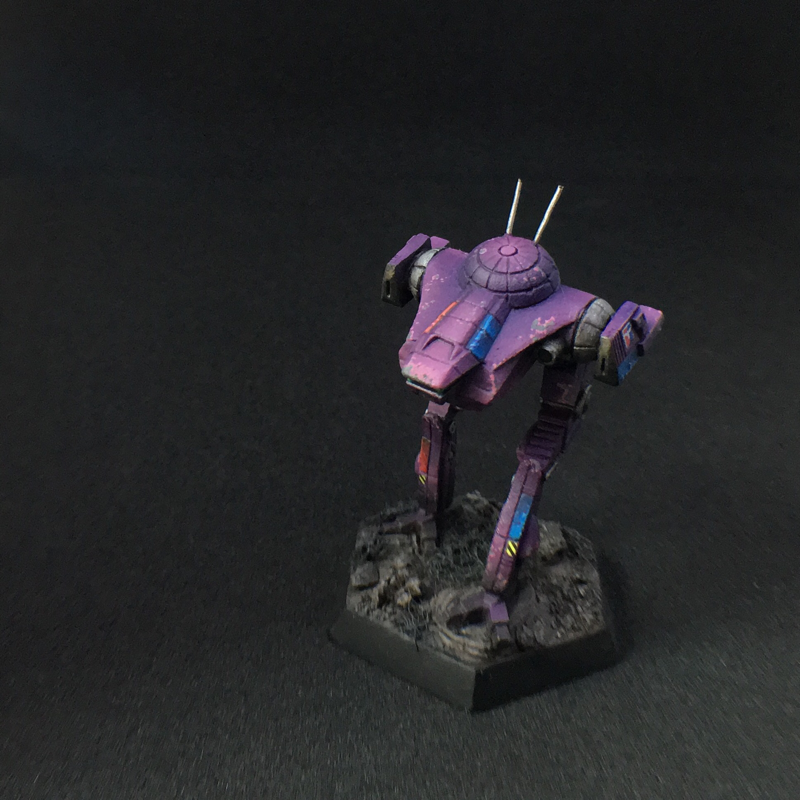
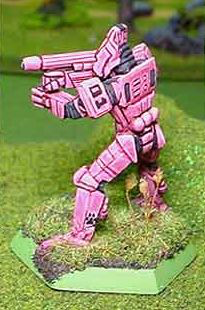
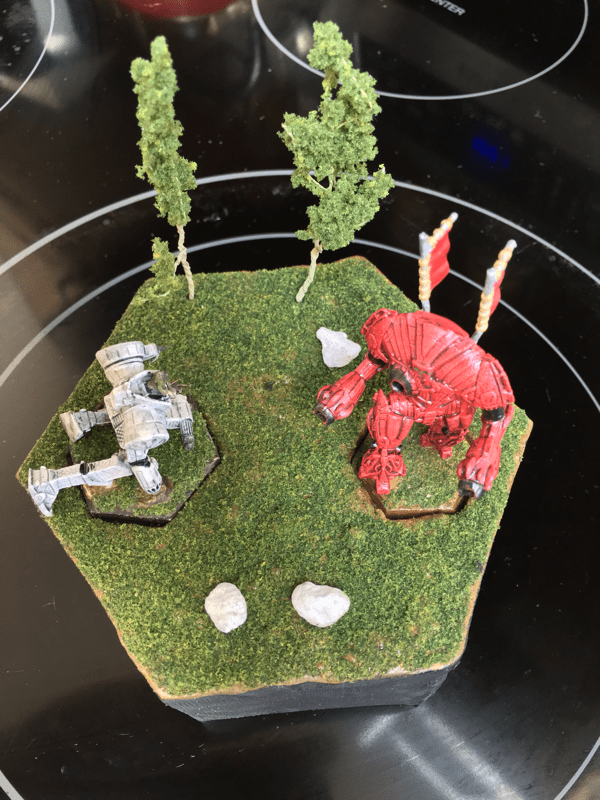
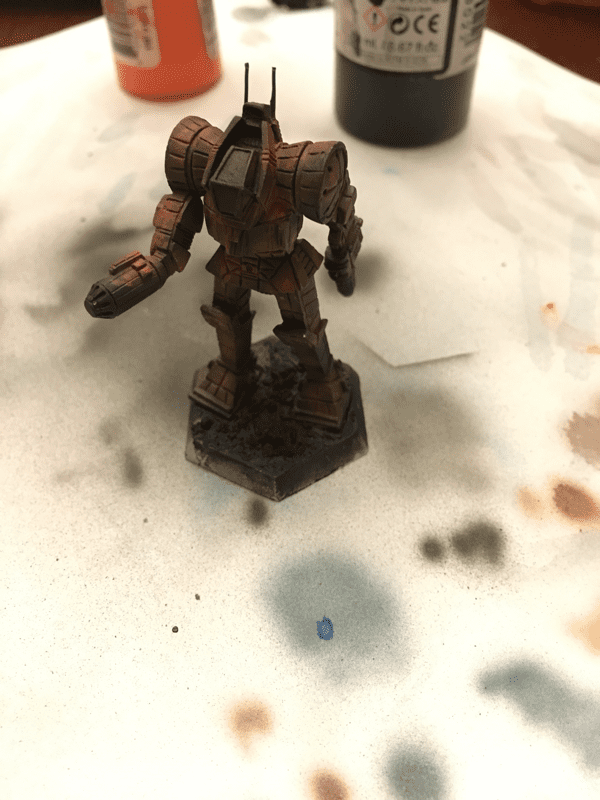
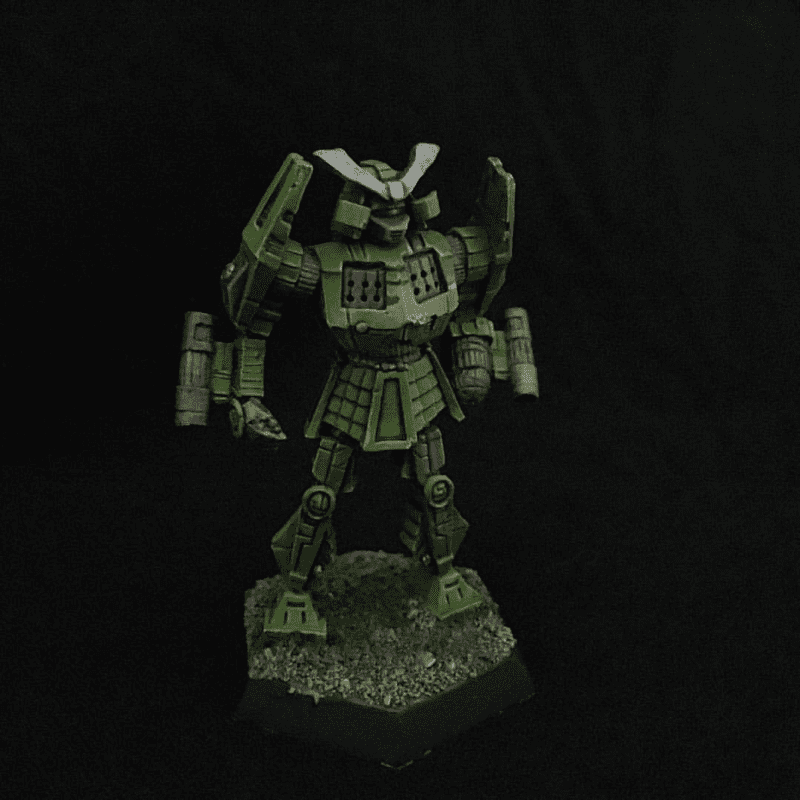
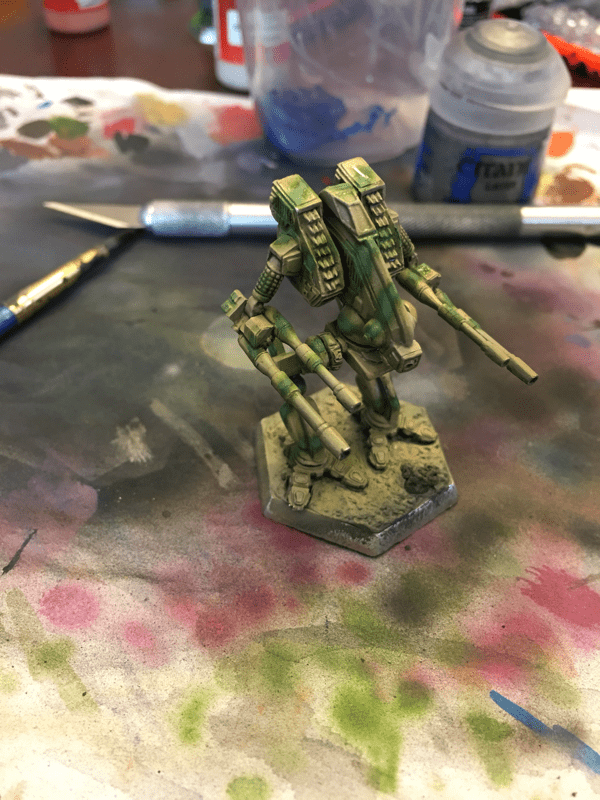
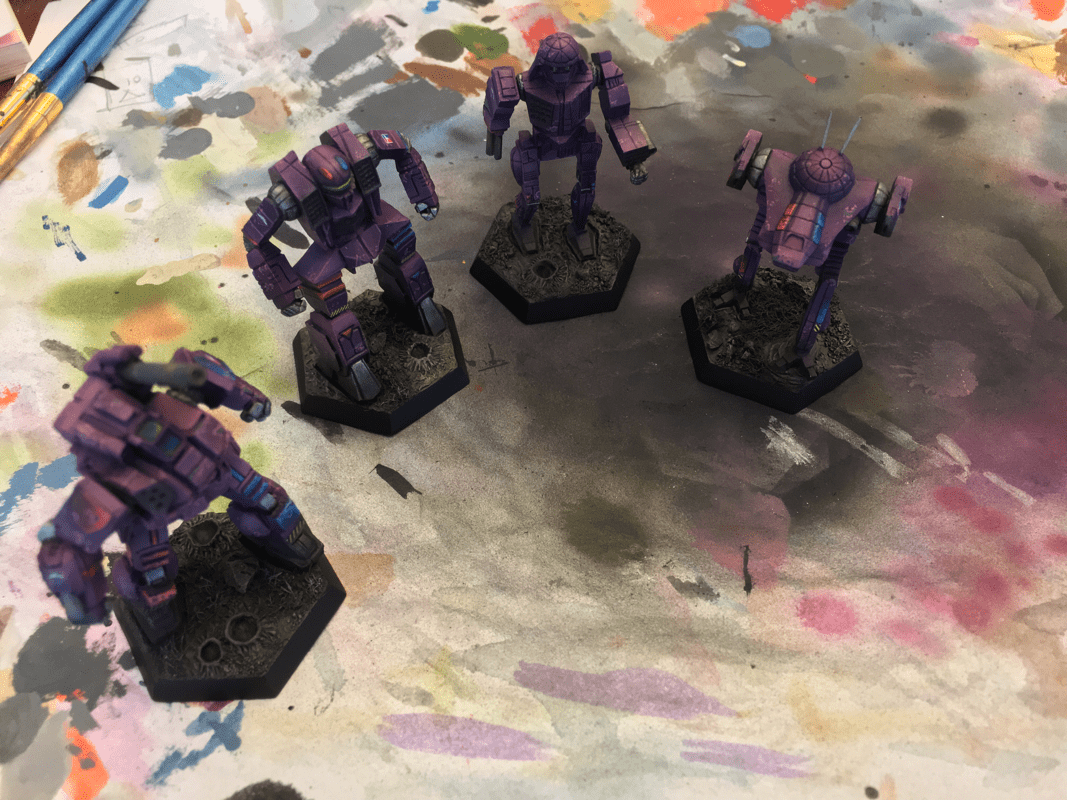
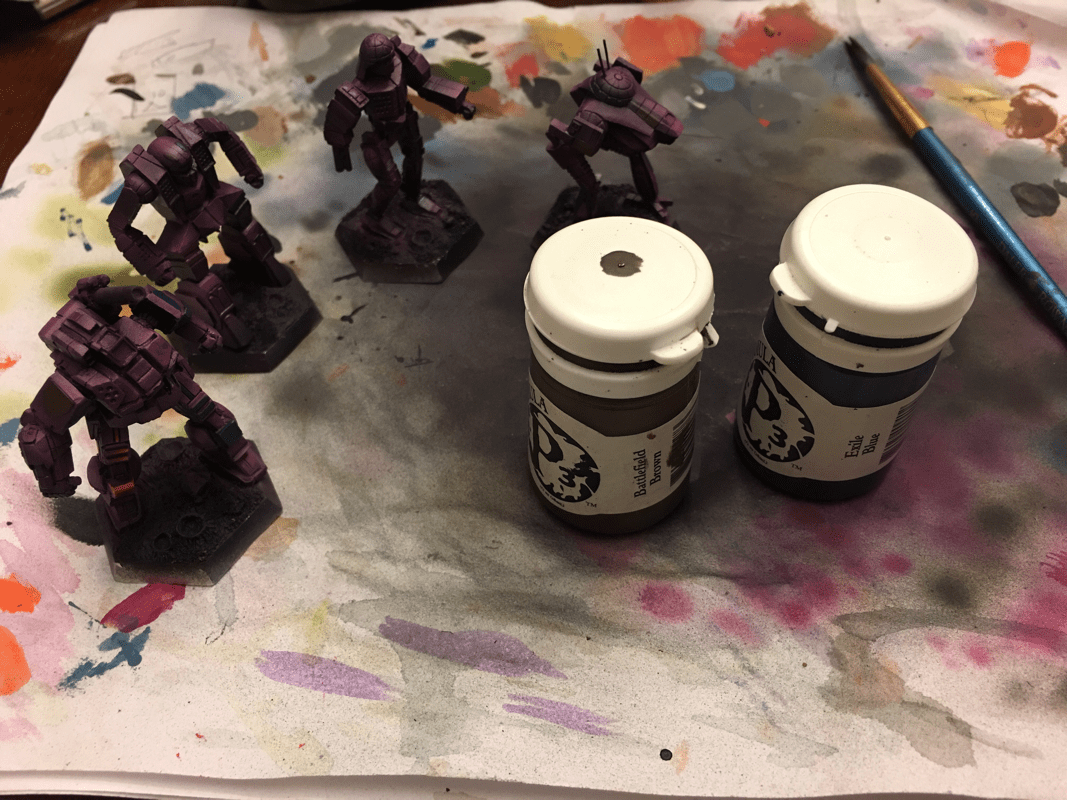
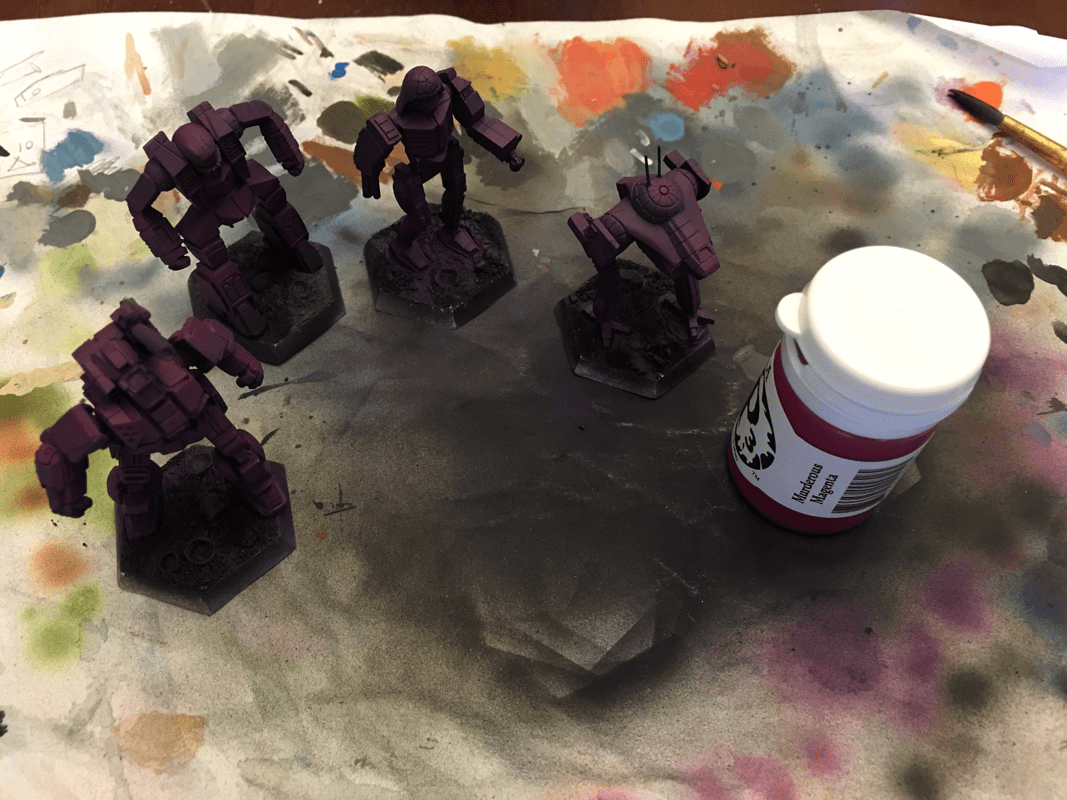
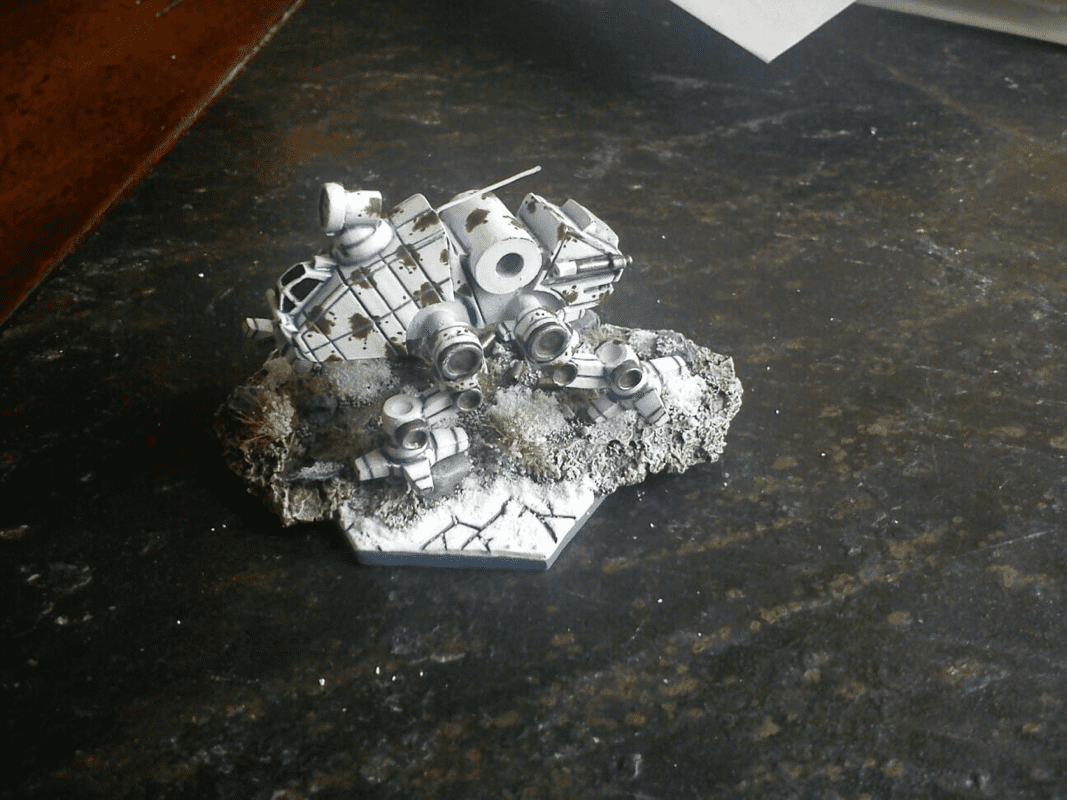
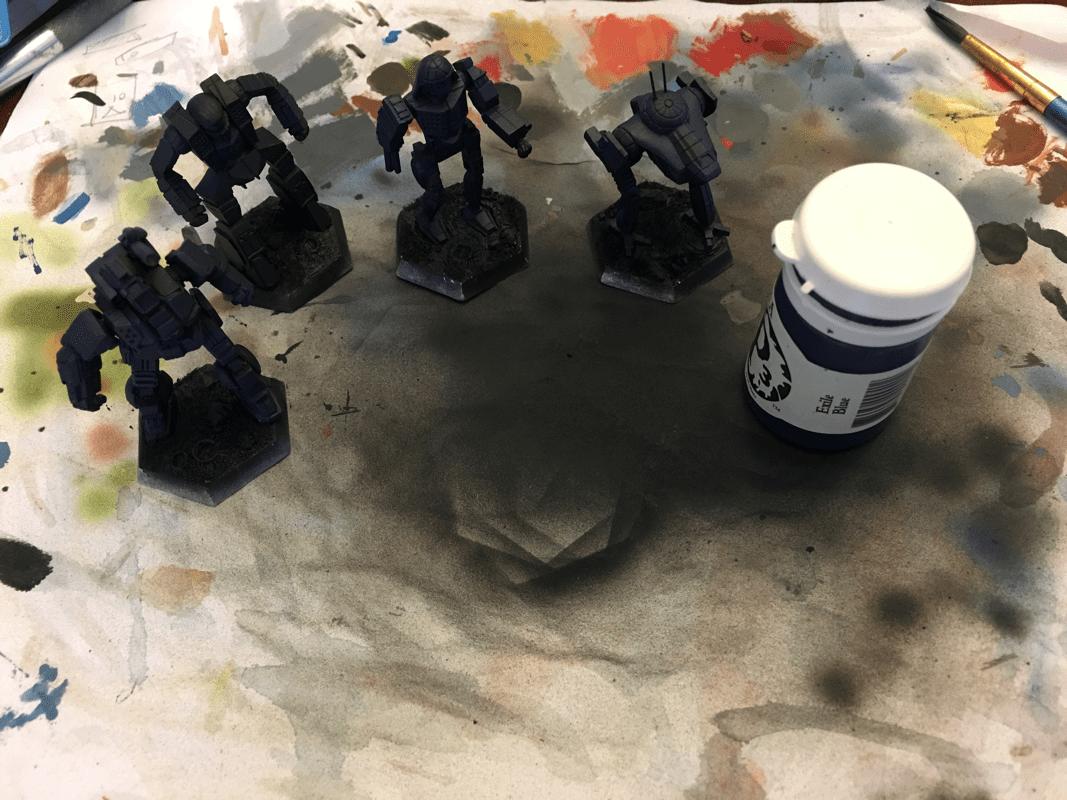
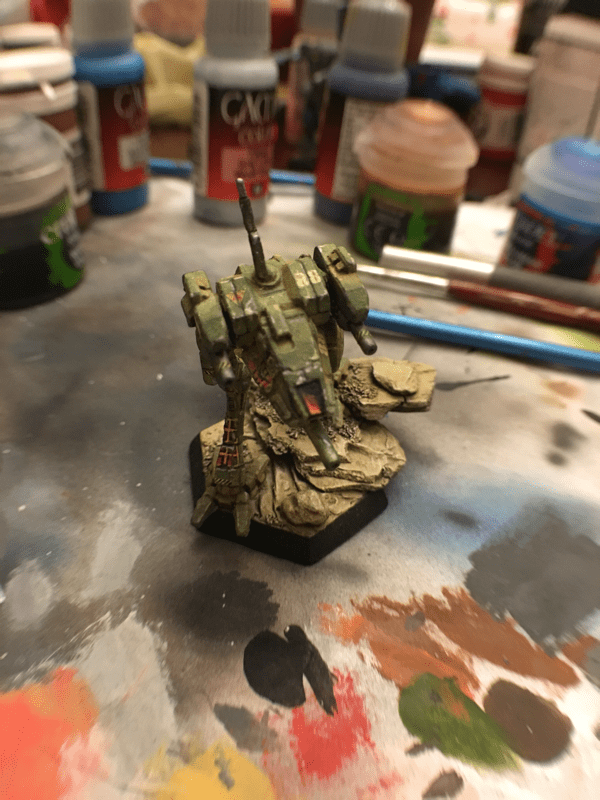
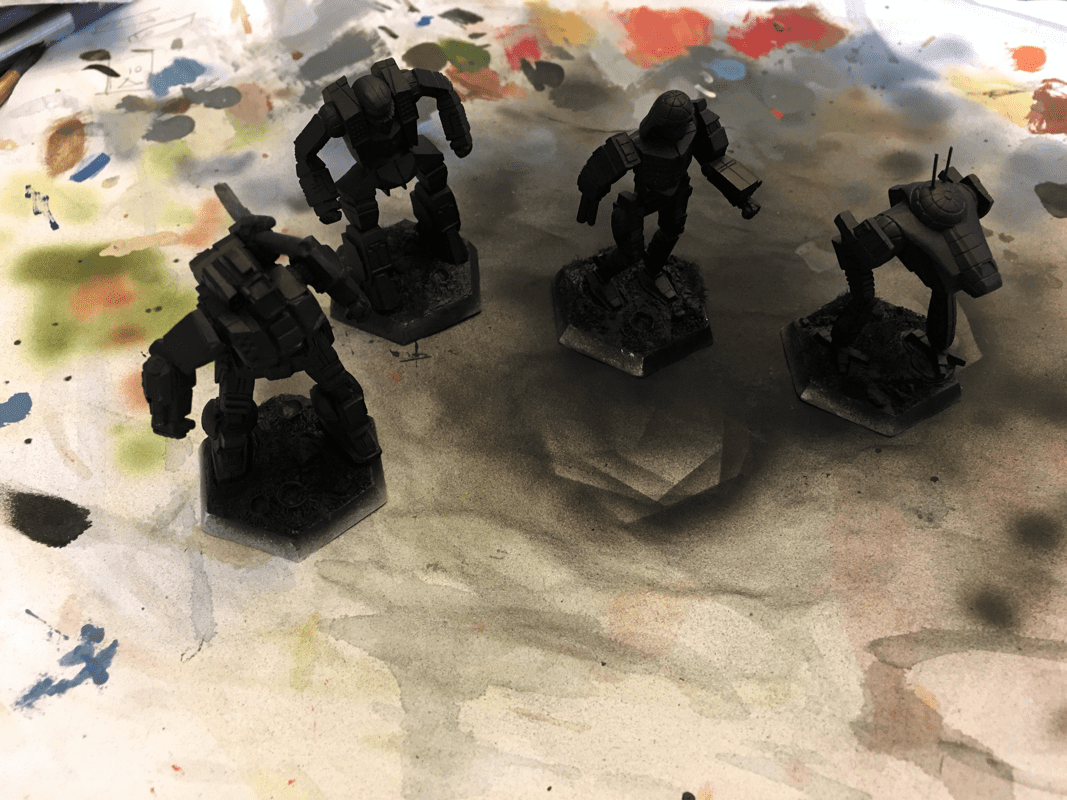
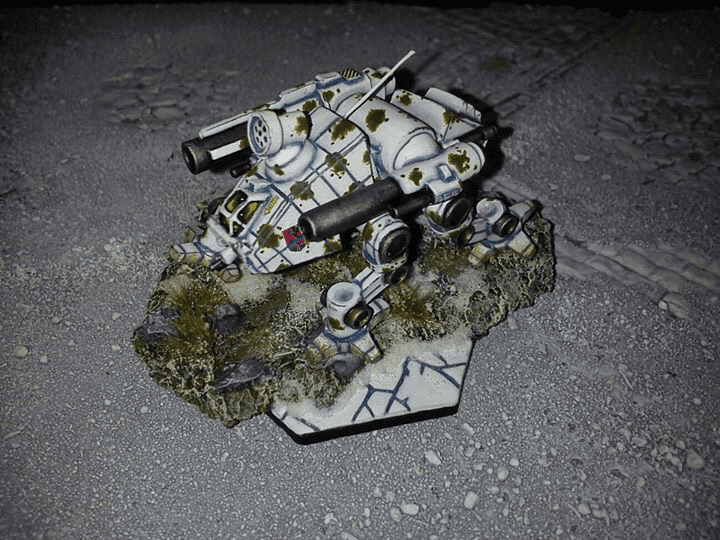
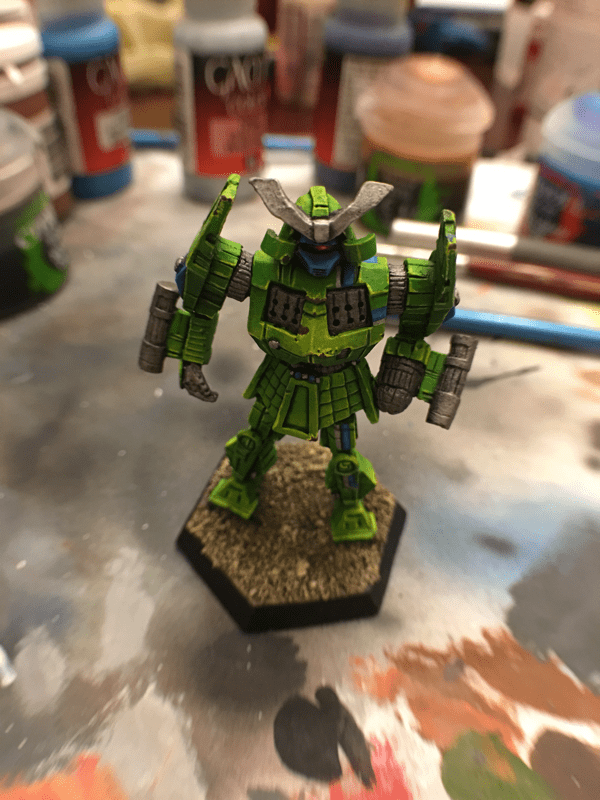
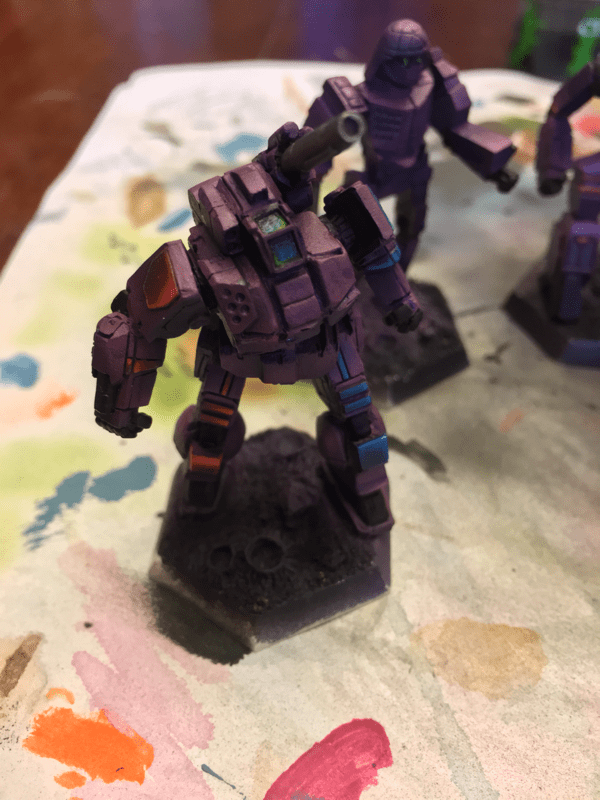
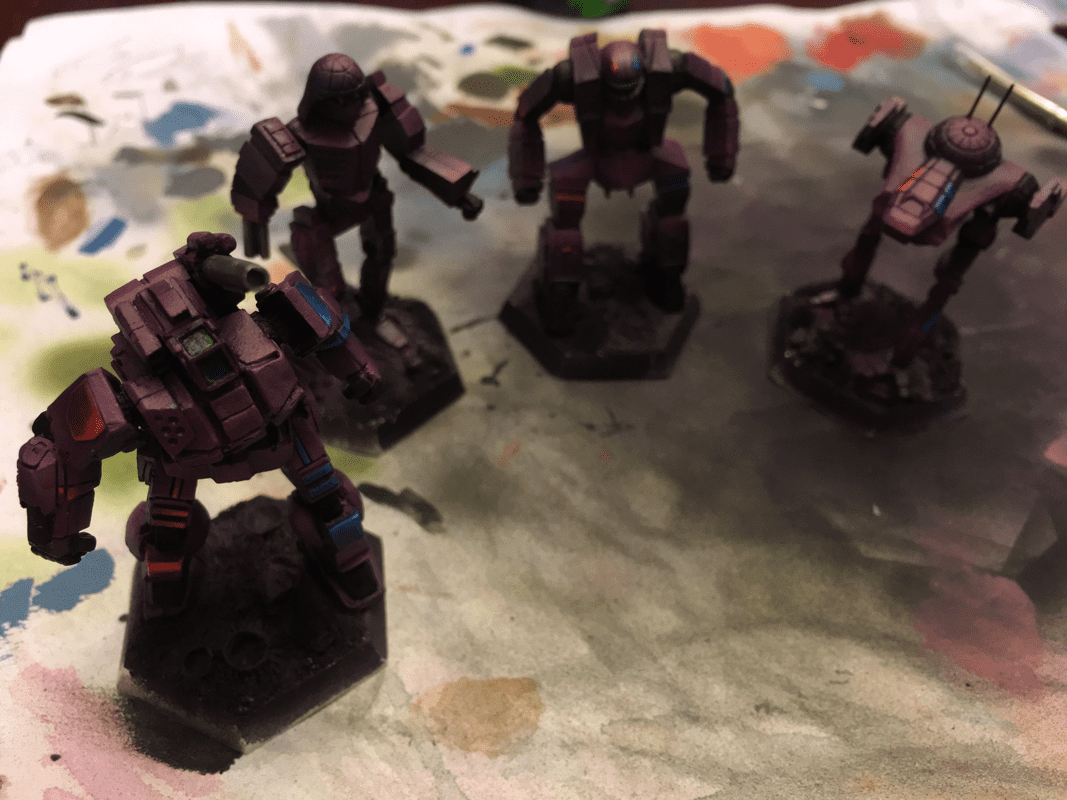
Welcome to Paint Slinging! we dive right into the mucky mess we're all here for-putting paint on metal and plastic. In this edition, we'll walk through building the base purple for the Multi-Era Mini Marik Missile Force featured in a previous Long Live! post. 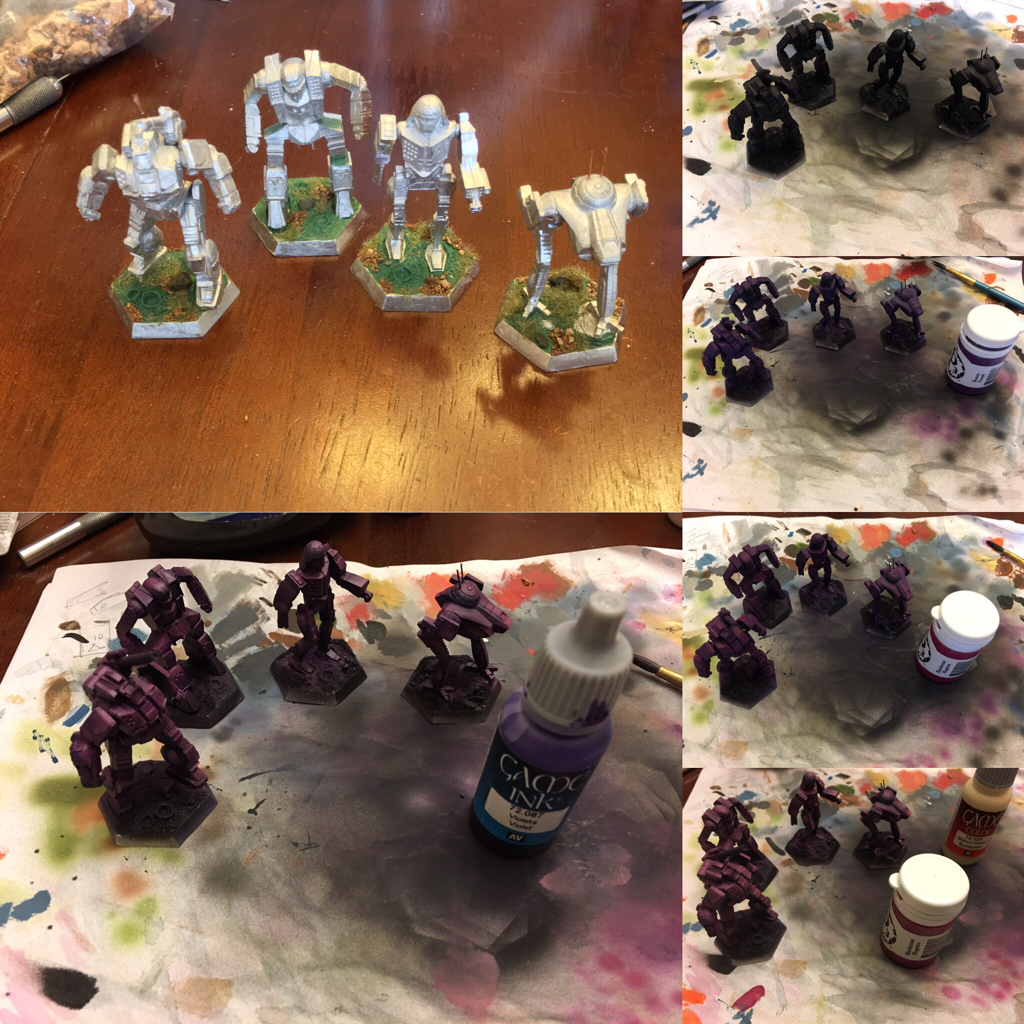 Some colors are notoriously challenging to paint. White seems to be a bane for many artists (perhaps this is why one of the go-to bad guys from the Battletech universe is the Word of Blake). Yellow, like that one person you dated a long time ago but would rather forget, seems like a good idea at the start, but end up being full of challenges and mistakes so that by the time you're finished with it you wish you'd rather have just not even started that mess. The list goes on. Purple, however, is not one of those colors. Surprisingly, purple is a wonderfully easy color to paint with (Note: I still am not a Leaguer). Not only is it a breeze to paint, purple is also an amazing study in color theory! Let's begin today's walkthrough where every good paint job does: primer. 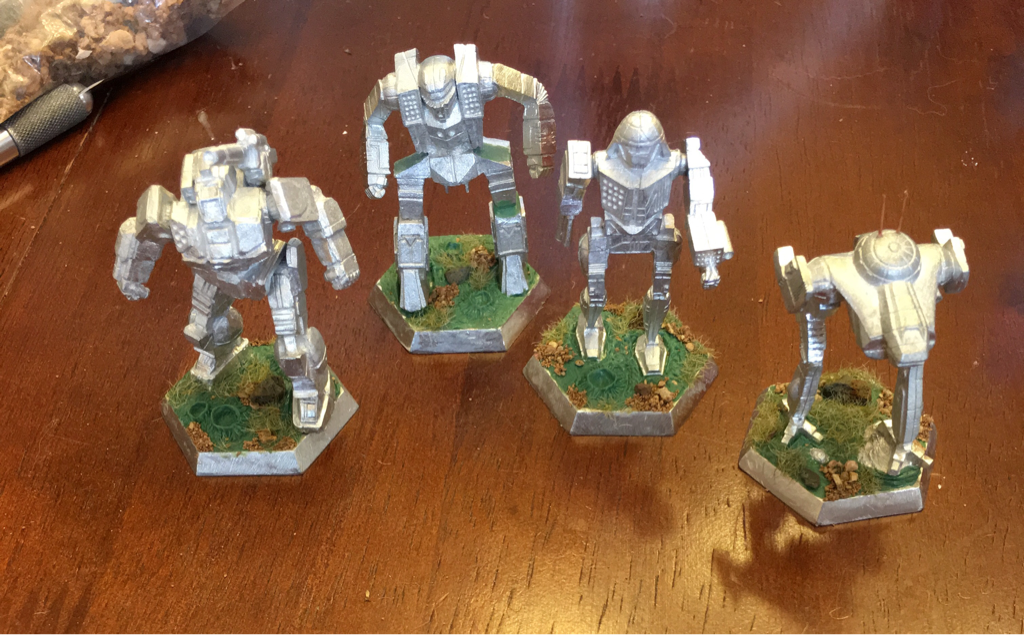 Because this is a "Fire Lance," I wanted it to occupy terrain that looked burned out. Using greenstuff, I sculpted craters on the base of exploded rounds. Knowing that I was going to want a black and burned look, I glued the gravel and grass down before painting. Choosing the correct primer will set the tone (literally and figuratively) for the rest of your project. Generally, artists will prime their miniatures one of several colors including black, grey, and white. (While I have seen red primer for other projects, I haven't used it for miniatures-yet...) Generally speaking, if the final piece should have a dark tone, use black; a mid-tone, use grey; a light tone, use white. The final color itself also has bearing on the primer choice. If using a dark color, such as green, dark red, dark blue, or something similar, use black. Conversely, such as yellow, bright red, or bright blue, consider a white primer. Some colors tend to work better on certain primers, regardless. Green on black and yellow on grey or white, for example, are two instances of magic colors that seem to work best on only certain primer colors. Primer choice may change depending on the method of painting as well. For example, if using an airbrush, black is a safe go-to primer for nearly any color because it adds rich contrast in the shadows (a key to miniature painting). This same idea-rich contrast-will work with brush painting as well, though it will require more layers, and thus more time, to achieve the brightly contrasting highlights (the component in contrast). An alternative when using brush painting is to prime white for an overall brighter finished product through fewer layers. When in doubt, use grey. When priming your miniature, make sure you cover every surface and do so with an even amount of paint. This may require a mixture of spray and brush primer to get every bit of metal or plastic painted. You may also need several light coats to achieve this. Patience while priming will make the final piece well worth the effort. 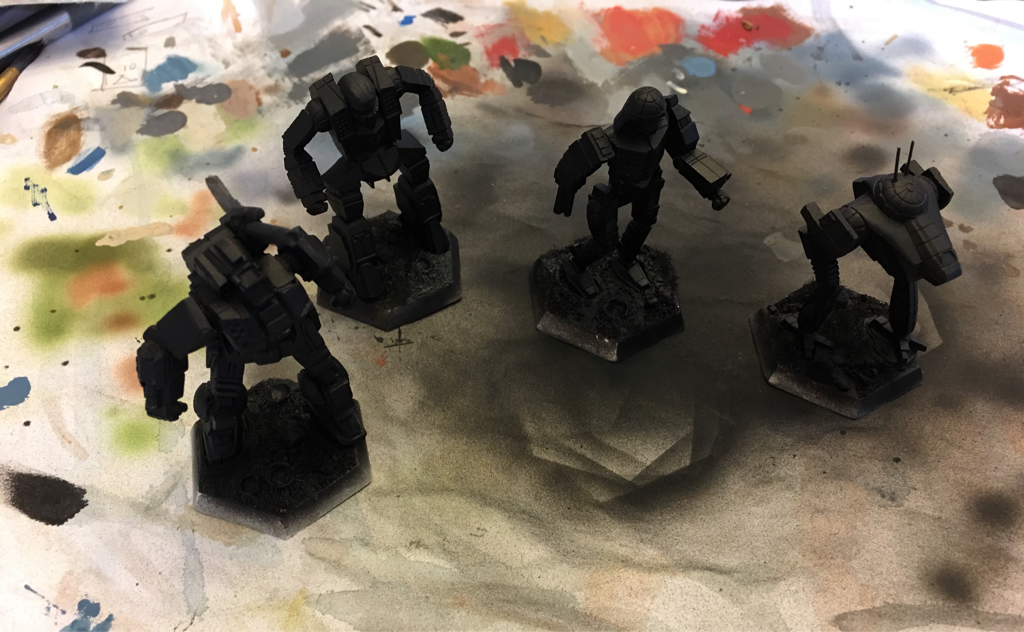 Black primer. Simple as that. The outlines of hex bases show several coast of primer were applied to these pieces. "Dark to light." Mr. Nissen, my middle school art teacher, always reminded us, "When painting, go from dark to light." When layering paint, it is easiest to begin with the darkest colors and move to the lightest. Why?
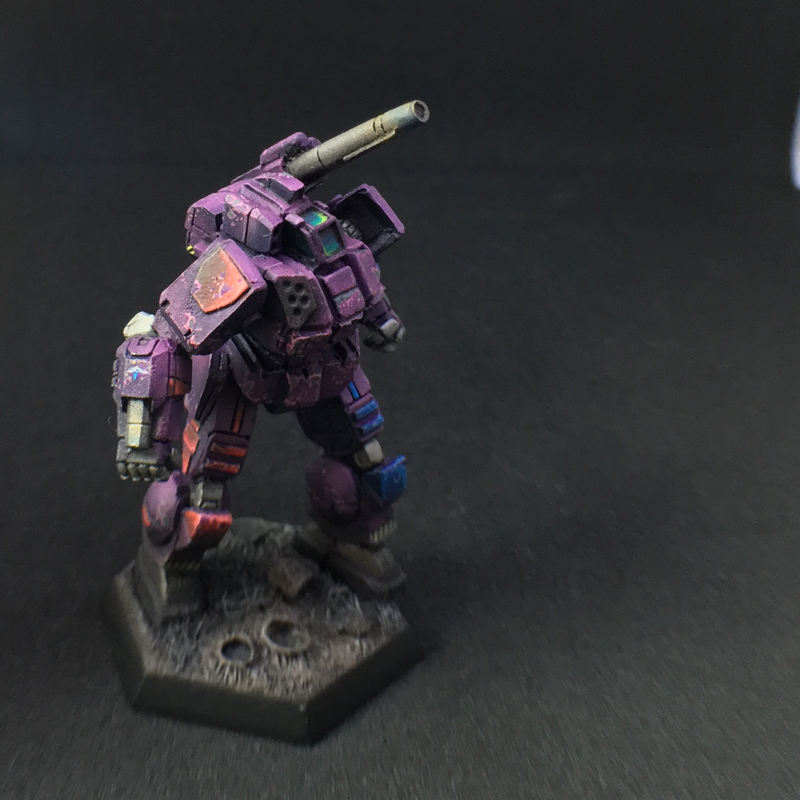
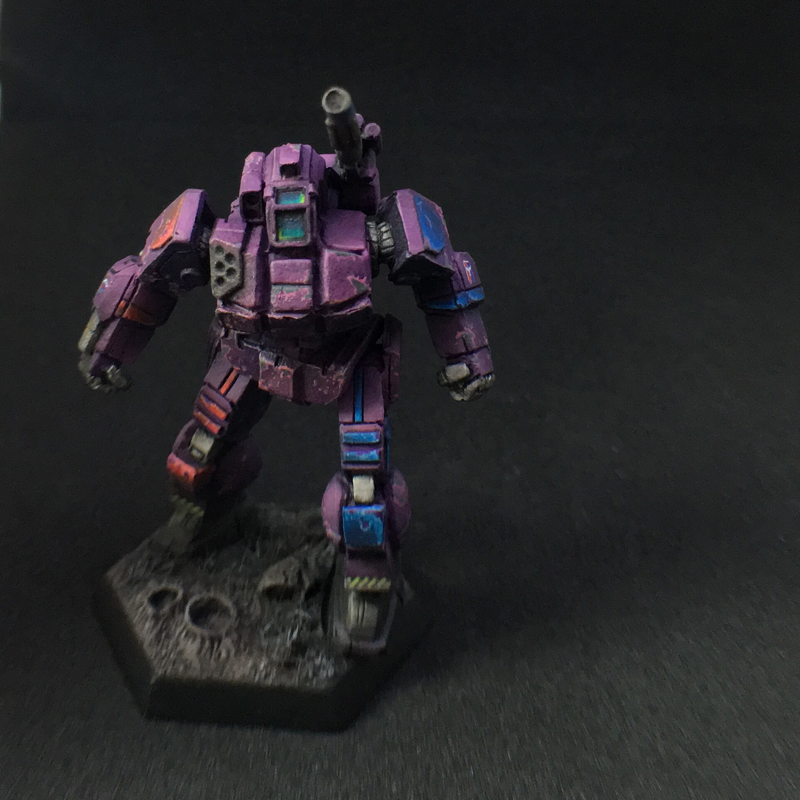
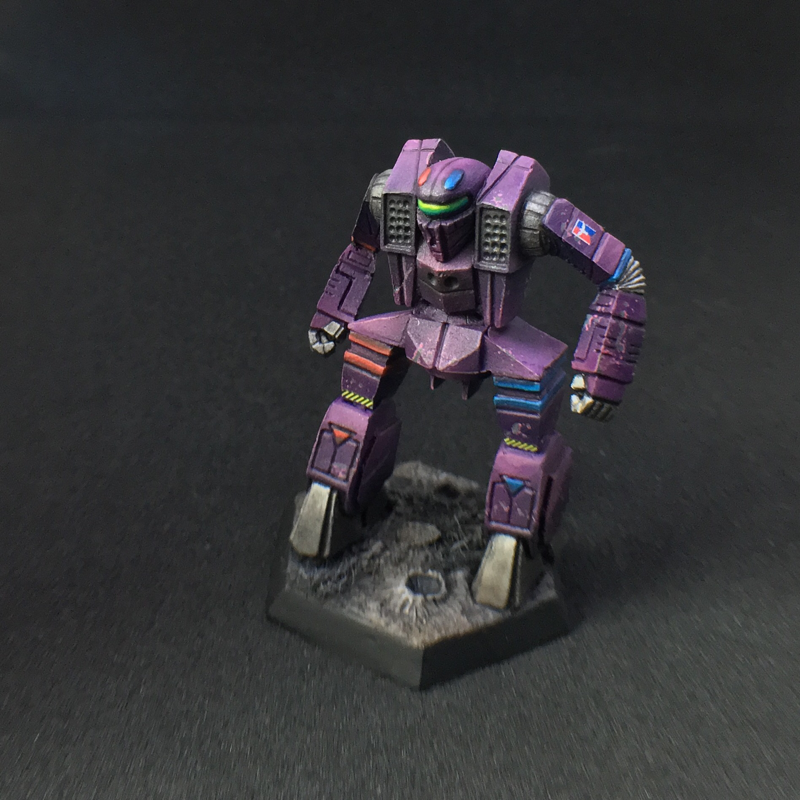
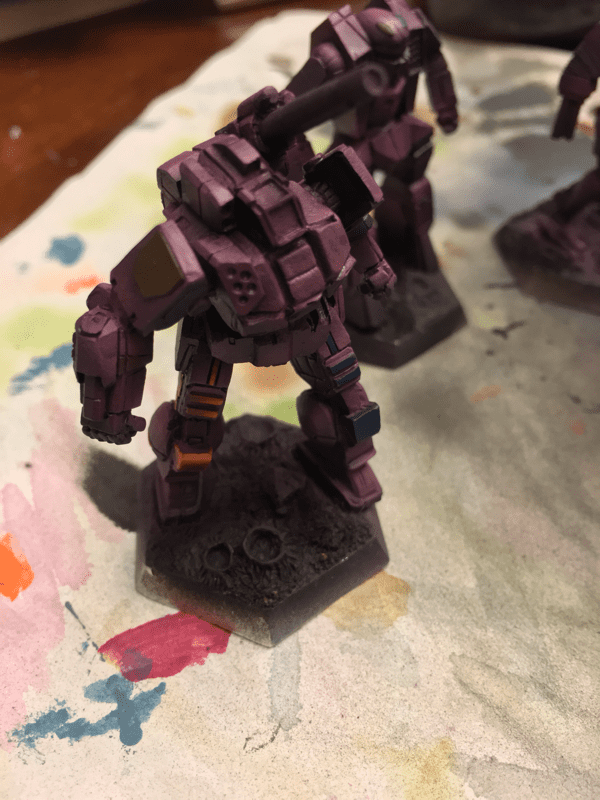
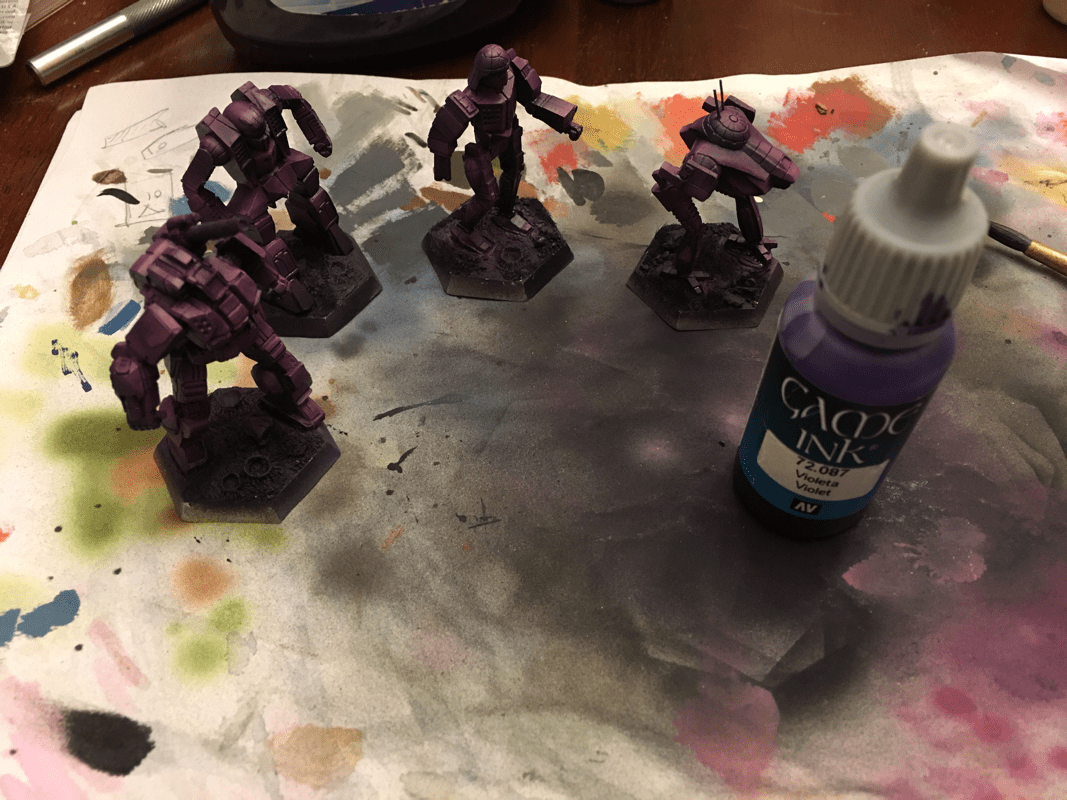
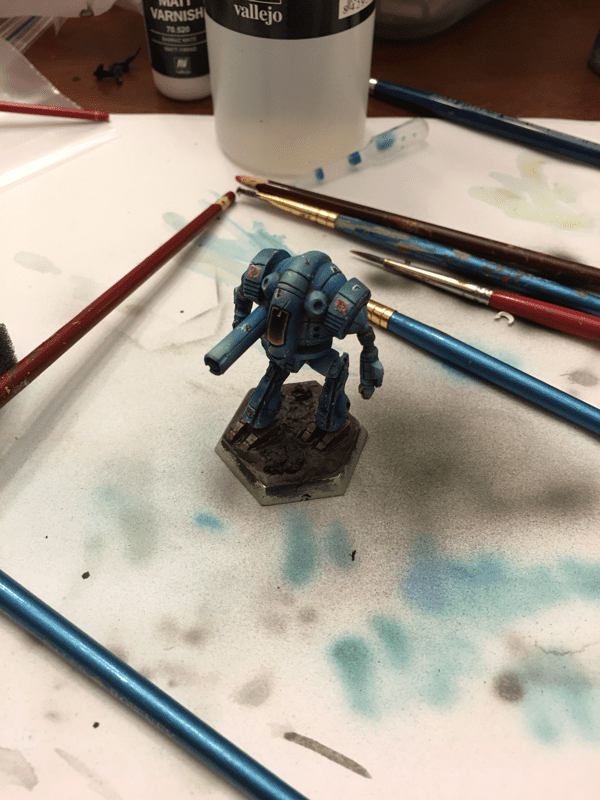
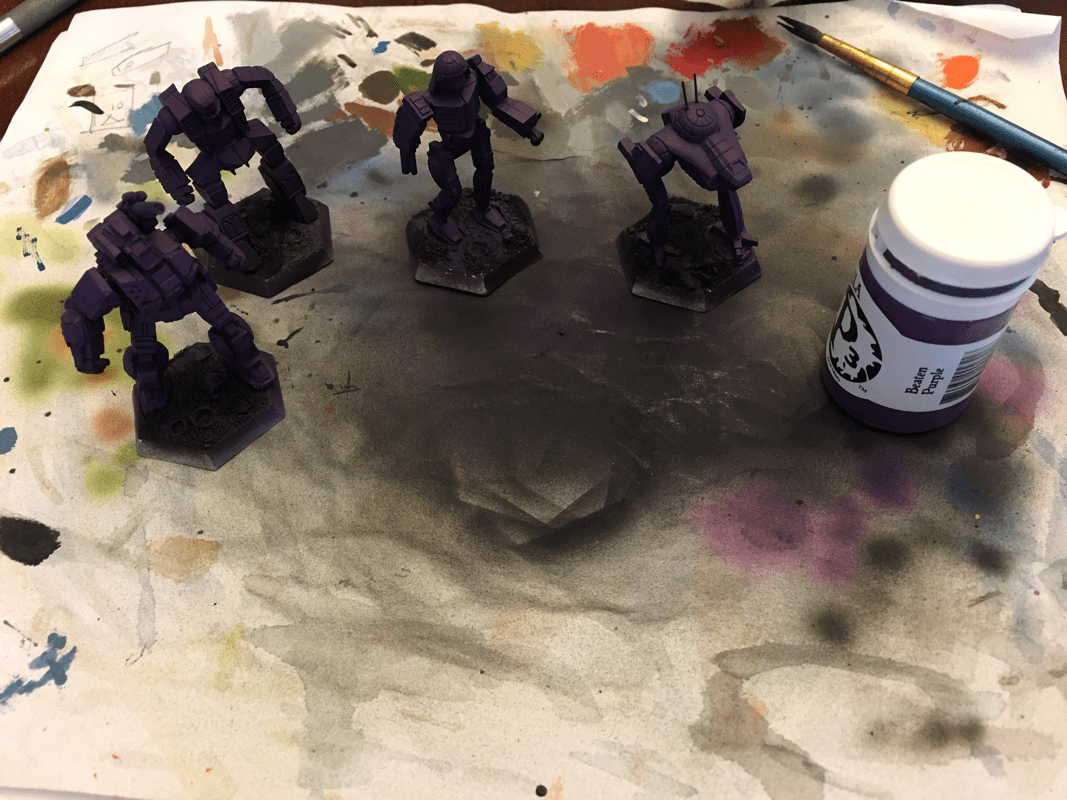
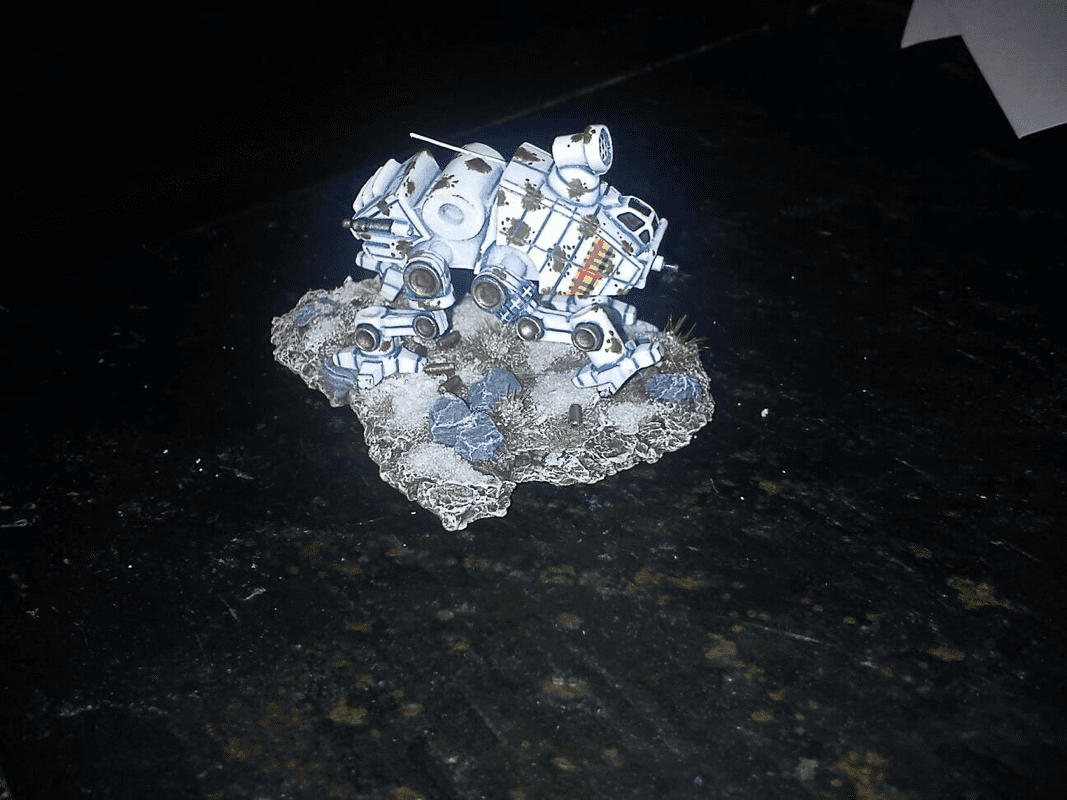
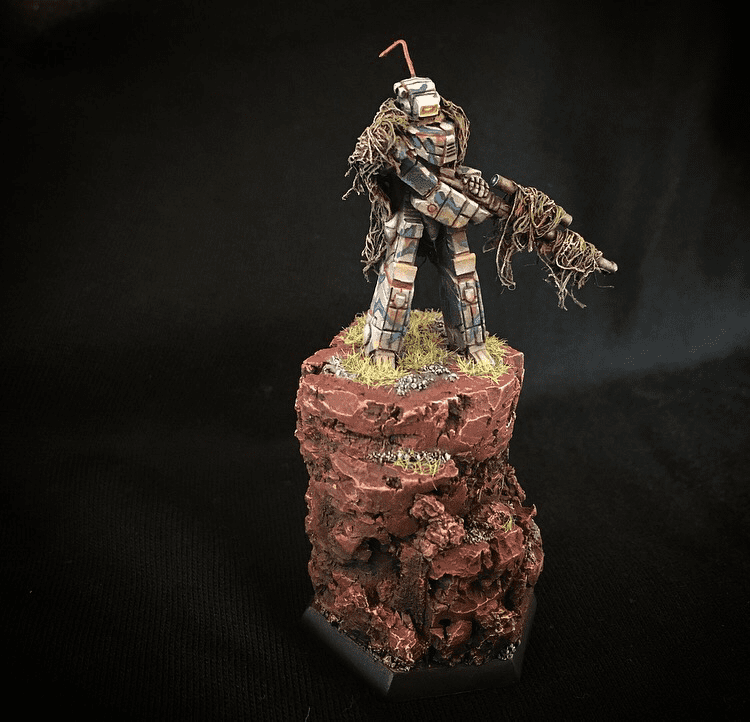
Wait! Why blue? Color theory time! When shading, there are a number of methods to build these dark tones. First, you can add a dark color like black or dark brown. This is best if you want to highlight with white or bleached bone. Second, use the color's compliment-the color opposite it on the color wheel. RED:GREEN BLUE:ORANGE YELLOW:PURPLE Third, and what I did here, you can use the component colors of secondary colors. Primary colors are colors that cannot be created by mixing other colors: RED, BLUE, YELLOW. Secondary colors are colors created by mixing two primary colors: GREEN (BLUE+YELLOW), ORANGE (RED+YELLOW), PURPLE (BLUE+RED). This choice seemed best because my later intent was to highlight with a tone of red, pink, to create a rich contrast and sense of depth. 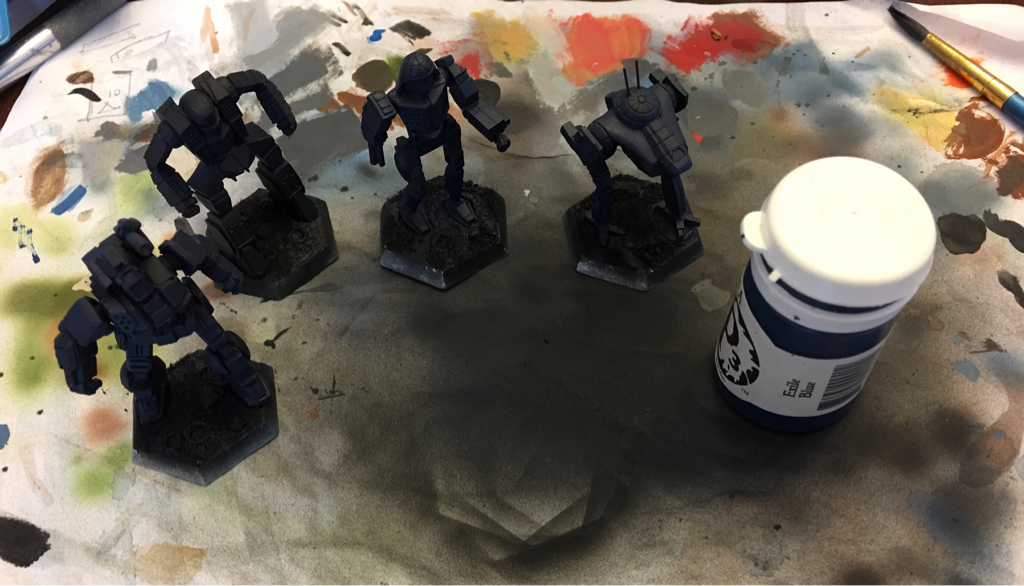 With the blue shad down, it was time to move to base colors. The base color is the most prominent color of the miniature, in this case purple. For the first layer of purple, I used a dark purple, sprayed at a 45* angle over the miniatures. In the shadows, I still wanted the dark blue to be visible. Where it seemed natural for light to highlight, I made a few extra passes to brighten the purple color and mark it later for further contrast.  Rather than mixing colors, I applied a pre-made, lighter red-ish purple. As the highlights increase in contrast, the angle of spray increases; this time to between 15*-30* approximately. It is important to leave a bit of the previous layers still visible, especially in the recesses. With this color, aim to highlight the brighter areas that are closes to the light source. It's okay if this takes a couple of passes to get an appealingly bright color. 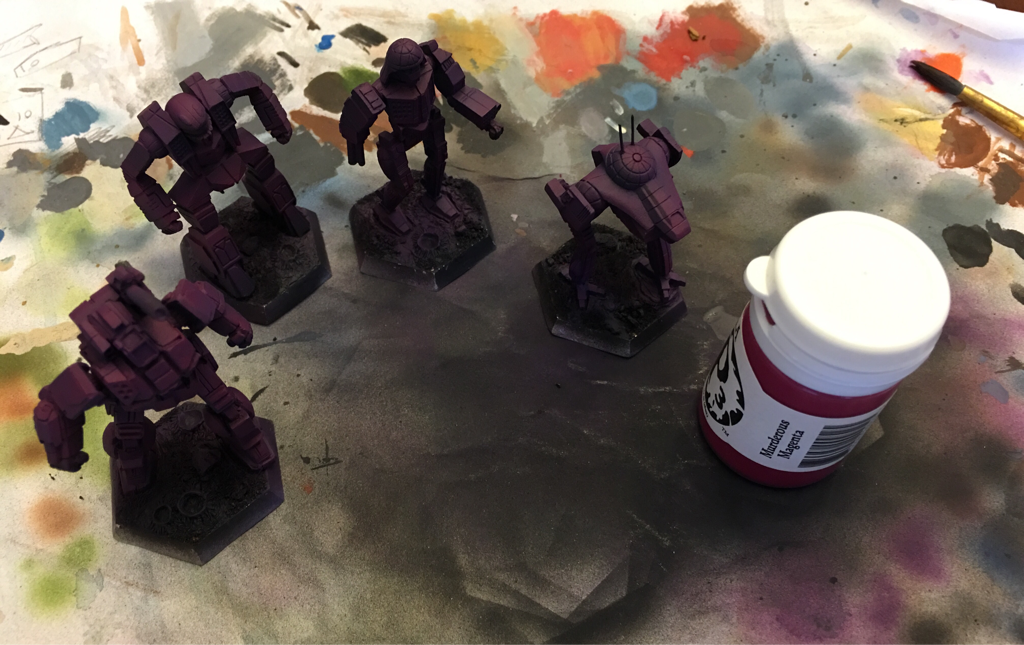 Here we see the highlights building into a pink color. Remember, pink is a tone of red. Red is opposite blue on the color wheel. Red and blue make purple. Blue is the shade on these pieces and pink is the highlight. Mixing white with the purple would have created too strong of a contrast. Instead, a touch of bleached bone and several layers later we have these highlights. This was sprayed at 0*-10* to mark the places with the strongest highlights-that is, those closest to the light source. More importantly, these highlight layers were carefully applied to the points with the most likelihood of being highlighted by the light source. How do I know where to highlight? This comes with practice. As you're out and about during the day, observe how lights highlight objects around you. If necessary, after a few passes with this layer, add a bit more bleached bone to the mix to highlight even further. 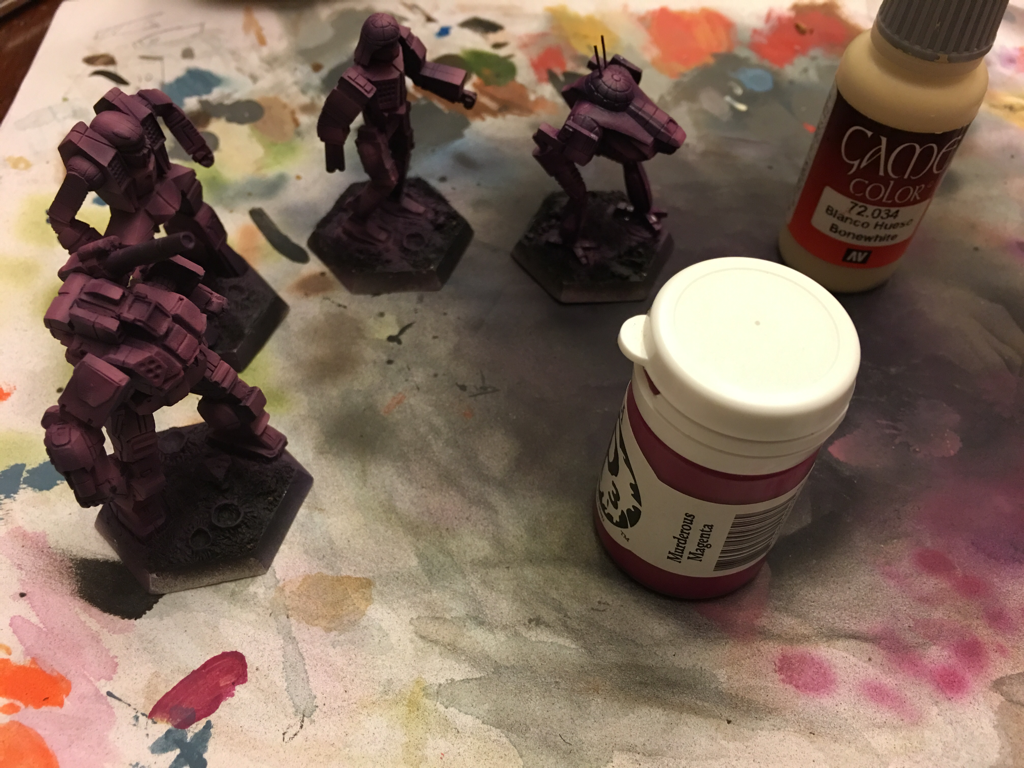 To bring the pieces together, tone down the highlights a bit, and make the transitions more smooth, I added a wash of purpled ink. This wash formula was built from ink, Future floor polish, and water in a 1:10:10 ratio. This is a very light wash, and may need to be applied in several layers. It is always better to do several light layers than one dark layer. When washing a miniature, place your brush loaded with the wash on the highlight and drag it towards the shadow. This will cause the ink to pool in the dark area, giving you a shading effect. It also doesn't hurt that you're dragging the ink to a dark area where unnecessary pooling will be less apparent. 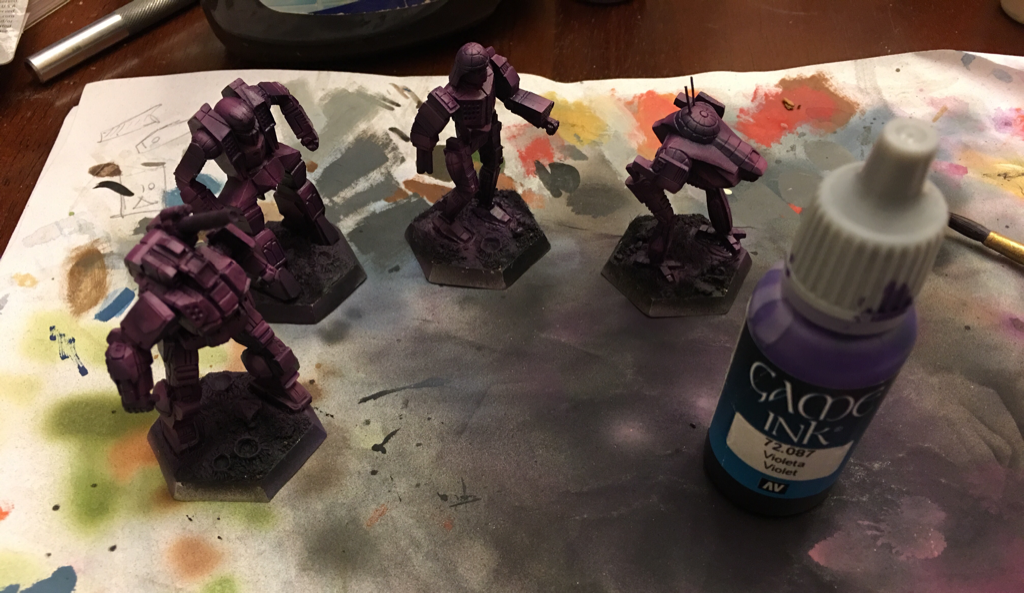 The highlight colors and cockpit jeweling were all done in the same way, but with brushes. Start with a dark shade (red and dark brown, blue and dark brown, and dark green), moving progressively to lighter colors. This layering technique, often described as jeweling, is actually what artists strive for across the entire piece. It creates depth and contrast, that combined give the miniature both artistic appeal and the illusion of mass and volume. 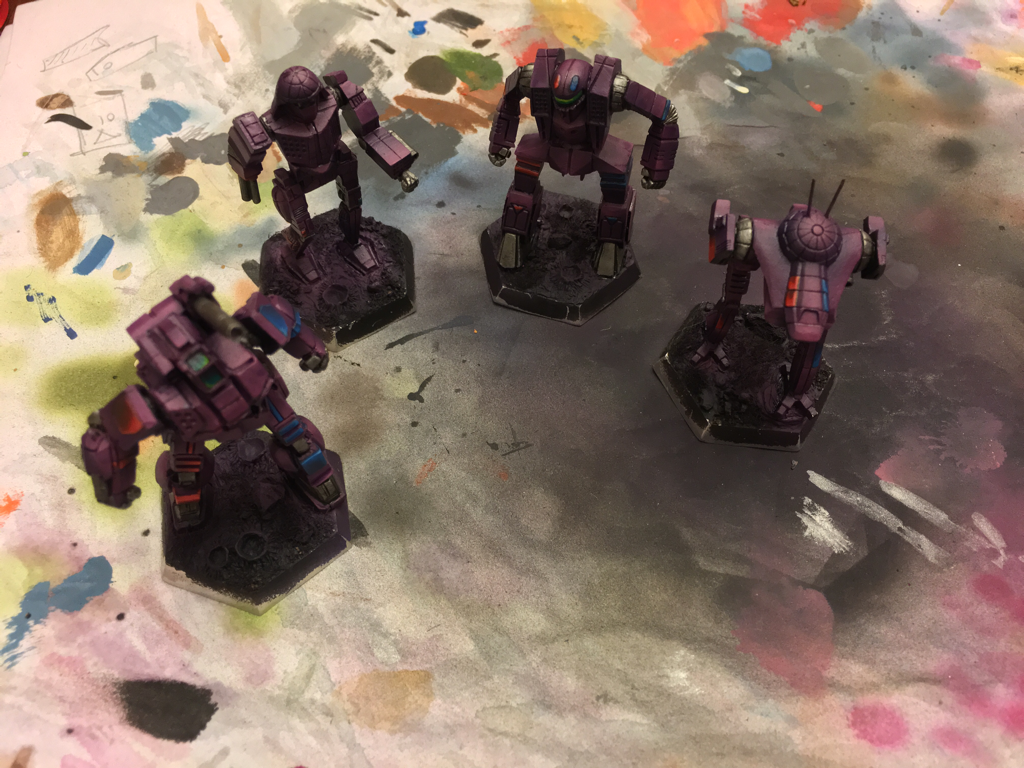 For the bases, I sprayed the entire base black again. I wasn't worried with this oversprayed onto the feet-it was ash. After that, I applied a light drybrush of dark brown followed by very light drybrushing of grey. Where it was too bright for a burned landscape, I applied a black wash. A few minor other details like metallics, sponge paint chipping, and some weathering pastels and the pieces were done. Purple is a great color to paint with. Not only is it easy to use with relatively solid coverage and fluid application, but it's also a great study in color theory. The techniques learned when working with purple apply to nearly every other color.
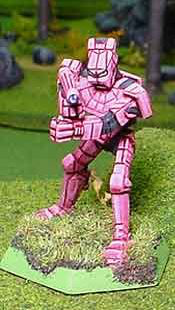
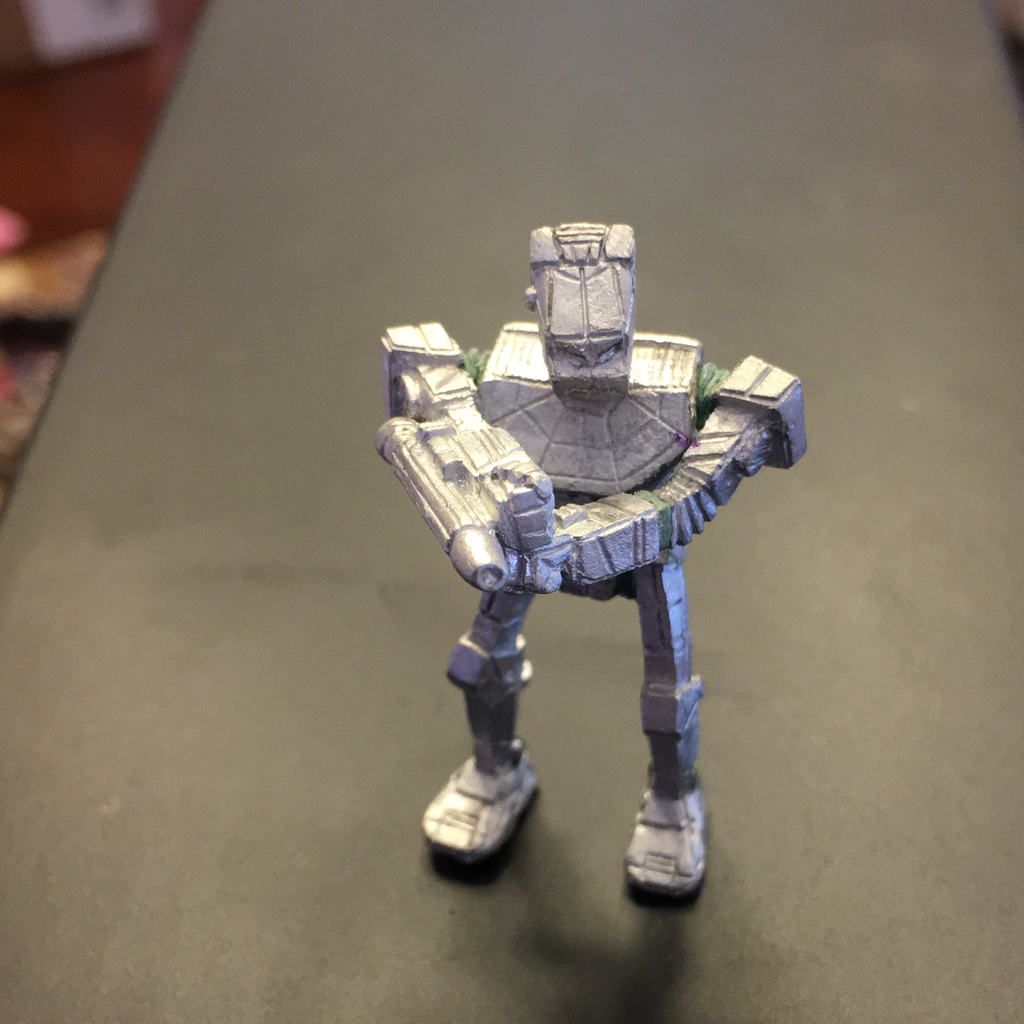
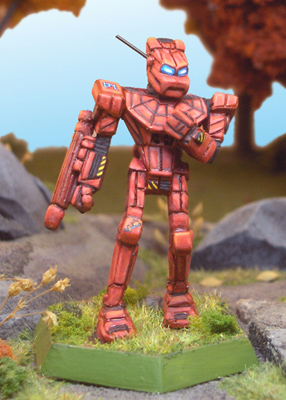
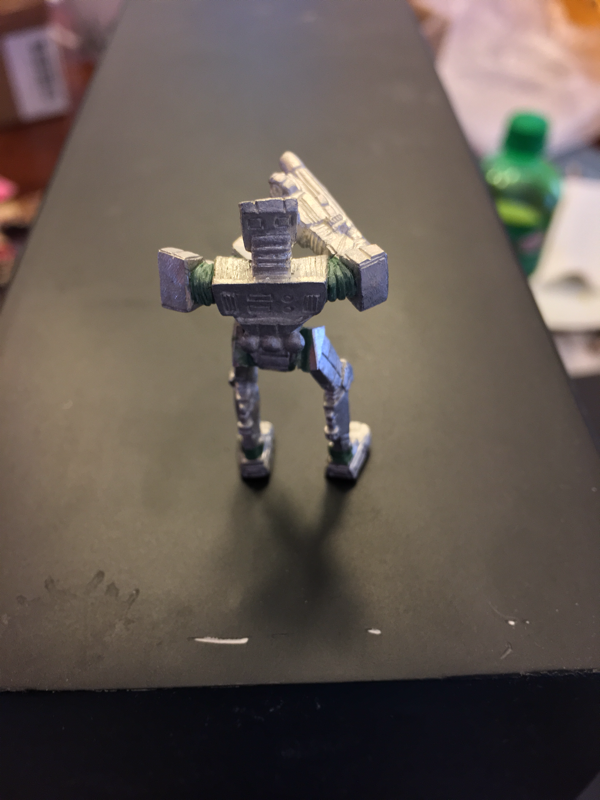
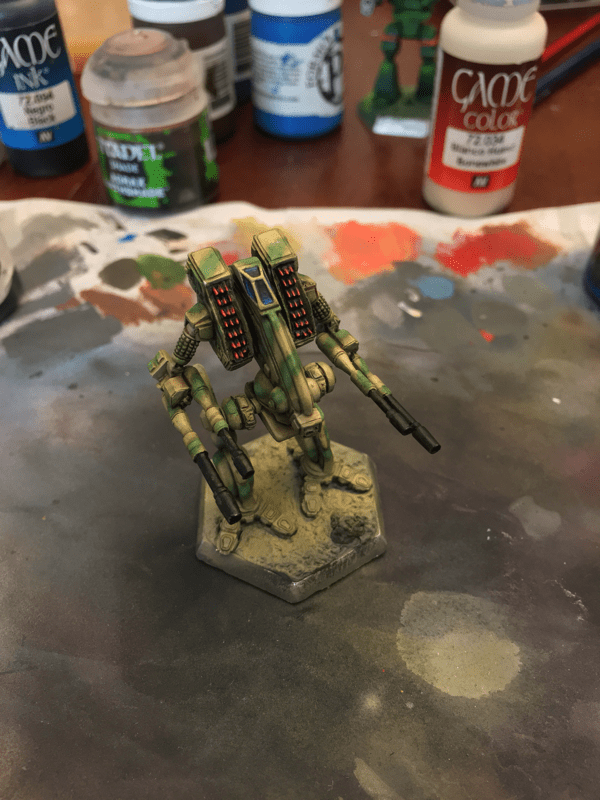
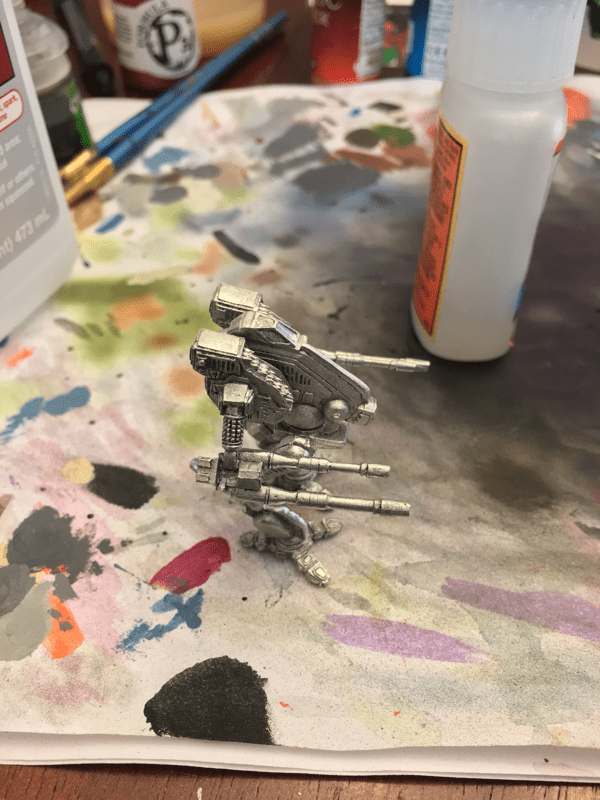
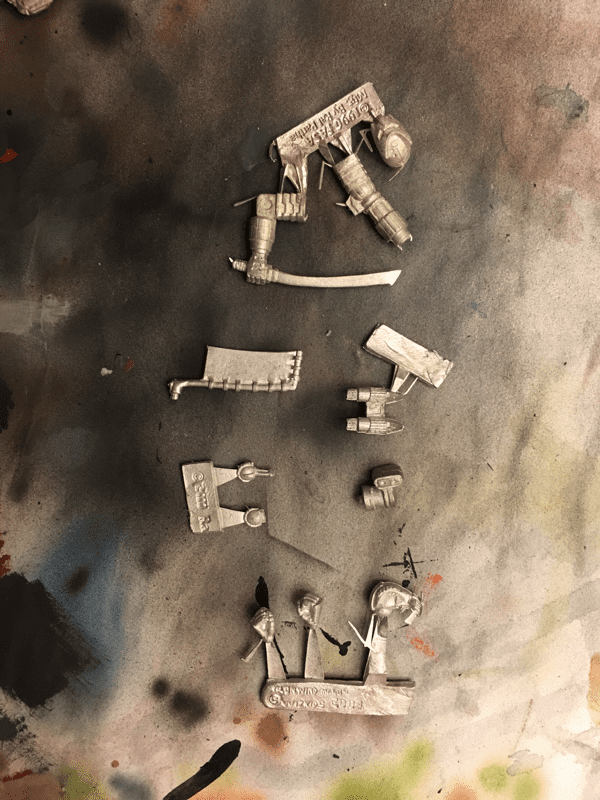
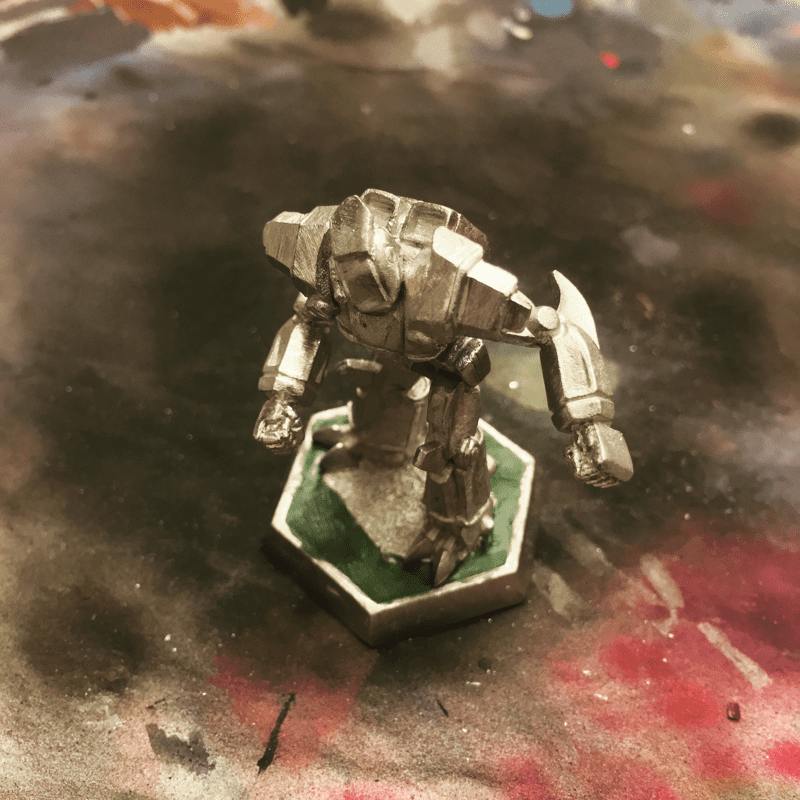
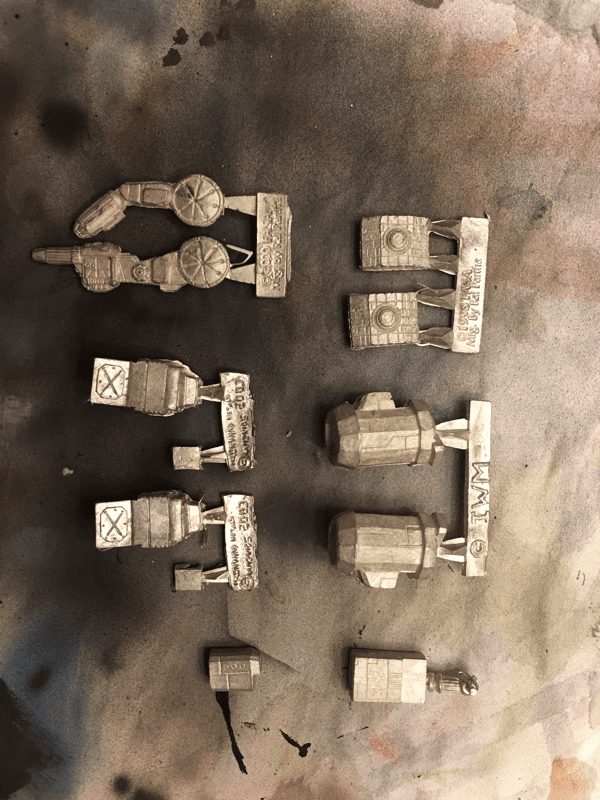
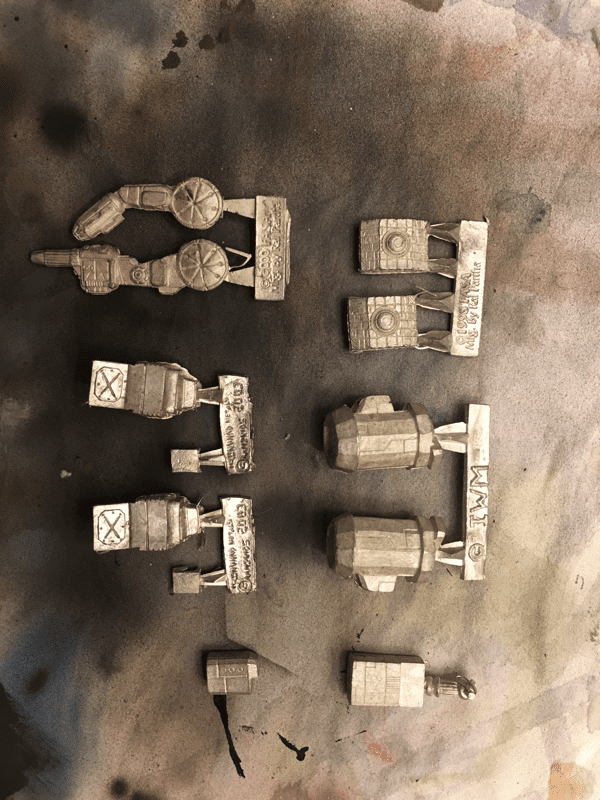
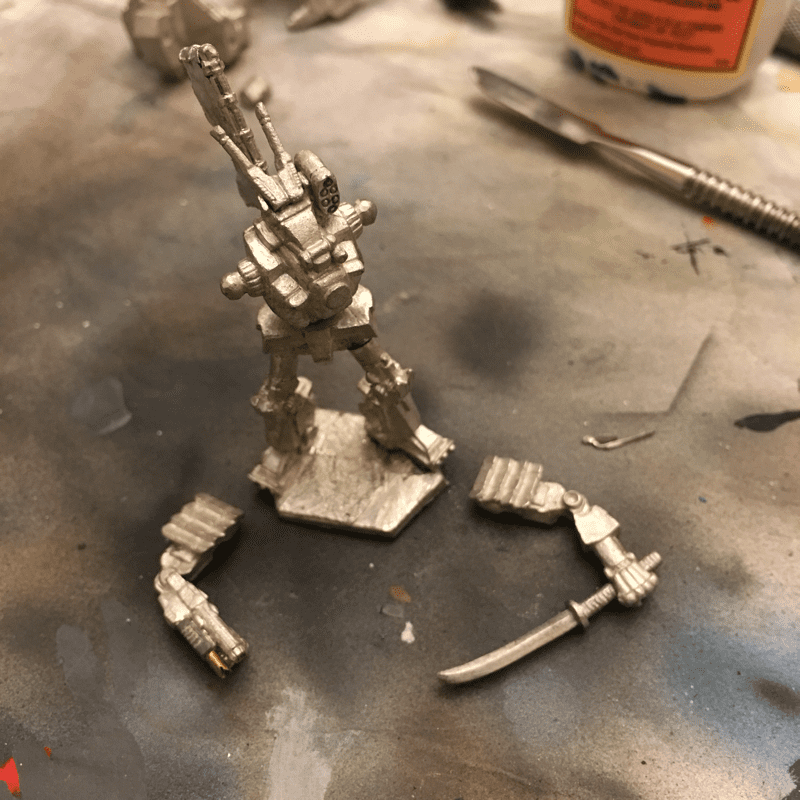
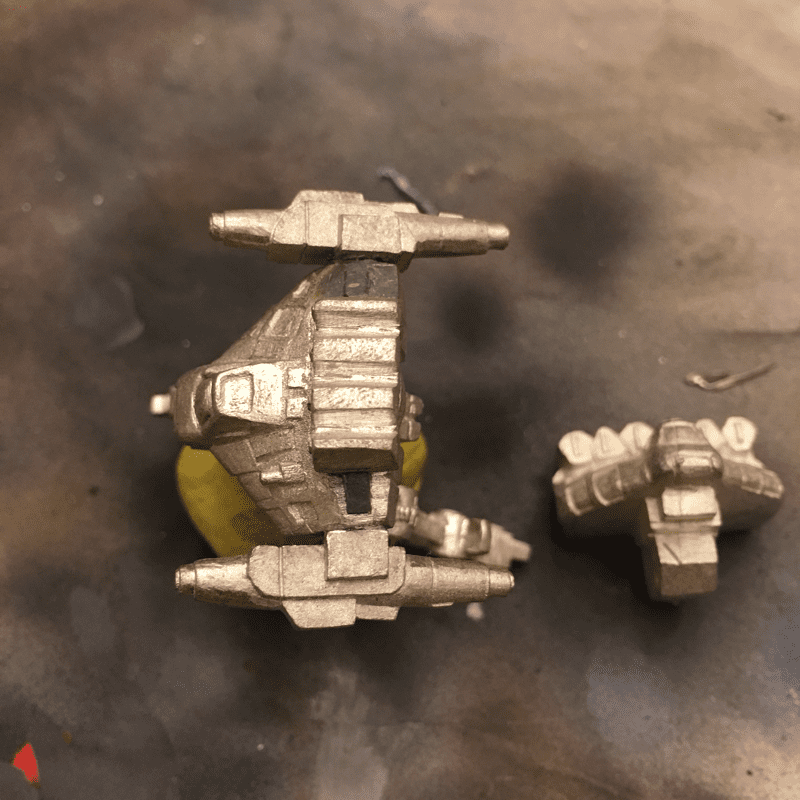
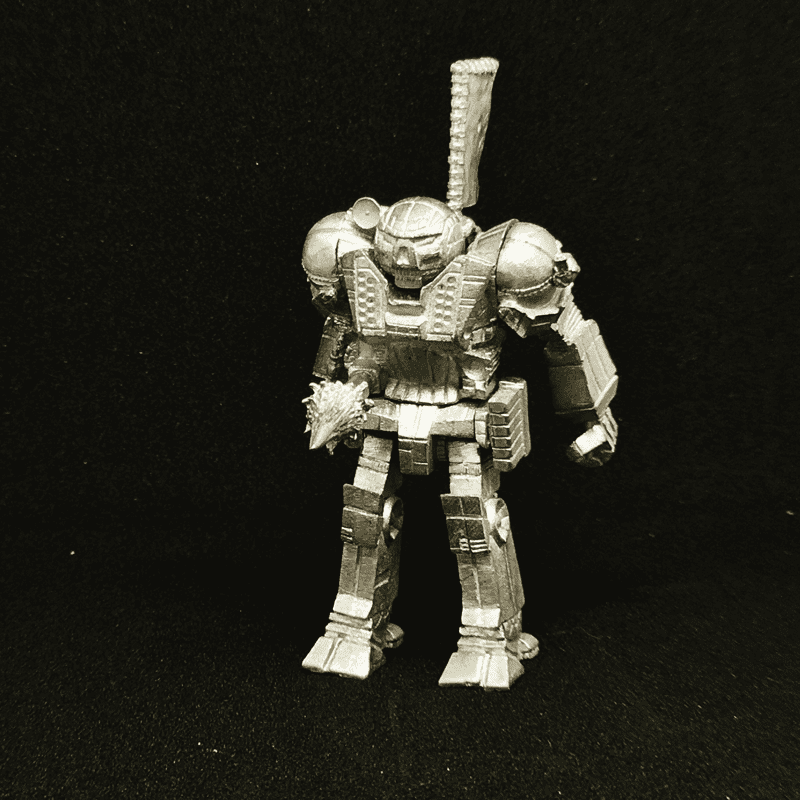
I'm still not a fan of Leaguers. Have your own purple plans? If there a color you'd like to see featured here? Throw it in the comments! Welcome to Mod Monday! One of the best ways to make your force stand apart from the rank and file and attract new players to the table is with creative and unique game pieces. While Battletech and Alpha Strike aren't WYSIWYG (wee-see-wig, "What you see is what you get") like other games, modifications, reposes, and creative construction enhance the gaming experience. In Mod Mondays, we look at cool modifications and tutorials to build dynamic poses! This week, we'll look at a relatively easy repose on a Panther. Though this example is metal, it is just as easy (or easier) with the new plastics!
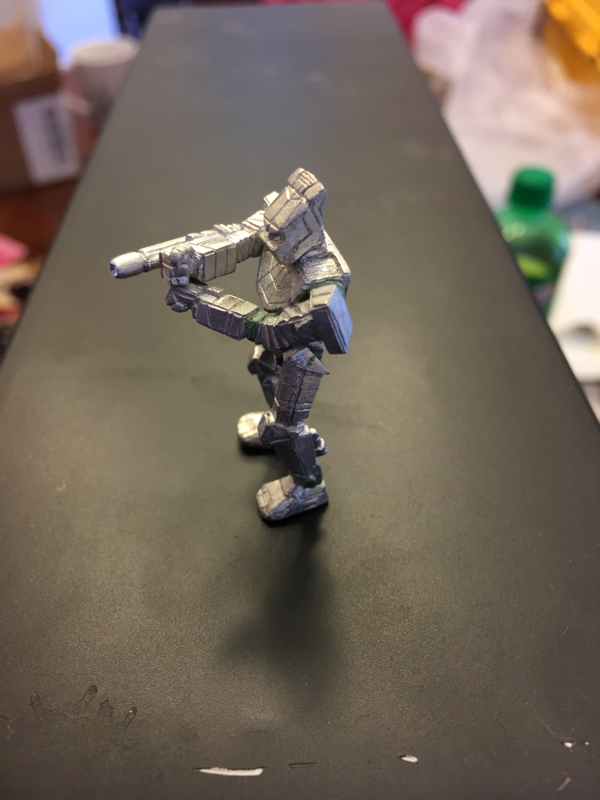
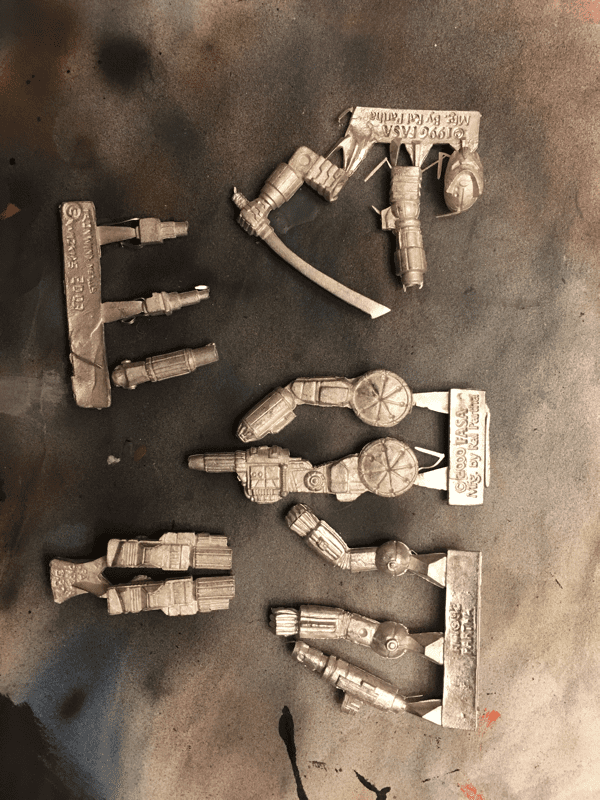
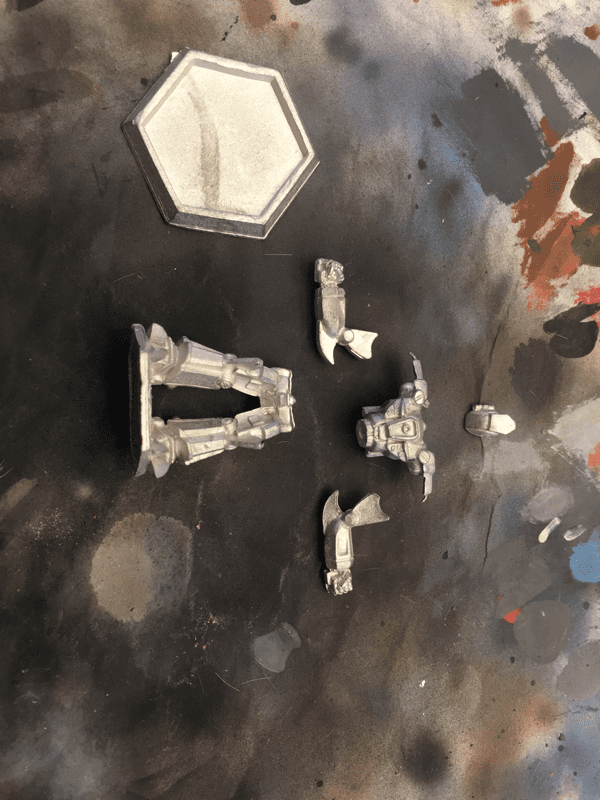
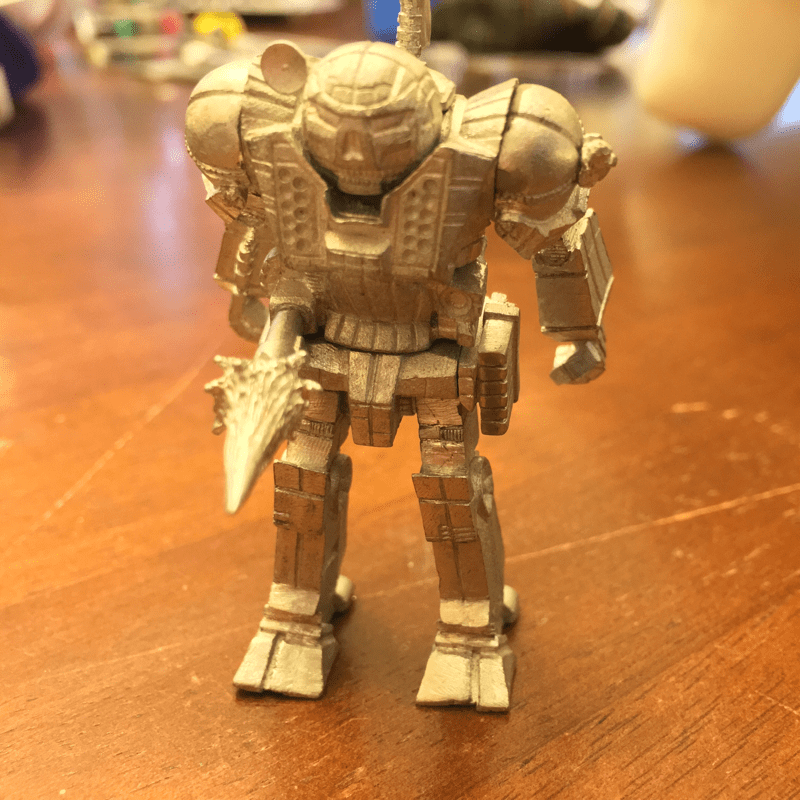
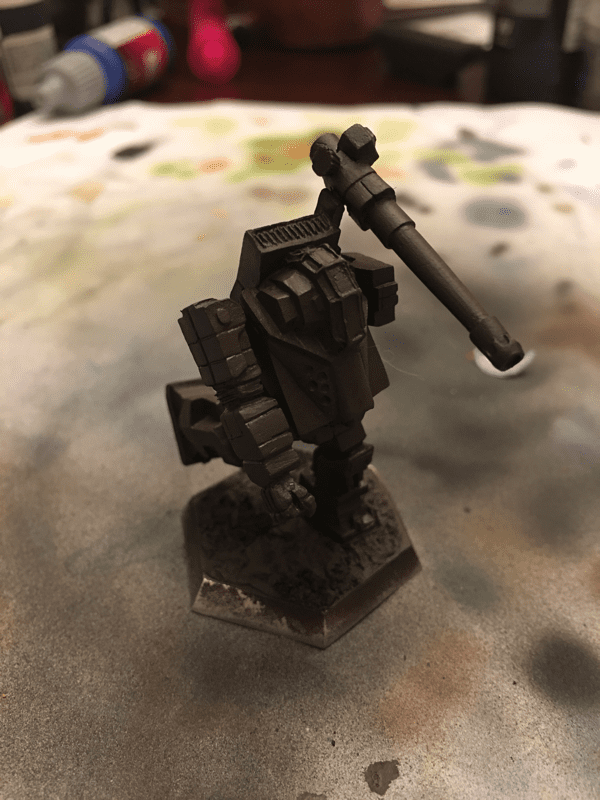
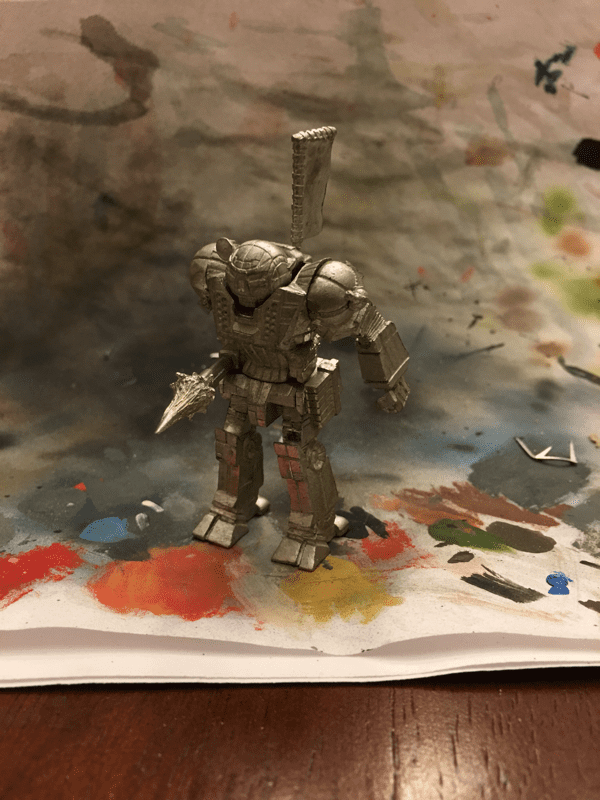
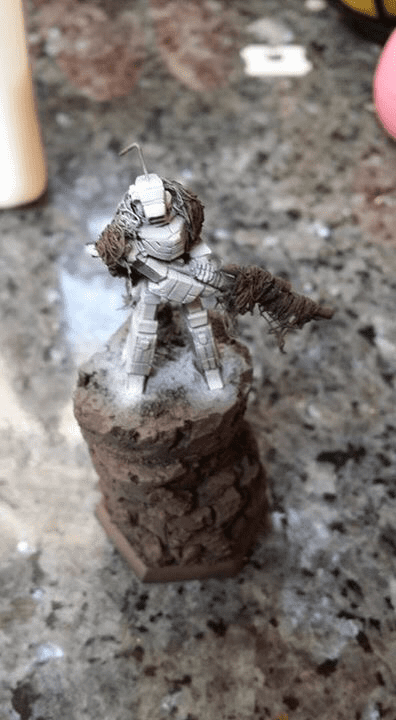
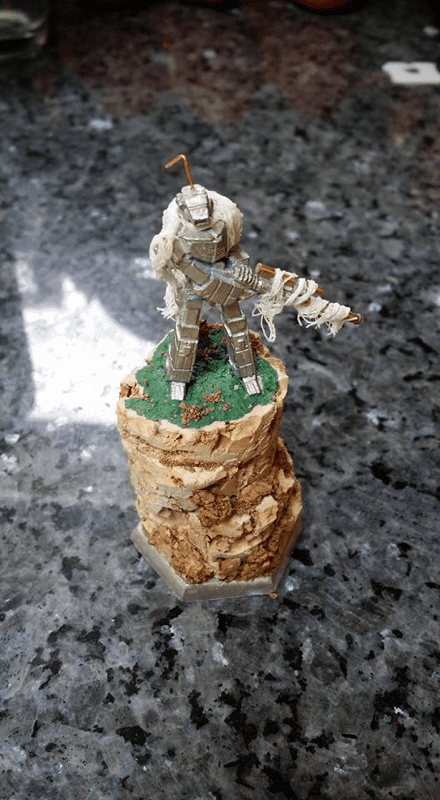
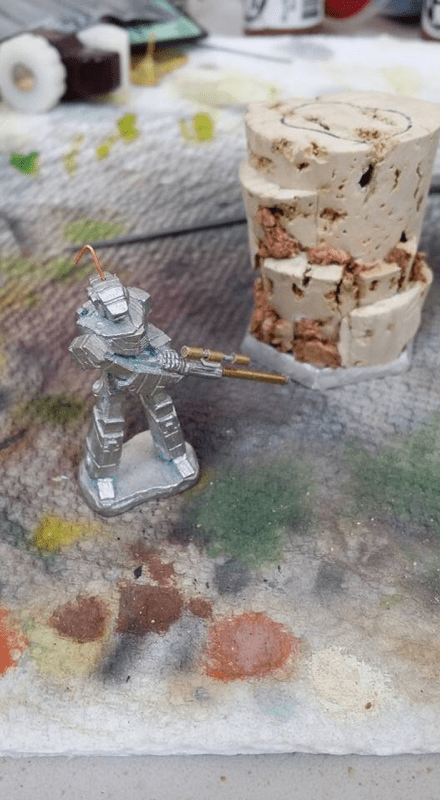
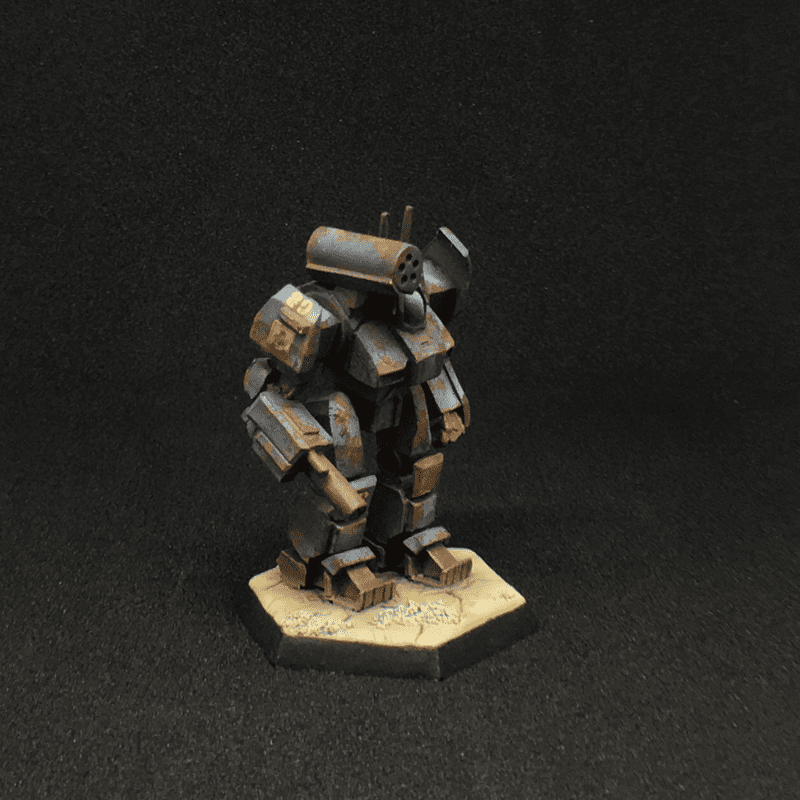
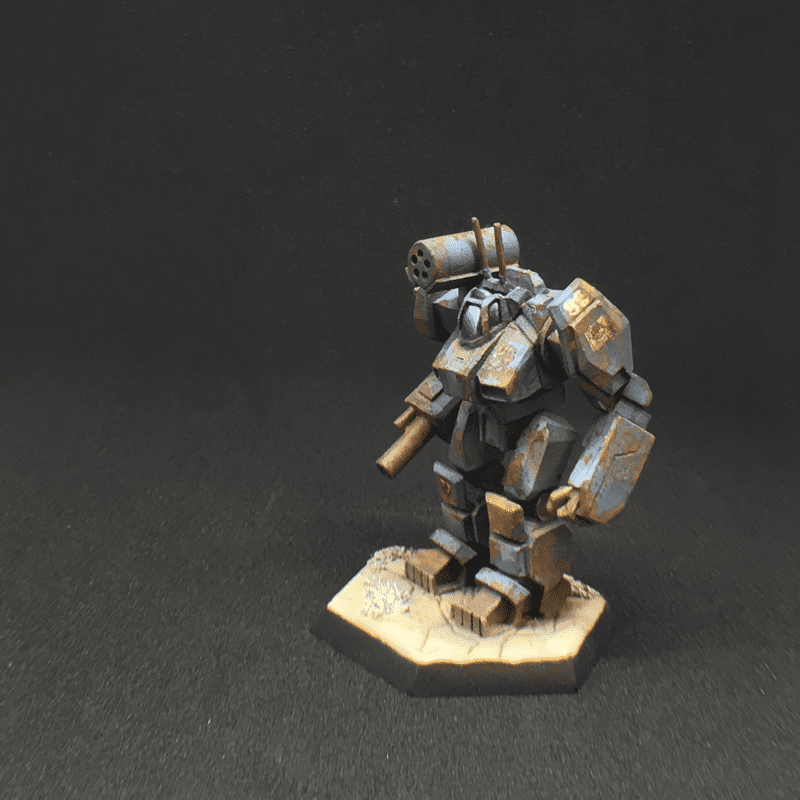
Panthers are all over the place-- and not only if you're a DCMS player. Issued in three metal pieces (walking, jumping, and the beginner set of a jumping piece made to walk) and at least three plastic editions (the old City Tech box, the Not Named box set, and the most recent, glorious box set and Alpha Strike Lance Packs) Panthers abound in collections. With Combat Manual: Kurita, DCMS players have new formations like the Horde Lance and faction exclusive variants like the PNT-CM, this venerable light 'Mech has new life. Fortunately, it is an easy model to modify and repose. As far as minis are concerned, the Panther is one of the easiest to work with. The legs have a natural bend from the start, making most reposes easy to complete. The arms have clean, straight lines between the shoulders and the torso that make removing and reposing a simple cut. Even the head, with sufficient ribbed material in the neck comes off with a few careful cuts of a hobby knife or saw. This build used the jumping model. To start, I sawed the peg from the feet, sawed the feet apart, and then removed the legs at the hips. (Were I going straight to the base, I may not have needed to remove the peg from the jumping base stand. Because I wanted to build a dynamic base with interesting terrain, however, I removed these.) To get an appropriate bend in the ankles for the standing pose, I made little incisions at the front and back of each ankle and carefully bent the foot to the correct position. Where the gap created by the cut closed, I filled it with glue and sanded it down when dry. Where the gap opened, I added a bit of greenstuff to fill it. After the putty set, I cut away the excess material with an X-Acto and sanded it flush. Wanting a natural stance, much like an archer or standing rifleman, I lined up the spine of the 'Mech between the head and pelvis (already in a decent pose) with the knees and ankles. To keep the legs balanced and in the correct placement, I added a hip pin that went through the pelvis and into both legs. A bit of filing was required to make each joint flush. BAM! Legs are done! After the legs, I moved on to the arms. Two easy and straight cuts with a razor saw removed the arms at the shoulders. Keeping the pose, I sighted an approximate line of sight down the arm from the position of the head. The right arm required a bit of straightening-but not too straight-by carefully bending it. The left arm required a bit more work. After separating the upper and lower arms at the elbow, I sculpted a bracket around the pin in the newly reposed arm. This bracket also made up for some lost material and lengthened the arm to the spot I wanted supporting the hand. I avoided rotating the arm 45* to put the PPC on top because that's extra work. Once fitted, each arm received a pin at the shoulder to the torso. To get around the chest piece, the shoulders had to extend and flare out to the side. Using greenstuff, I sculpted accordion style joints like the neck to both match the aesthetic and justify the expansion of the arms outward. This isn't the best match of how the 'Mech would function in the real world, I imagine. In retrospect, I should have shaved a bit of the chest piece down, cut the arms out from under the shoulder pauldrons, and positioned forward from there. BAM! Arms are done! All together, this build required about a 24 hour turnaround--and most of that time was for greenstuff to cure. Modding with a plastic Panther, that time can be cut down ever further. (Yes, that was a Mod Monday pun.)
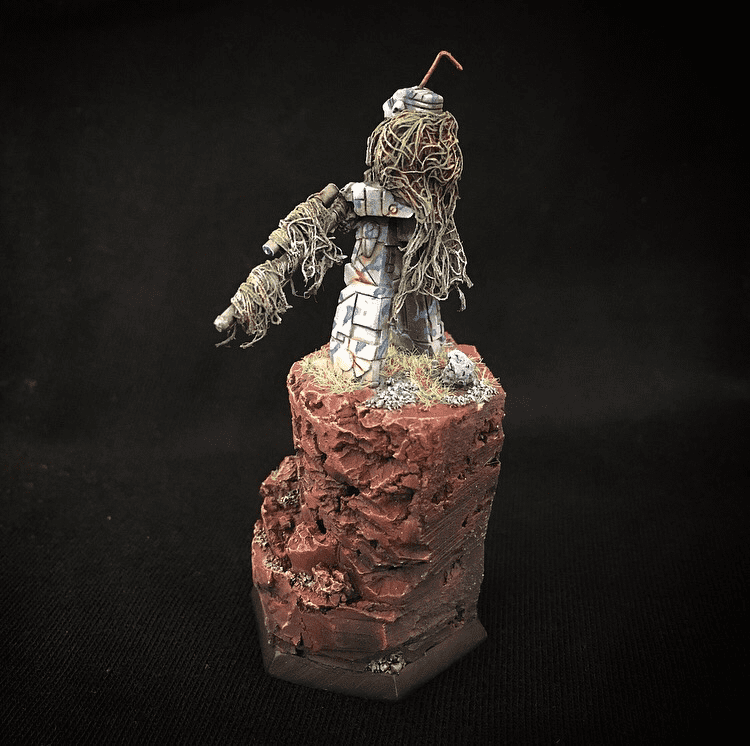
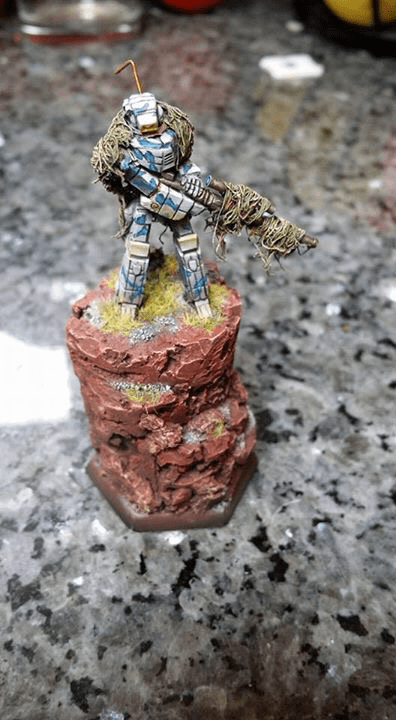
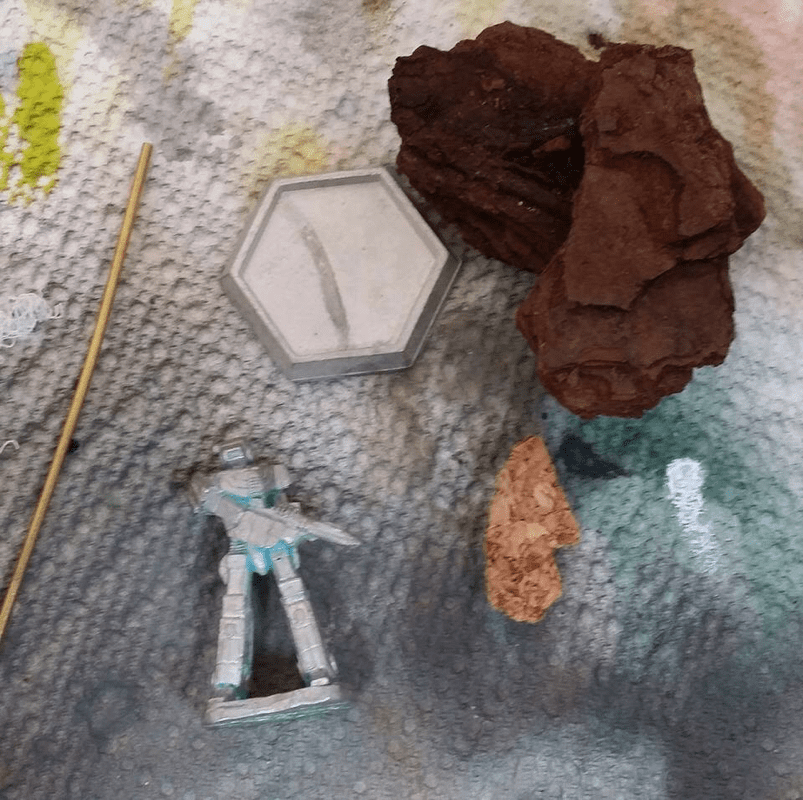
Have your own Panther mod or build you'd like to share? Be sure to add it in the comments below! In The Process series, readers see the creative process of a new piece from start to finish. This edition looks at the beginning of creating new, dynamic works with sticky notes and planning.  This is where it all begins--a blank canvas. We've all been there: you've cut off the legs, drilled holes for the pins, and set the glue only to realize that the mod you made doesn't pose right. The feet don't fit on the base. The variant parts are in the wrong locations. The repose doesn't feel natural. To the dip it goes, along with hours of work. It's like Dad always said, "Measure twice, cut once." But how do you do that with miniatures? Use the trusty old yellow sticky note. Sticky notes are amazing tools and they remain a constant part of laying out larger scale projects and modifications. The small size forces artists to focus on the main points of the work like structure, components, and general feel of the piece and prevents hyperfocuing on details that may derail the project. What's more, if an arm, leg, or other part ends up out of wack, it's a minor loss to tear off a sheet and start fresh. It isn't important to capture all of the finished details that only the creator of the work can love. SKETCH A QUICK, ROUGH OUTLINE OF THE MAJOR SHAPES AND PLACEMENT ON THE PIECE. The general part to include are feet, joints, hips, torso, arms, and cockpit. If you're an especially fancy artist, include construction and motion lines to plan out other details necessary for construction. 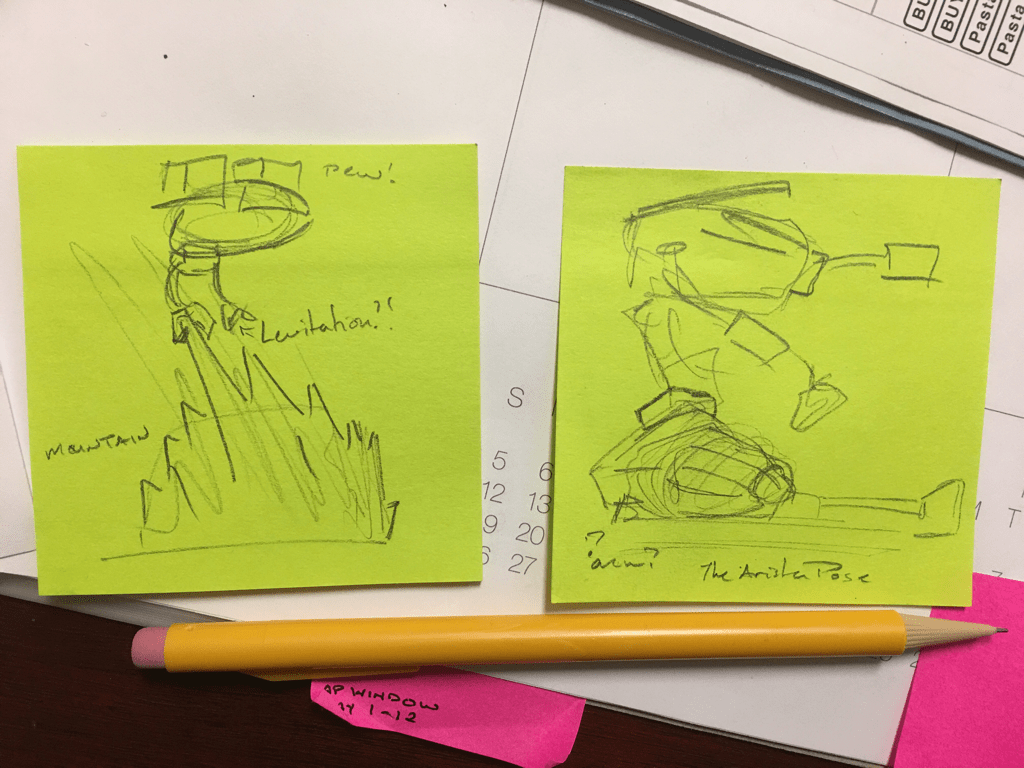 Here are two examples of rough sketches with notes. Looking carefully, you can see the light pencil lines that formed the basic shapes with darker lines overtop to represent the fleshed out details. It is more important to rough out an idea with general shapes, poses, and notes than it is to create an entire masterwork. While designing, remember that the sketch isn't a finished-piece goal--you aren't trying to get to this end and check of this box to move to the next step. Rather, it is an active study of the idea and how to create it. Does your piece need to have a sense of motion? Use arrows to show this on the sticky note. Have questions about what you drew or how to achieve it? Mark it with a question mark. Maybe you need to add notes so you don't forget the source of the inspiration? Jot down a few words to remind you later.
When putting together a piece, no matter how simple or complex, planning is everything. Visualize the piece in your imagination and transfer that to the note. Where something doesn't make sense or match your image, make a note. In most cases the finished piece will be different than this sketch and that's okay. This is just one step in planning out--and saving time to reach--that finished work of art. Welcome to Mod Monday! One of the best ways to make your force stand apart from the rank and file and attract new players to the table is with creative and unique game pieces. While Battletech and Alpha Strike aren't WYSIWYG (wee-see-wig, "What you see is what you get") like other games, modifications, reposes, and creative construction enhance the gaming experience. In Mod Mondays, we look at cool modifications and tutorials to build dynamic and different models. By popular demand, I'll share with you my tool kit for mod work. Like Dad always says, "Use the right tool for the right job!" 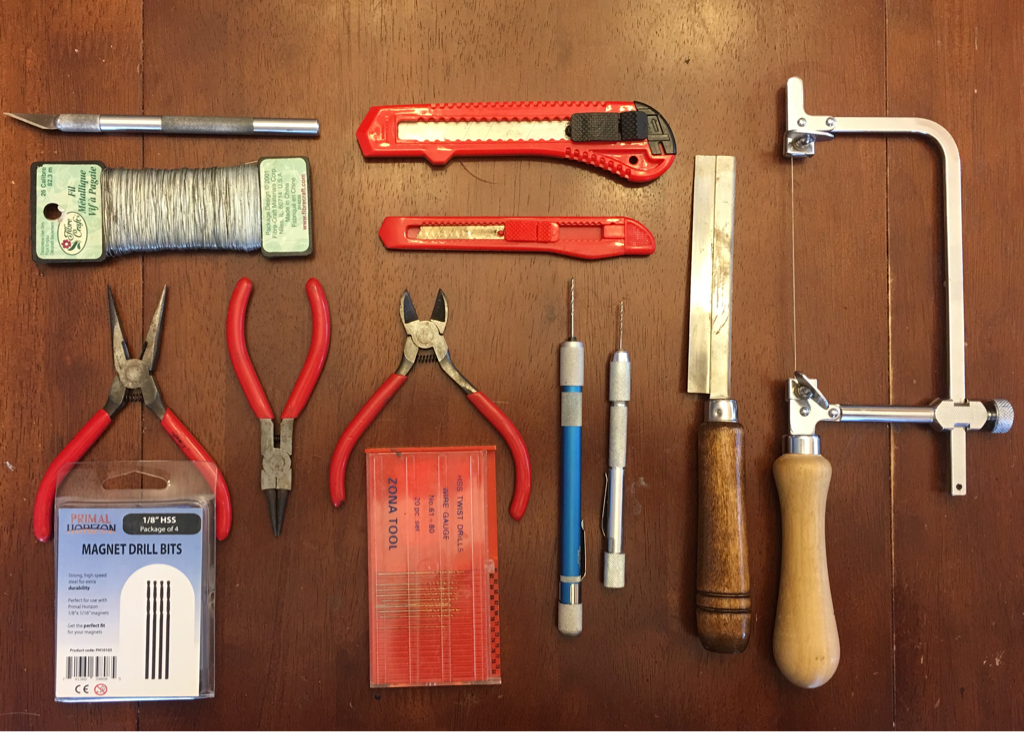 Many of the tools in this kit serve to either sever parts of models or pin them back together! The Kit--sans dremmel. It includes: X-Acto with spare blades and saw blades; floral wire: needle nose pliers and snips; various sizes drill bits; retractable box cutters; hand drills; hand pull saw/razor saw; jeweler's saw. 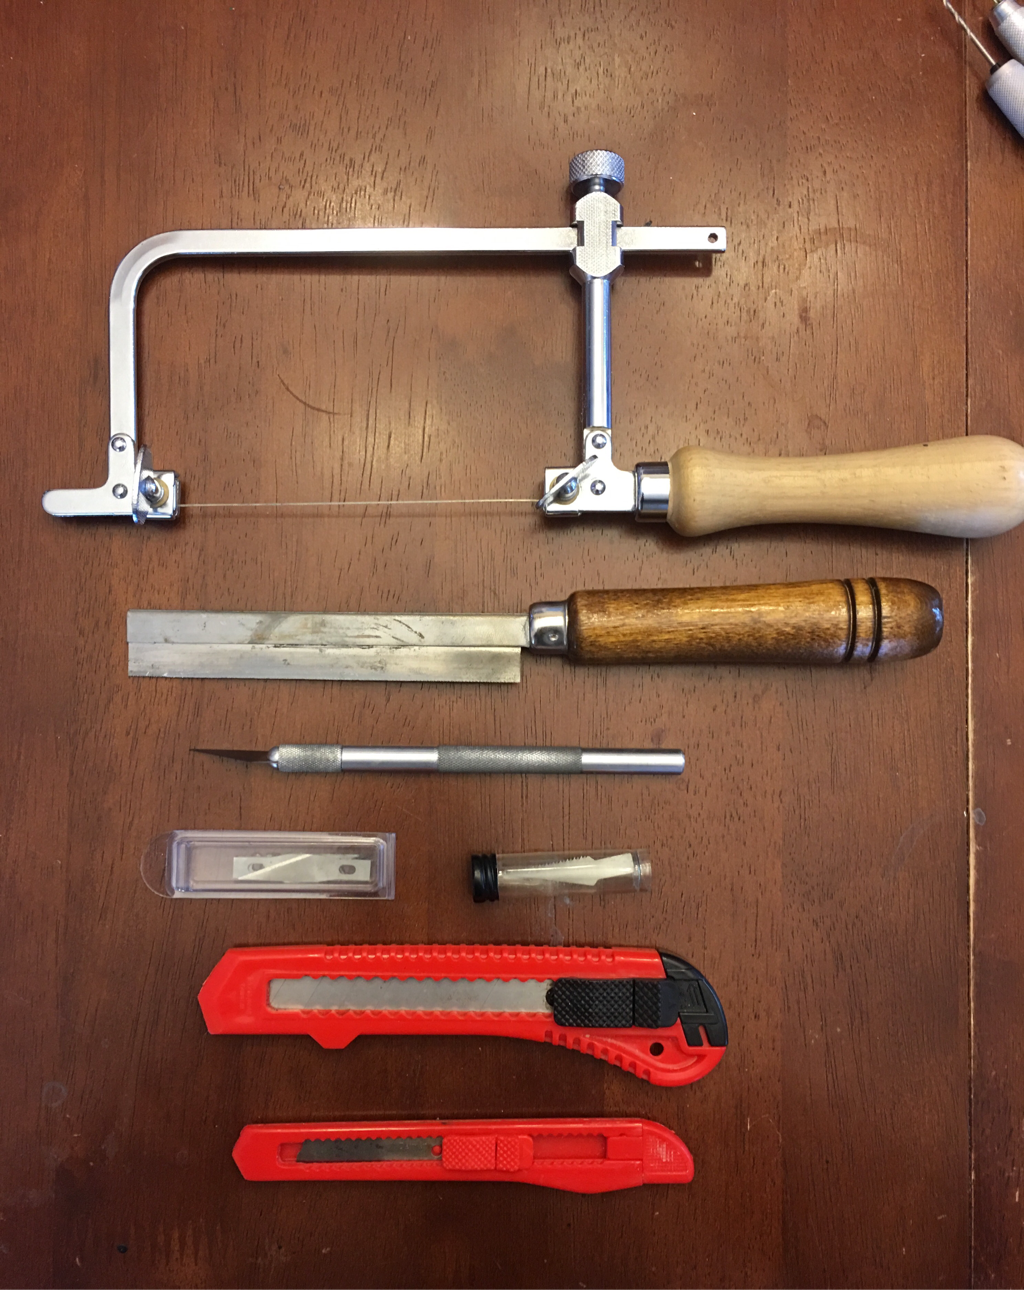 CUTTING TOOLS Must Haves:
Each of these tools serves a singular purpose but in a different way--they cut things. For general miniature work from cleaning mold lines to making simple cust and reposes, a good X-Acto with spare blades will meet nearly every need. The find tip of an X-Acto is great for cleaning and preserving small details like around rivets, vents, and joints where a filed would otherwise erase the details. When dealing with thicker sections of, or more dense miniature materials, consider upgrading to heavier X-Acto handles and blades. Alternatively, considering investing in some X-Acto saw blades (in the tube with the black cap). These work much like any other hobby saw. To make sure your cut stays where you wish, use a standard X-Acto blade to create a guide line. With the cut started, switch to the saw to finish your mod. Regractable blades are great for working with terrain modifications. Because materials such as foam and cork can dull blades quickly, snap-off blades allow you to work quickly and relatively cheaply. In some instances, you can use these to clean out panel lines that have mold lines or deformatives in them; the larger blade thickness helps to clean and preserve details. When diving into more complicated modifications or needing to cut through a moderate or greater amount of material, use a razor saw or a jeweler's saw. The razor saw, one of my favorite tools, have varying sizes and thicknesses of blades. What makes these especially cool, these tools work best on the pull stroke of the cut--hence the alternative name "pull saw". When needing to make careful cuts in small places, use the jeweler's saw. This is also a great tool for maneuvering your way into complicated curved cuts. Make sure to have spare blades on hand--these break...a lot. BE MINDFUL! THE WIDER THE BLADE, THE MORE MATERIAL YOU WILL LOSE DURING THE CUT! Always use the safest and thinnest blades possible to preserve details.  This is definitely not an Error 404 situation! FILES Must Haves:
ALL THE FILES! For general miniature assembly and modifications, keep on hand different sizes, shapes, and thicknesses of files. Files generally clean miniatures more quickly than X-Actos, though some of that time disappears when switching between file shapes to fit different surfaces. These are especially best to use on more complicated mold-lines that don't require careful preservation of details or to smooth out a connecting surface--especially to remove saw marks. 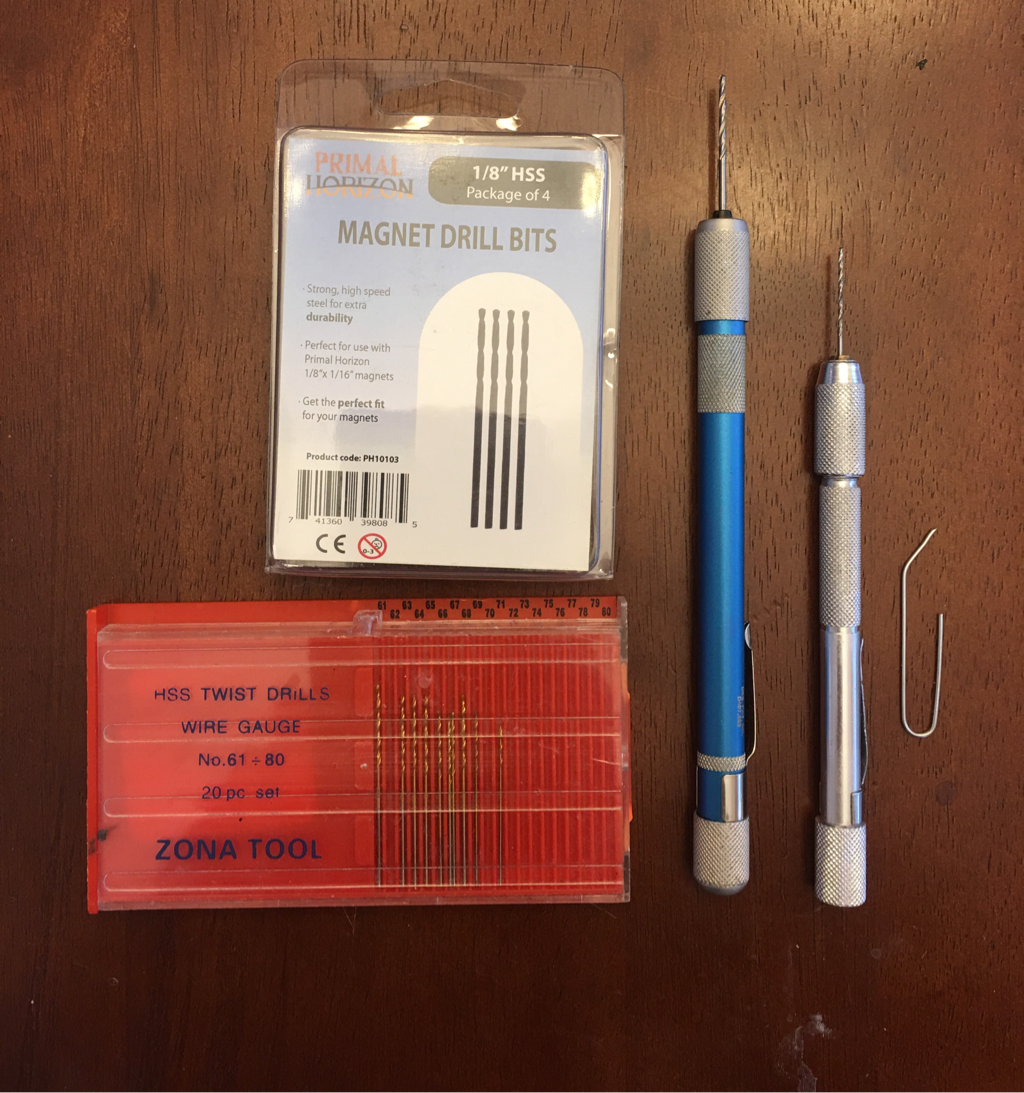 Yes, that's a paper clip. Yes, it is essential. DRILLS, BITS, AND PAPERCLIPS Must Haves:
Zona Tools Drill Bits These are essential parts for any kit--from basic assembly to complex modifications. With a pen drill and the included bits from a hobby store, a set of sturdy paperclips, and snips (not pictured), the possibility of more sturdy models with greater dynamic poses suddenly become a possibility. By drilling a small hole in either side of a joint and adding a "pin" cut from a length of paper clip, then gluing the assembly together, joints and assemblies are now considerably stronger and more resialient to transportation, use, and more durable for more dynamic poses! Congratulations--you can now pin your miniatures. In addition to this, with smaller and smaller bits, addint details like antenna becomes easier. My drilling out the appropriate sized hole, adding a bit of floral wire, electrical wire, or toothbrush bristle, and a small dab of glue, your minis can now sport intense communications arrays! If it seems a bit overwhelming, remember that it has taken over a decade to build it to this level. You can begin to make awesome mods with a few, simple, and easy to find tools. Remember, for a basic kit, start with:
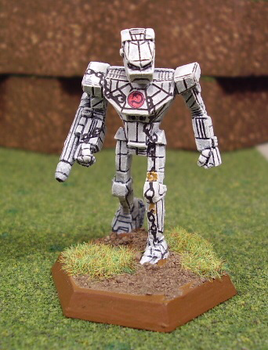
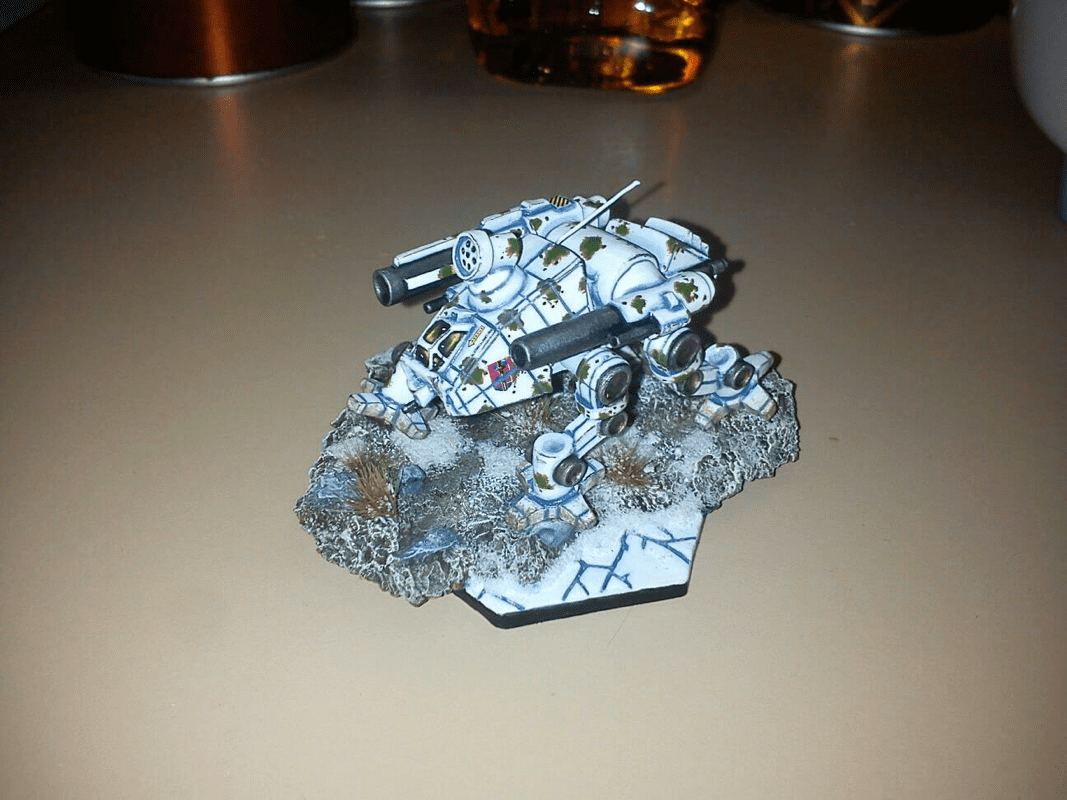
With this kit you can clean and assemble miniatures and even make some amazing mods and reposes of your own! HAVE YOUR OWN MOD TOOL KIT? ANY ADDITIONS, SUBSTITUTIONS, OR DELETIONS? SHARE THEM IN THE COMMENTS BELOW! Ask any of the contemporary greats of Battletech painting, from inside and out of Camospecs Online, "Who inspired you?" One name rings out in all of their answers: Joe Frazier. His work both laid the ground work for technical proficiency--the standard practices of painting--as well as set the bar for what's expected of Battletech painters for years to come. 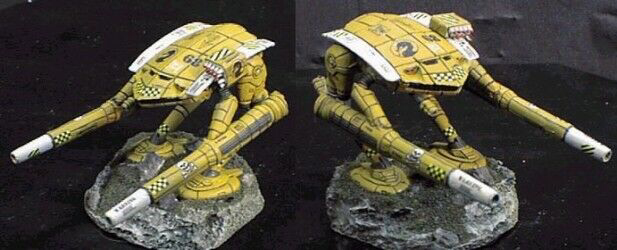 Works like this King Crab highlight Frazier's customization and painting skills to make unique centerpieces. Bold, clean lines that define panels are and create rich contrast are the defining hallmark of Frazier's style. Using a fine touch and black ink, Frazier carefully traced the panel lines of his pieces. From his inspiration, many later artists adopted the use of micron pens and brush ink to line panels in miniatures. This is most apparent in the early works produced by key Camo Specs Online artists, such as Savage Coyote's white paint and black micron pen Ghost Regiments. These pieces bear an uncanny resemblance to Frazier's work, showing a definite force of inspiration. Though over time styles have changed to more rich and blending colors, the art of panel lining remains a key skill that every 'Mech artist must master. 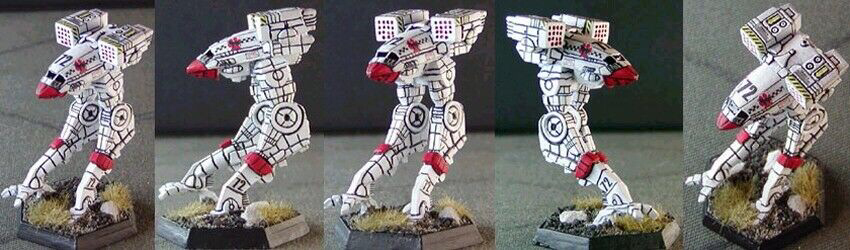 This Catapult by Frazier stands as an exemplar of his high contrast, deep black lining.
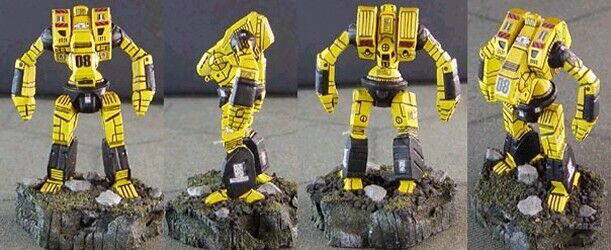   In an ironic Old is the New New sort of way, Frazier appears to be one of the earliest airbrush painters amongst the Battletech artists. Viewers should notice that, despite his use of different tools, his basic style of contrasting colors and bold lines remains consistent.
 This Locust highlights many of Frazier's hallmark techniques, from airbrushing contrasting colors, to the panel lines, to little custom details that make each piece unique. Even his bases show incredible attention to detail, making each miniature a standalone diorama.  Sadly, Joe Frazier passed away over a decade ago--as his hobby stood on the cusp of a resurgence. Inspired artists, hobbyists, and the global battletech community came together to mourn his passing with heartfelt tributes and "21 PPC Salutes" of their own works inspired by Frazier's. As miniatures change, models undergoe seen, unseen, reseen, re-unseen, and new-seen statuses, and the Battletech community grows, Joe Frazier continues to stand as one of the great defining pillars of Battletech art and miniature painting. There may never be an artist with neither quite the legacy nor long lasting inspiration as Frazier. His work inspired many of the contemporary greats and eith each new artist they inspire, a little bit of Frazier's influence continues on into the next generation. Below are a scant few of his exceptional works. Please enjoy and find your own inspiration in these! 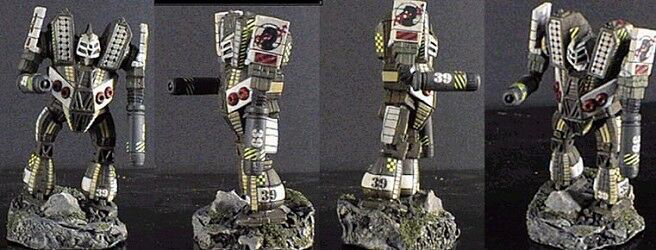    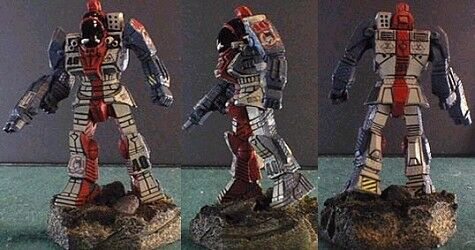   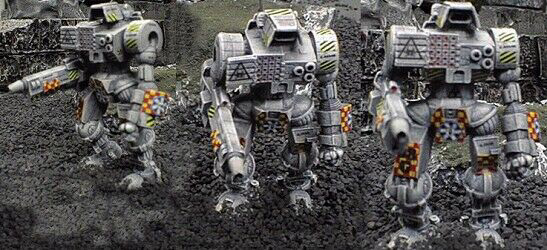  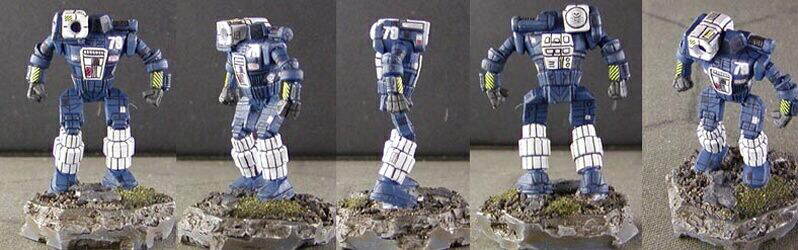 In Battletech Community, we examine and share the sites, pages, and groups of the mainstay of Battletech and Alpha Strike--the players and hobbyists. 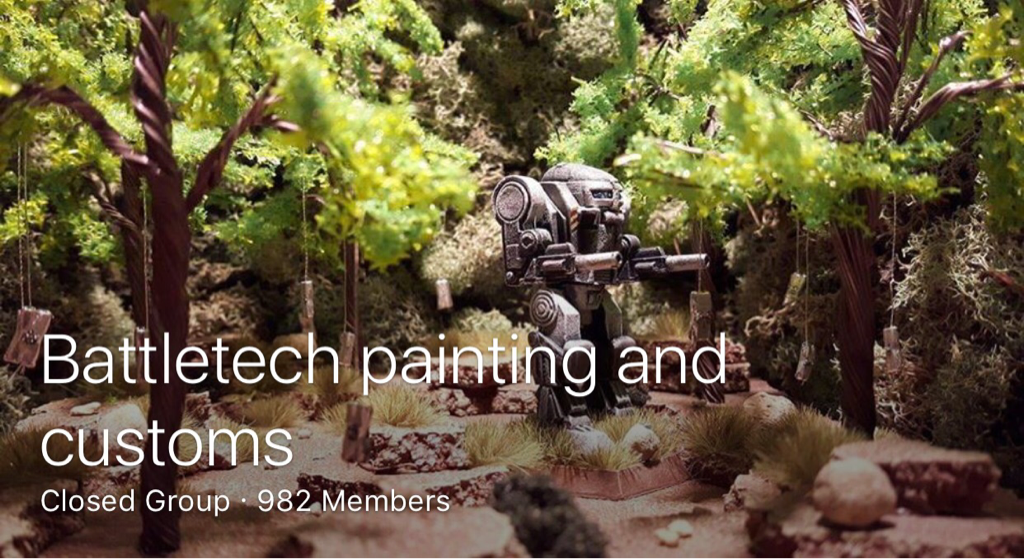 The cover photo of Battletech Painting and Customs. Admins change this weekly, highlighting the spectacular art of competition winners or outstanding, community posts. Facebook is one of the best tools to reach out to the global Battletech and Alpha Strike communities. With hundreds and hudreds of pages thrown back from a "Battletech" group search, its easy to lose a afternoon finding groups to join. For players, painters, and hobbysits, Battletech Painting and Customs stands as a leader for sharing the diverse world and work of miniature artists. With an active membership of nearly 1,000 'Mechwarriors, Battletech Painting and Customs has regular competitions, featured artist pictures, a rich and active work-in-progress and tutorial scene, and creative projects from sketching to sculpting! Battletech Painting and Customs doesn't beat around the bush--it is "a place specifically for painting tips, projects or jsut show off your stuff!" ContentAs the name implies, Battletech Painting and Customs has content for nearly any conceivable aspect of the hobby of painting and customizing miniatures. Two major categories of content keep this page moving: admin generated contests and member created art. Between these two contributions, Battletech Painting and Customs keeps the push notifications coming throughout the day. CONTESTS The admins keep the community pushing the envelope and improving their skills through contests. Contest guidelines always have clear rules and an interesting challenge, attracting great contributions from painters and modelers across the globe. The most recent, that ran from October through December 2016, challenged members to create a miniature diorama. With great work submitted from some notable artists, the victory went to Chris P. Bacon's "Battle of Wolcott" interpretation. More than just an oportunity to gamble on new techniques, these challenges carry prize support--and what's better than painting for free stuff? The current contest: paint a Marauder, Catapult, or Mad Cat! What's cooler than that? Find more details at the Battletech Painting and Customs Facebook page! 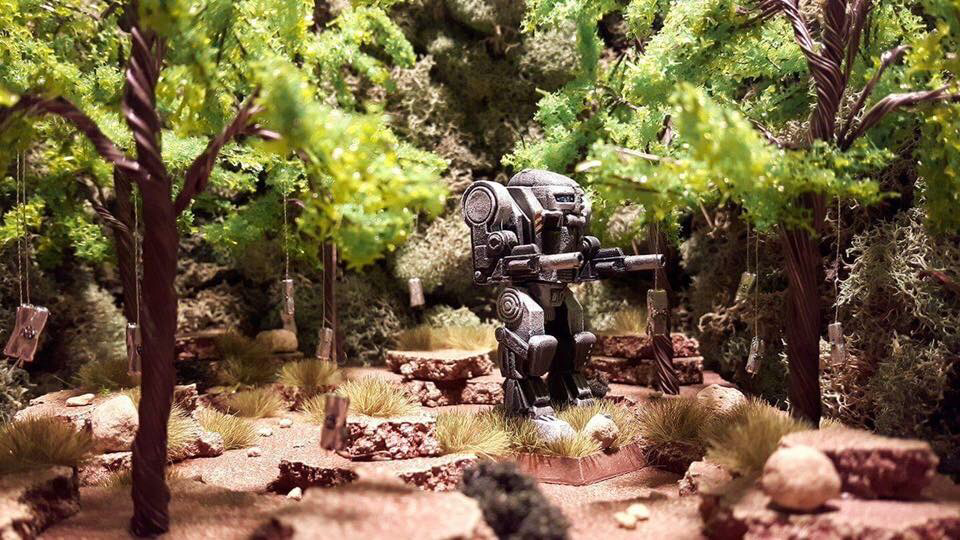 MEMBER CREATED ART When not creating spectacular dioramas, the members of Battletech Painting and Customs are working on finding long lost miniatures, sketching out ideas and form studies, modeling cool and interesting mods, and growing as artists. This page is a center for the artistic development of the hobby of Battletech. Member created art keeps this page alive and the hobby moving. 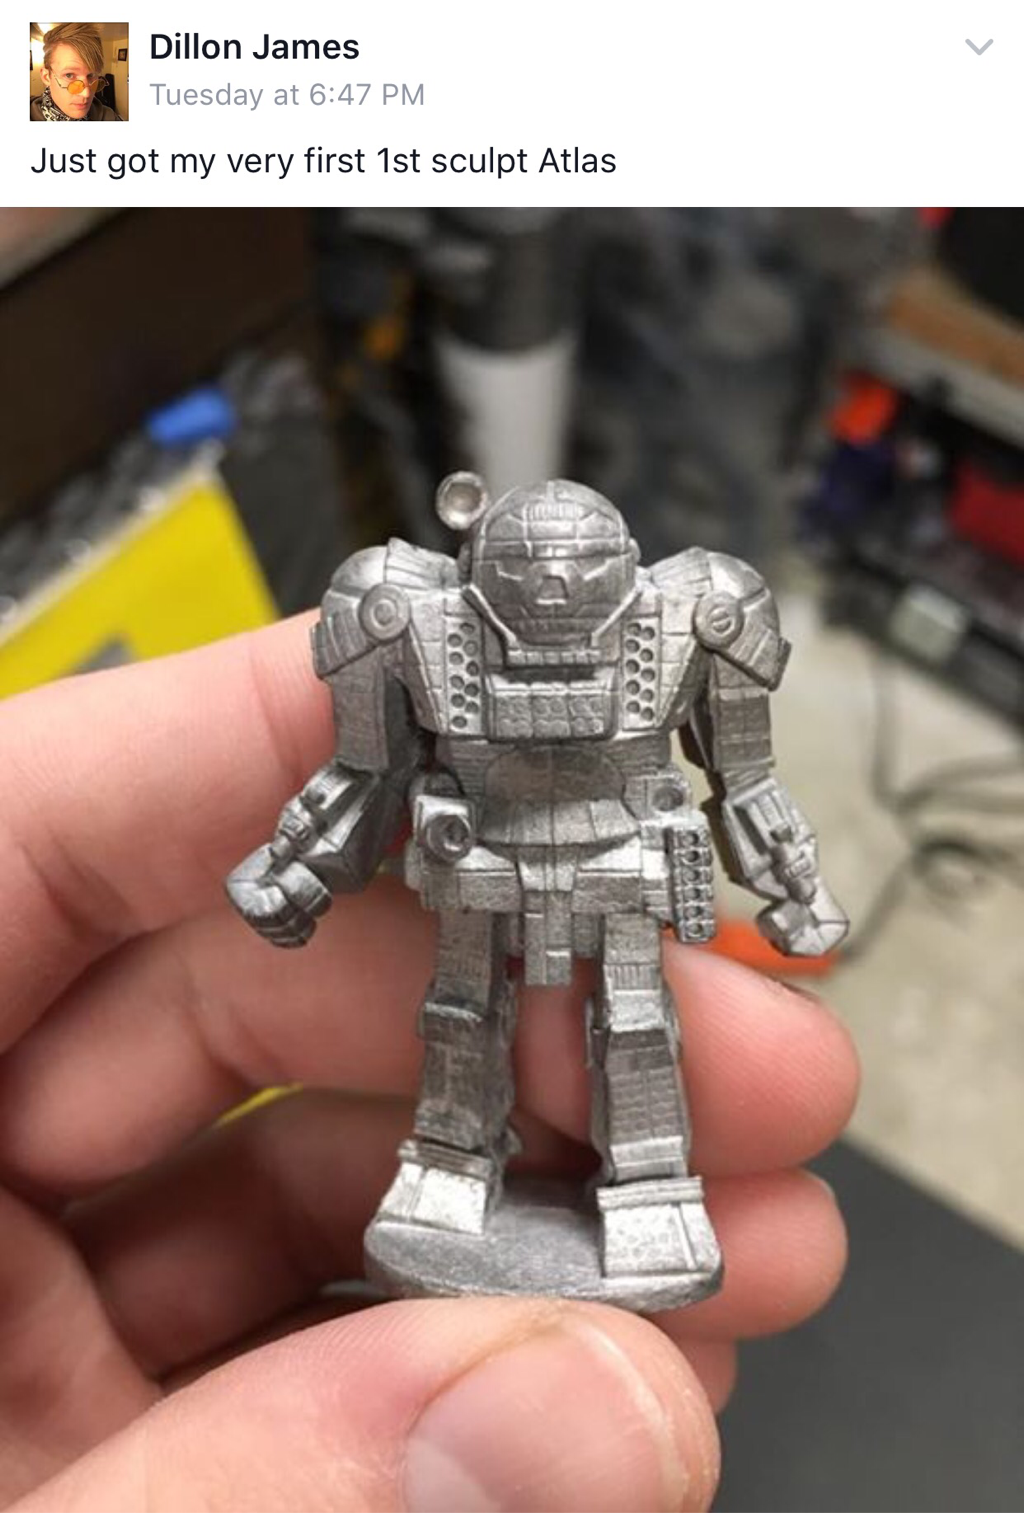 This post from Dillon James highlights the elation that we all feel when we come across that long sough after miniature that seems to only exist in memory. 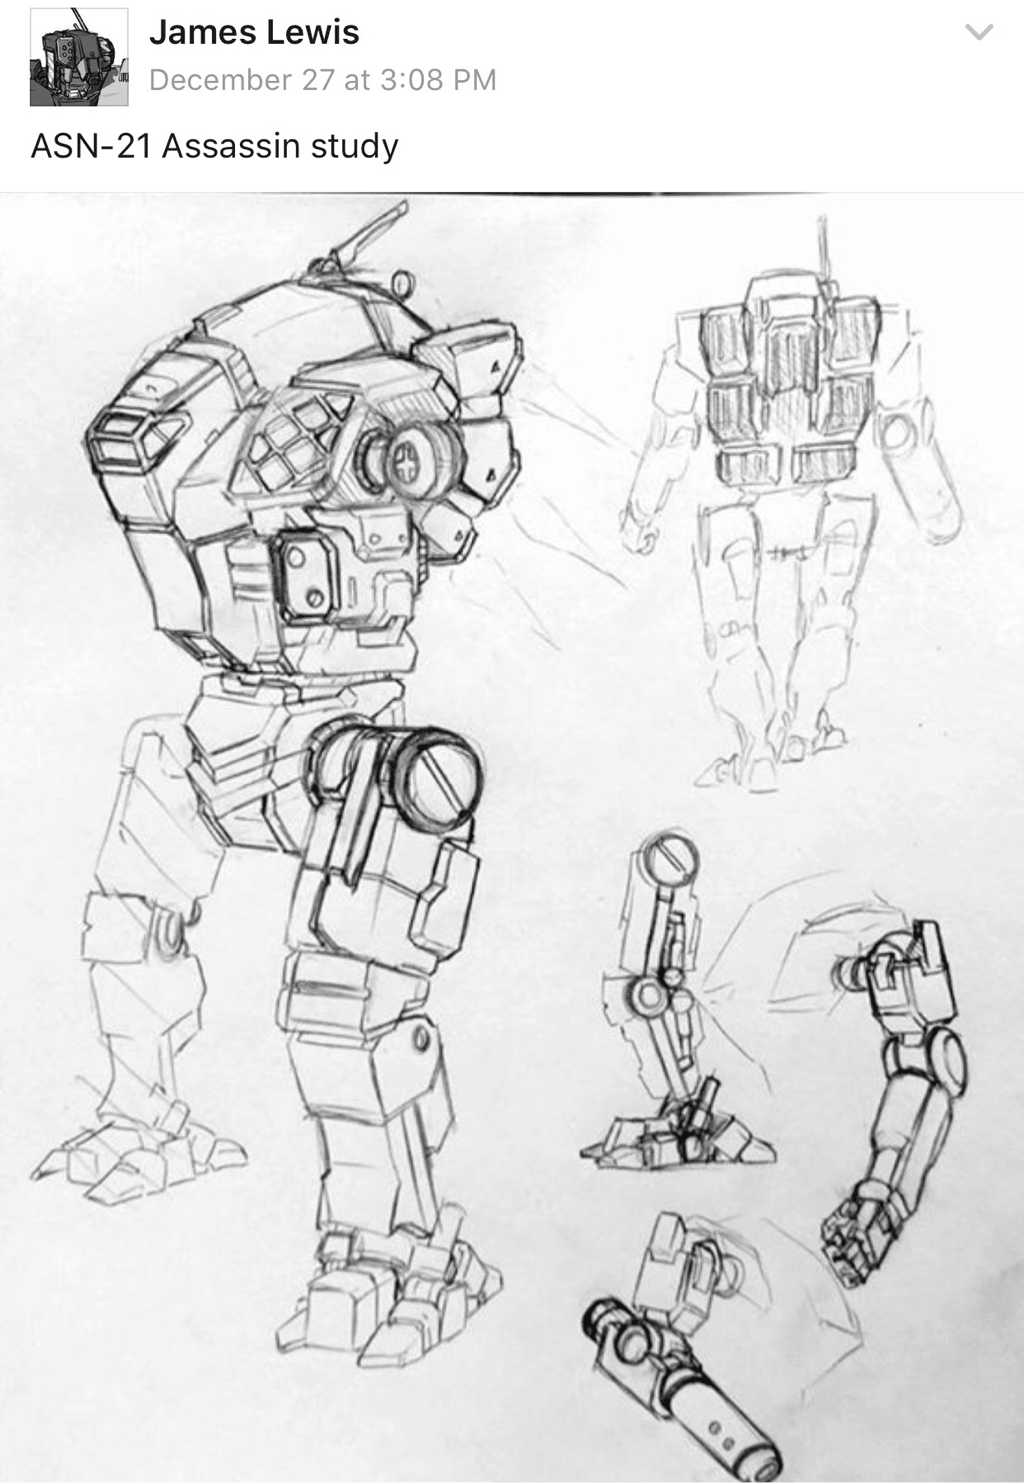 Sketches and studies like the work of James Lewis and other artists show that the big, stompy robots of Battletech continue to grow and evolve as artistic tastes change and provide inspiration for reposes, modifications, and resculpting. 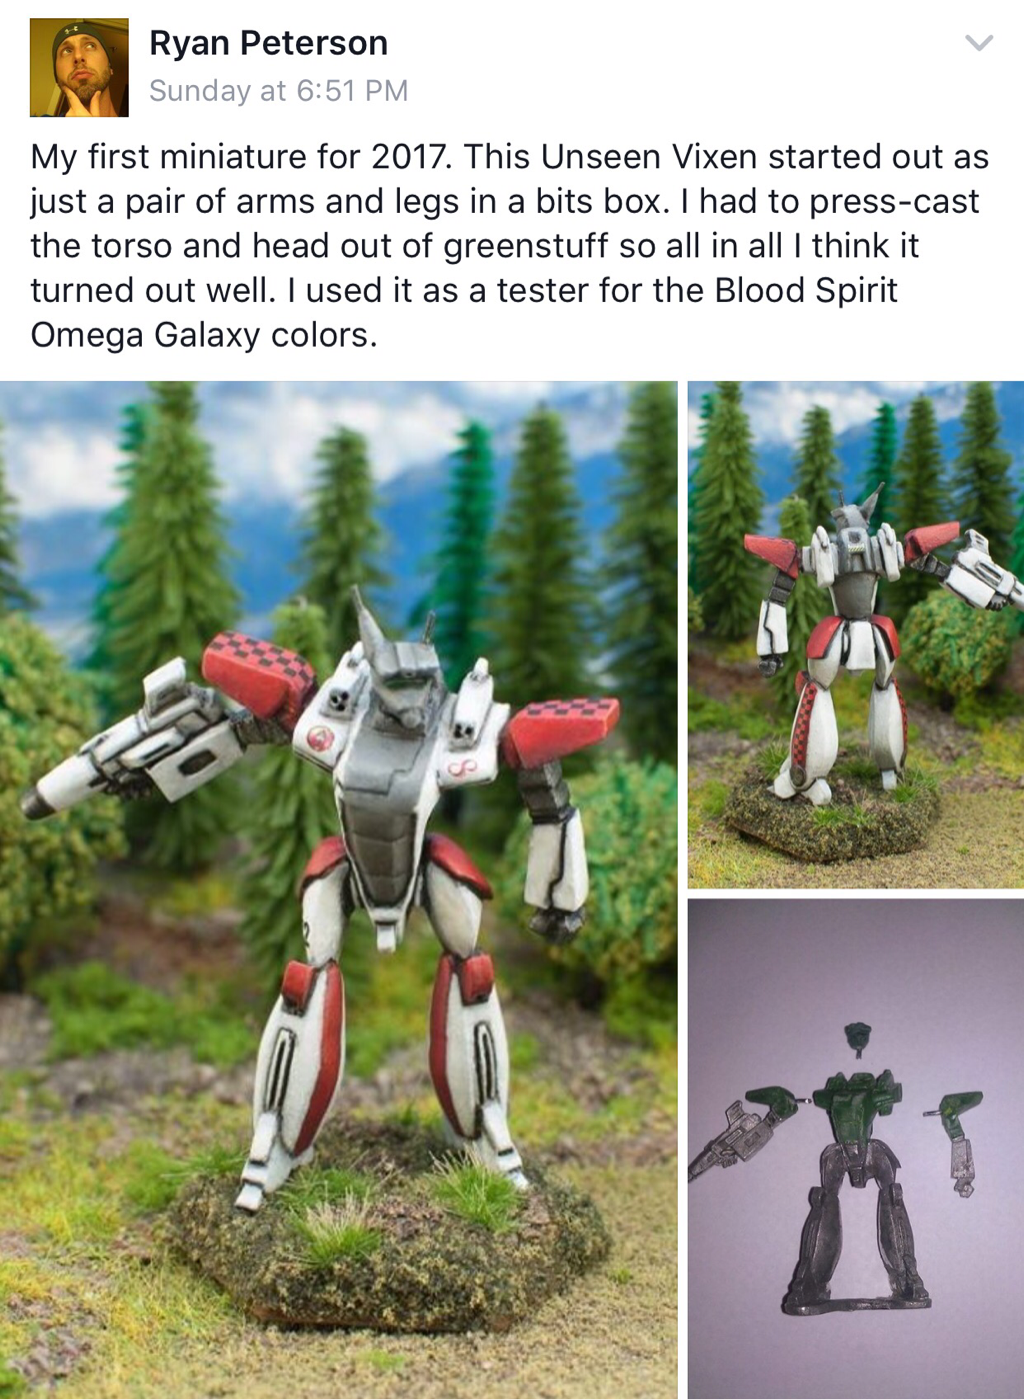 Multi-photo posts like this from Ryan Peterson show how artists can create an inspiring, complete miniature from spare parts and greenstuff! BLOGS AND TUTORIALS Several of the followers of Battletech Painting and Customs manage their own blogs and websites. With these awesome teams, both the page and contributors can help spread the hobby and, from time to time, give peaks into their craft secrets.
PHOTOBOMBS! What's more, users don't merely throw up pics of giant, stompy robots. Vehicles, tanks, VTOLs, aerospace assesst, battlearmor, even the lowly infantry trooper make their way onto the posts of Battletech Painting and Customs. 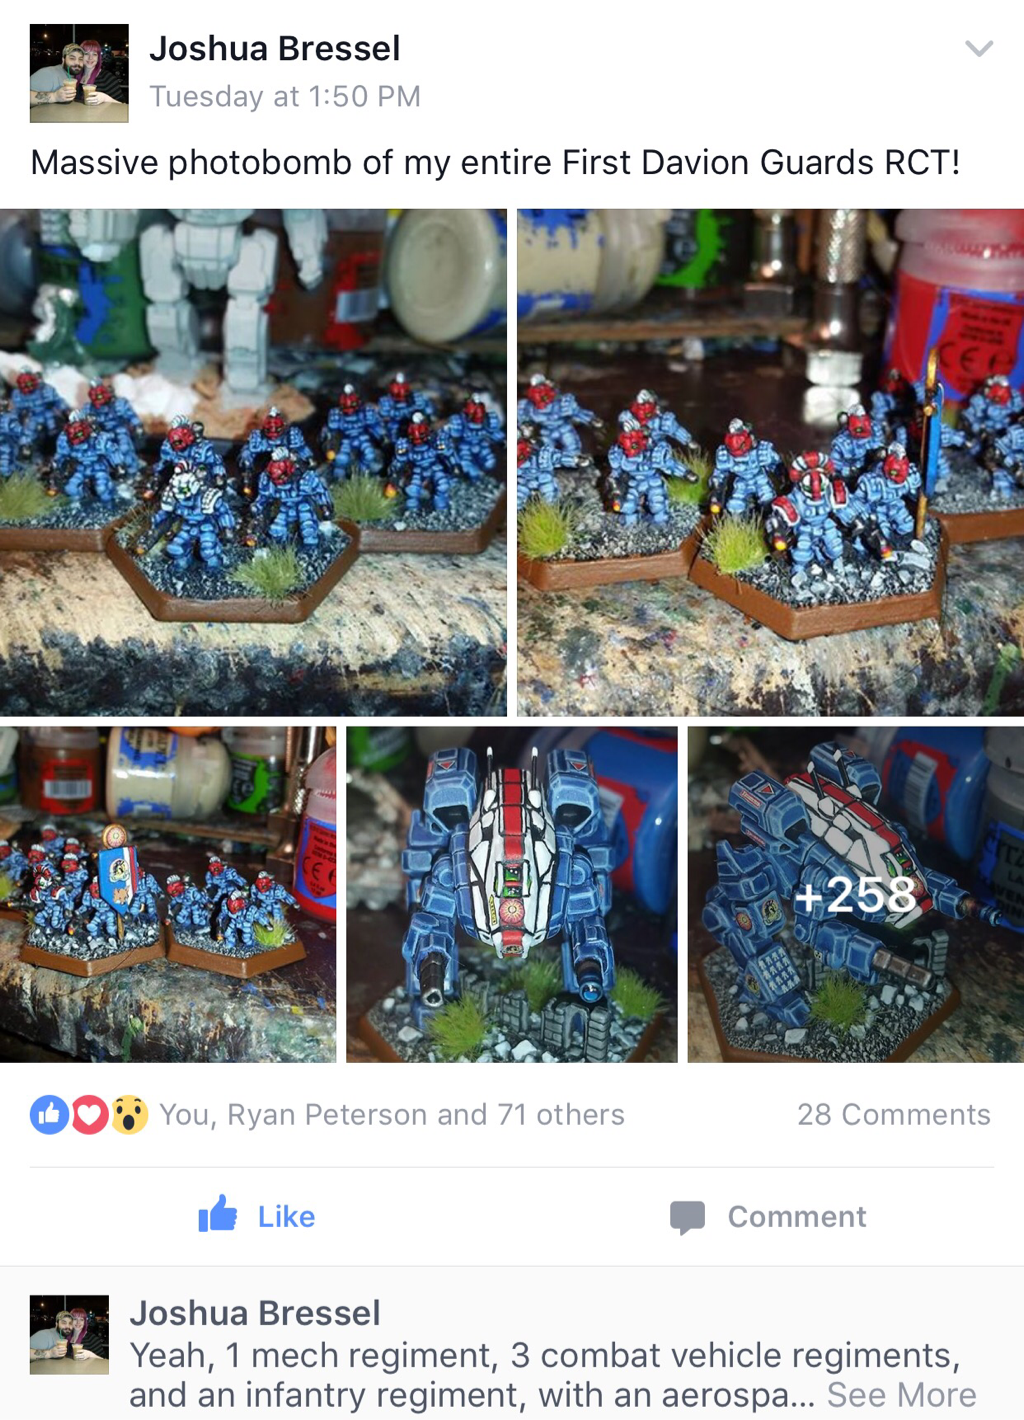 A prolific painter in his own right--I mean, just look at all that painted metal! Whose who?Nathan Pelchat is the owner/creator/admin for Battletech Painting and Customs. He built this page to "really focus on the custom, 'hobby' aspect of the rich [Battletech] universe." With aims to inspire fans to new levels of creativity and help teach the skills of the hobby to along the way, Pelchat aims for the page to continue to build mentor-mentee relationships are Battletech begins to build a player base with the next generation. And he's not just content with reaching across generations. Pelchat wants to conquer the globe! In the coming year, he hopes that Battletech Painting and Customs will "reach players from across the globe and...with others who share similar hobbies." He continues, "I have personally made several friends who I now converse with and houg out with outside of Facebook." This may be the most noble goal of Battletech Painting and Customs: to be a place for artists from across the globe to share their common bonds and overcome their differences--be they as minor as languages and citizenship or as major as faction alliances and fan-systems! A combination of his dedicated administration and the work of artists from Asia, through Europe, and into the Americas keep this page running and the community growing. 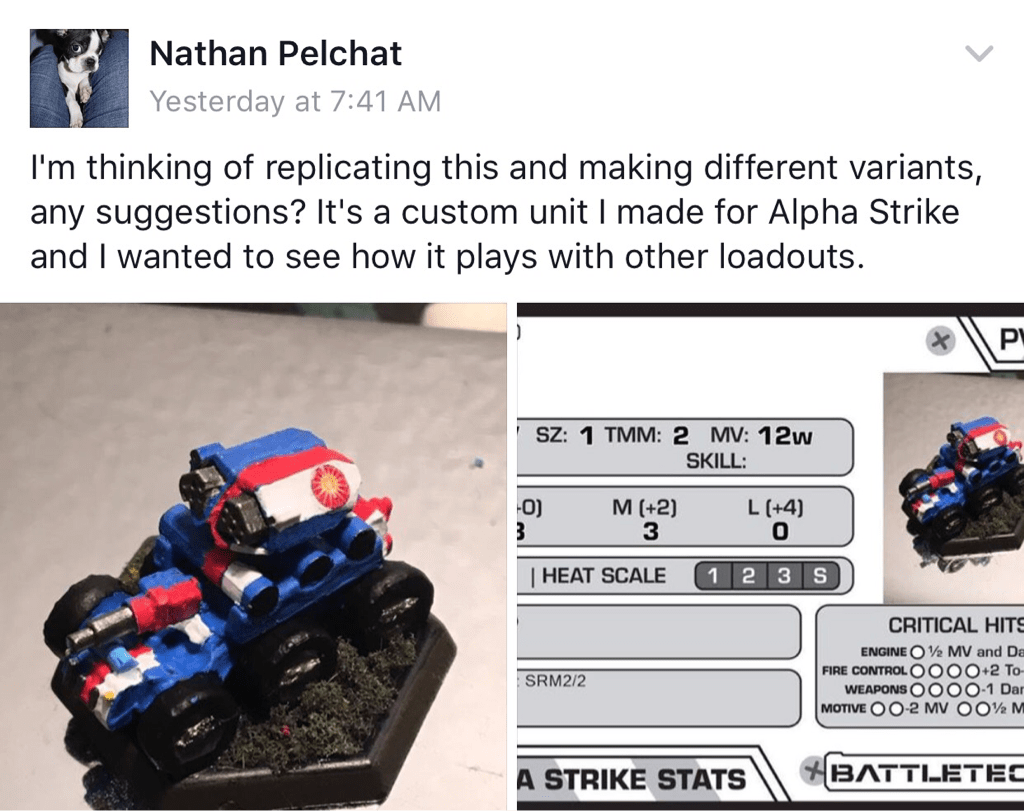 Nathan Pelchat, the creator and admin of Battletech Painting and Customs highlights the driving force of the page--to push the artistic envelope, create new ideas, and build a community of hobbyists. OverallBattletech Painting and Customs is a great--and unique--place for players, painters, and modders to come together, enjoy some friendly competition, and build 'Mechs and community. Its noble goals of continuing the game and hobby into the next generation and across the globe sets a standard of sportsmanship to rival the altruism of Rule 1 ("Have fun"). This is an excellent place for anyone in any level of modeling and painting to frequent and is one of my favorites.
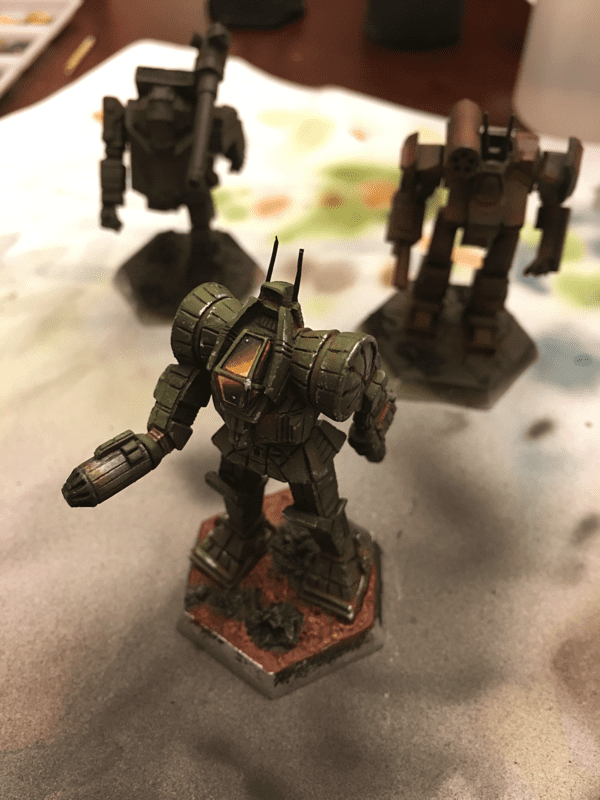
Now...where did I put that Marauder... Pencil It In is a series where quick ideas, proof of concept, and little musing that get left on sticky notes and dog eared pages remain. For this bit, a quick plan for an Alpha Strike 1st Ghost melee centric lance! 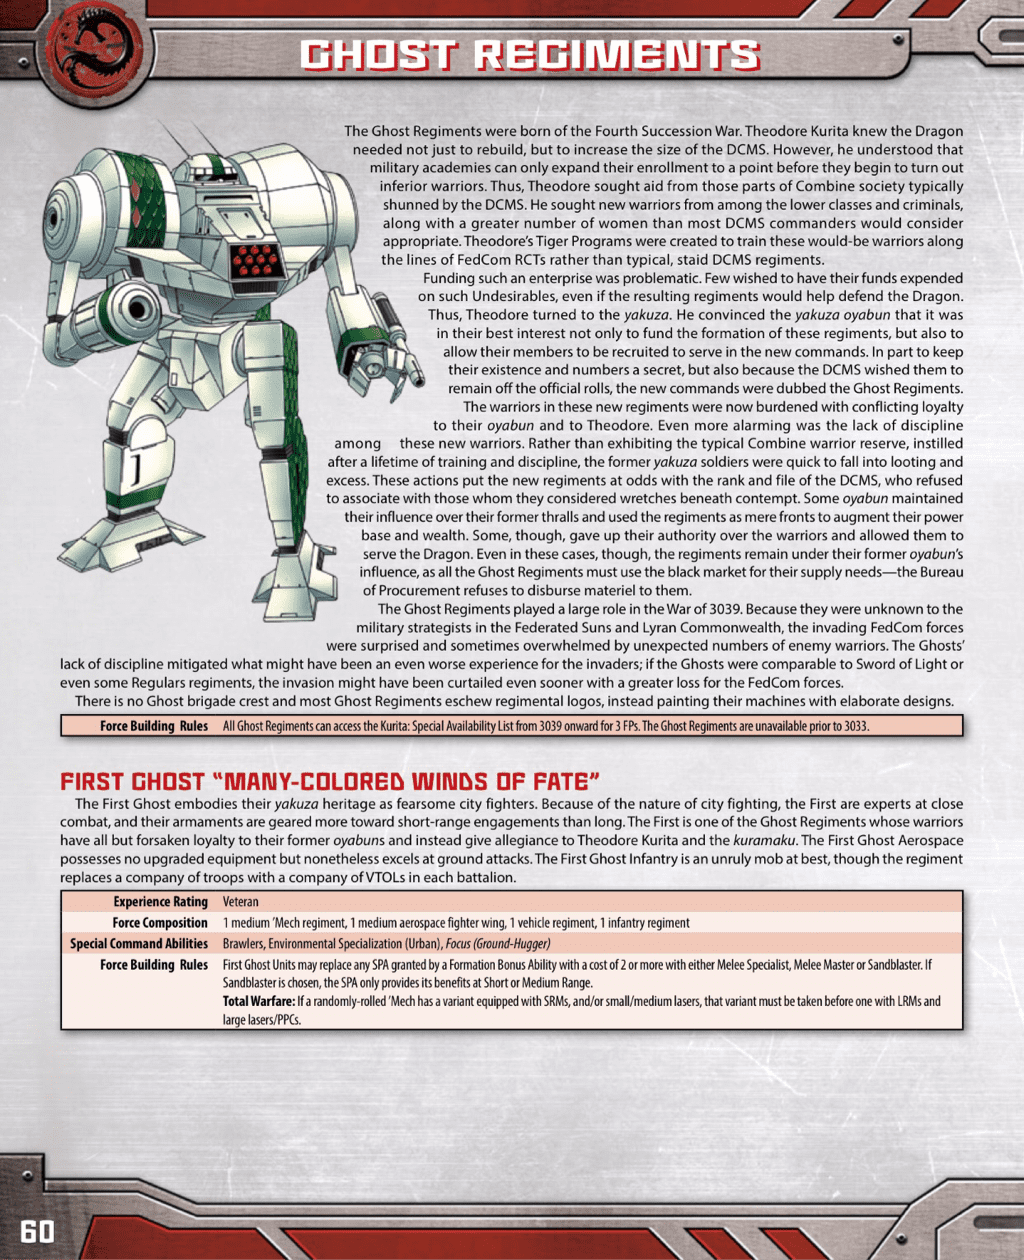 Theres something about the idea of giant punching robots that just screams "THIS NEEDS TO HAPPEN!" It may not be a good idea, it may not be the most sound idea, and it may not have the widest range of implementations, but by Blake, I'll design it! Combat Manual: Kurita has some awesome DCMS specific units, abilities, and lances. The Hoard and Berserker lances add some exciting options for new formations. Each combat command also have great selections of SPECIAL COMMAND ABILITIES and design potential.  While a Berserker Lance seemed like the perfect start for this project, the "replace an SPA" clause above made me rethink my design or else have a Berserker Lance with no real benefit. With a Striker Lance, however, I have three SPAs at 2 points each (Speed Demon). The built in SPA is cool for the extra 2" of movement, but I want to see Rock'em Sock'em Dragons! Besides, using this lance as a base means I am forced to pick speedy units--a handicap to make sure I don't slow down the lance and expose it to being picked apart before the first flying side thrust kick. To to keep the lance within the bounds of a veteran unit with medium weight, I chose to limit it to one heavy, two mediums, and one light. Having to cross a lot of terrain meant survivability is key. The skill rating needed to round to 3, so all veterans and one elite made that easy enough. Finally, I wanted a very DCMS aesthetic to it.  Each unit has the skill along with SPAs and Melee, Short, Medium, and Long range damages. With the addition of Fist Fire to the Dragon, the lance comes in at 149 points. There we are--a DRG-1N Dragon that does six--SIX--points of melee damage with a skill of 2. For SCAs, the Brawler provides a -1 to hit at short range. This will help overcome the challenges of higher to hit numbers. Will this lance ever be made? Maybe...
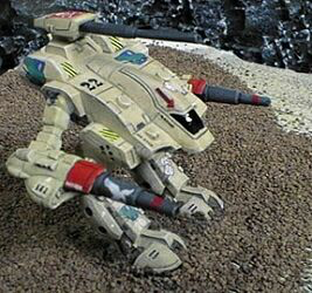
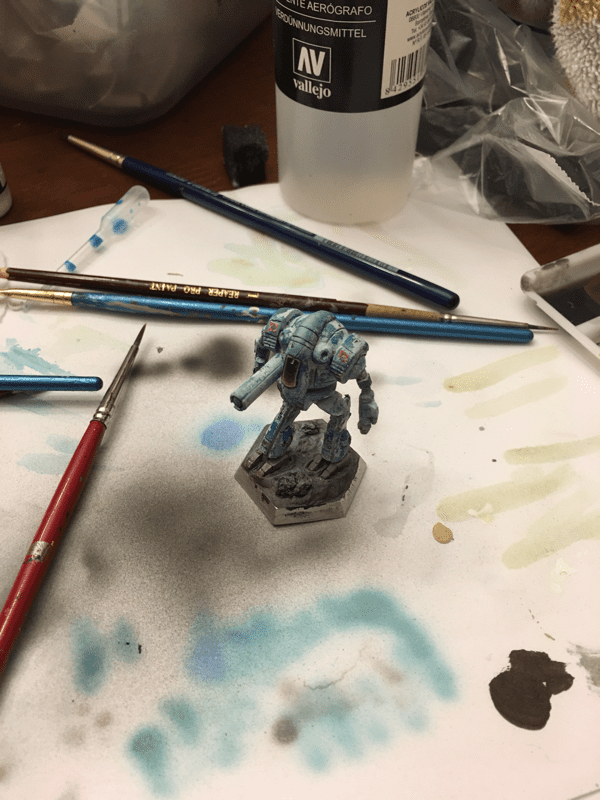
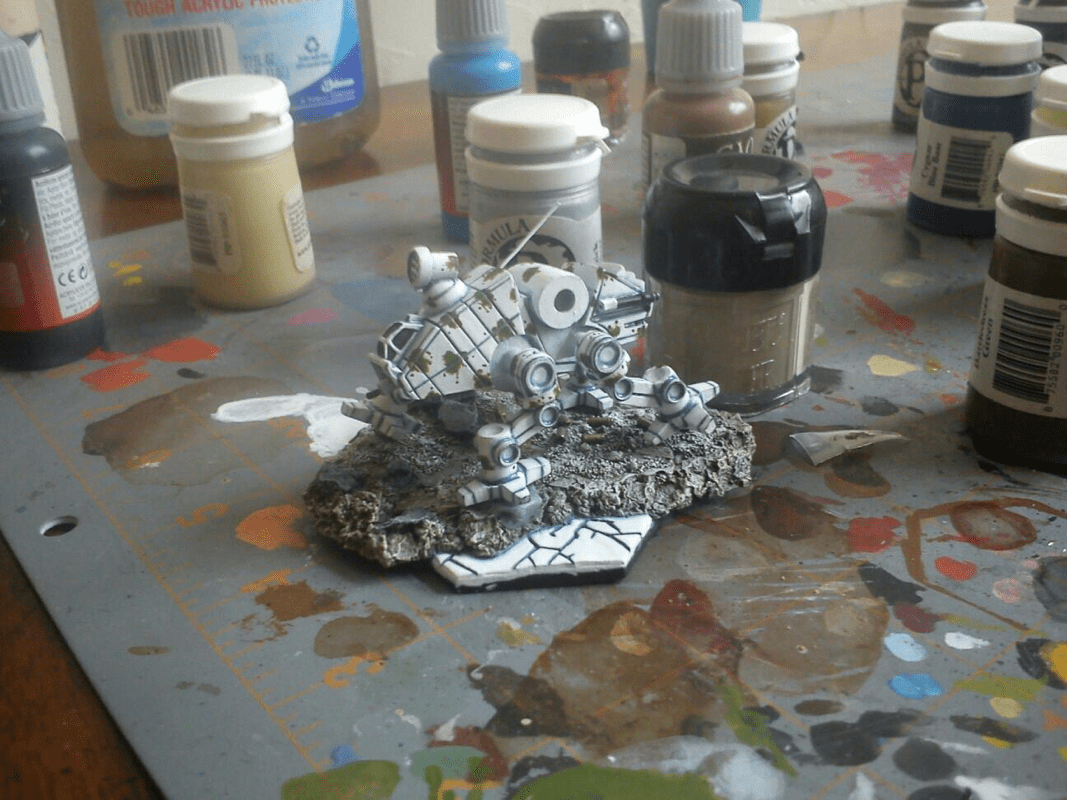
Have your own penciled in lance? Grand schemes that never leave the drawing board? Tried this or a similar lance with an after action report? Post it below for us all to enjoy! Welcome to Mod Monday! One of the best ways to make your force stand apart from the rank and file and attract new players to the table is with creative and unique game pieces. While Battletech and Alpha Strike aren't WYSIWYG (wee-see-wig, "What you see is what you get") like other games, modifications, reposes, and creative construction enhance the gaming experience. In Mod Mondays, we look at cool modifications and tutorials to build dynamic and different models. For this post, I'll walk you through the build of a work in progress, moderately challenging, Nyx with a C3 slave. 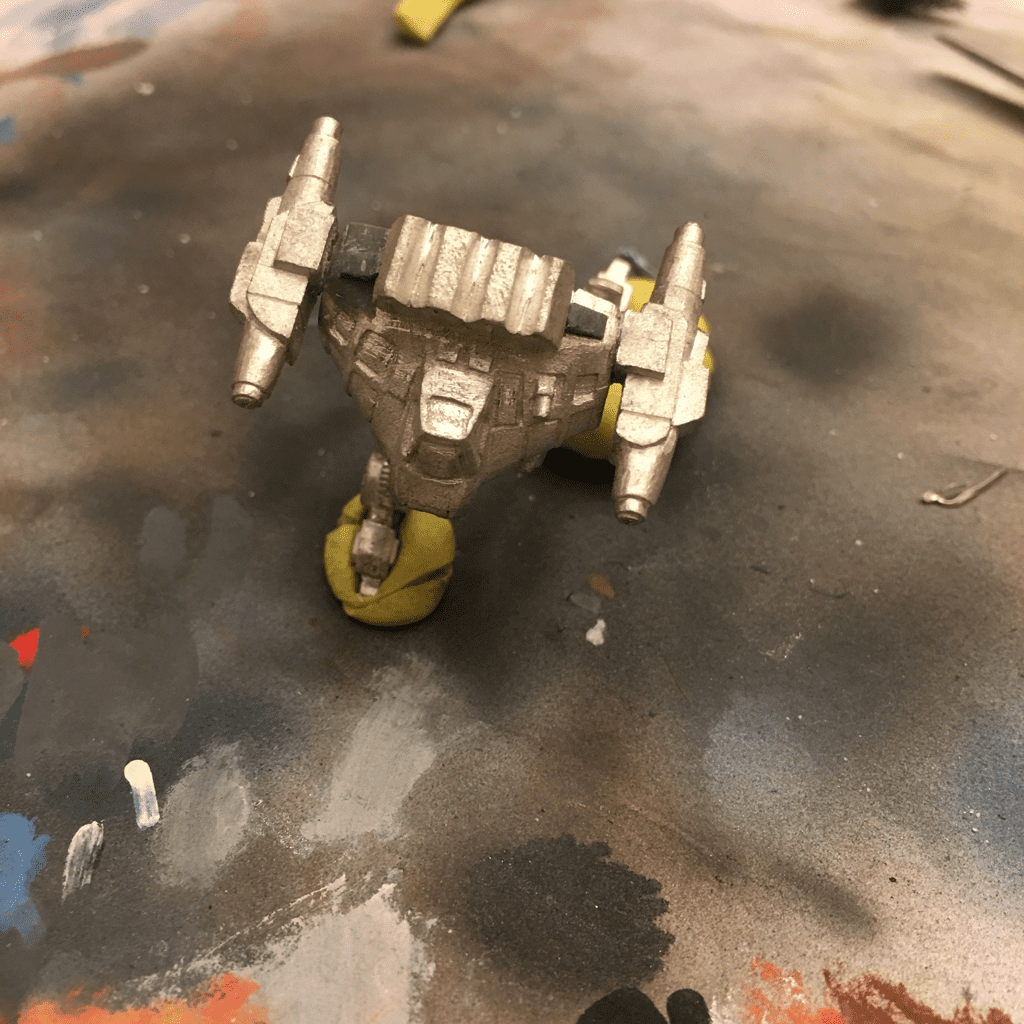 Looks like he stepped in something... Something reminiscent of a Jenner II, the Nyx is a speedy Strike and fade unit. With a shared aesthetic and similar performance Profile, the most noticeable diffference is the lack of jump jets. What is looses from being grounded, however, it makes up for with a significantly increased ground speed. Add a C3 computer to its load out, like the NX-80C, and you have a tough to catch spotter. 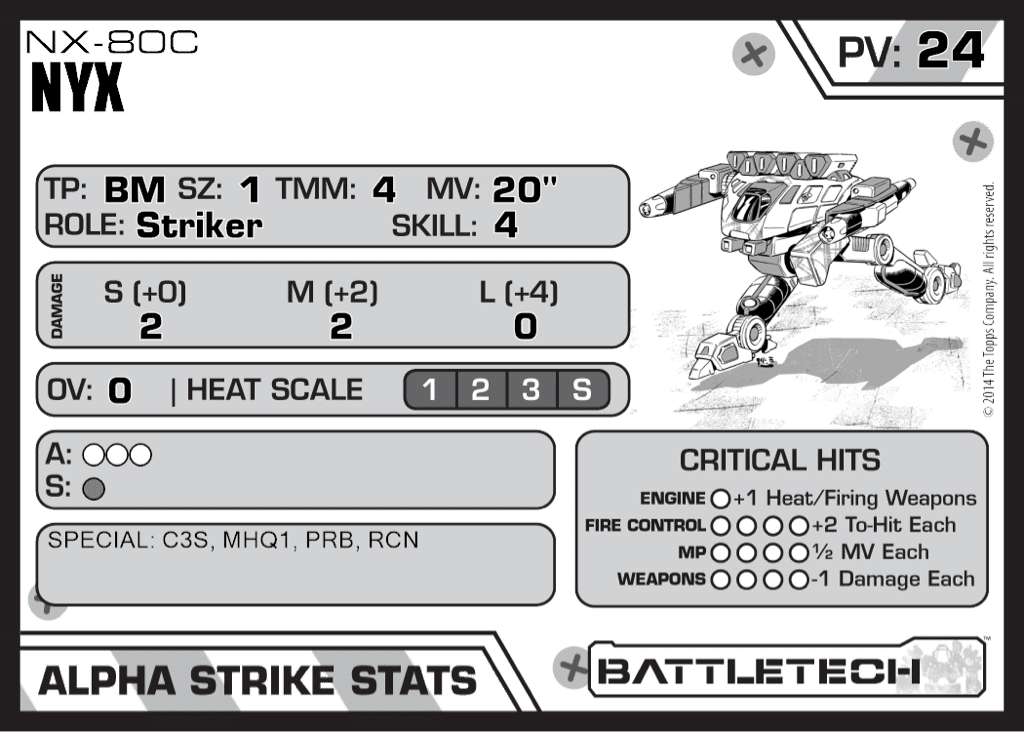 This is another case where record sheets are very helpful. The standard NX-80 carries a top-mounted SRM6. To make room for the C3 computer, the -80C downgrades this to an SRM4 system. This mod is relatively easy, with a few cuts of a razor saw and a little bit of greenstuff. 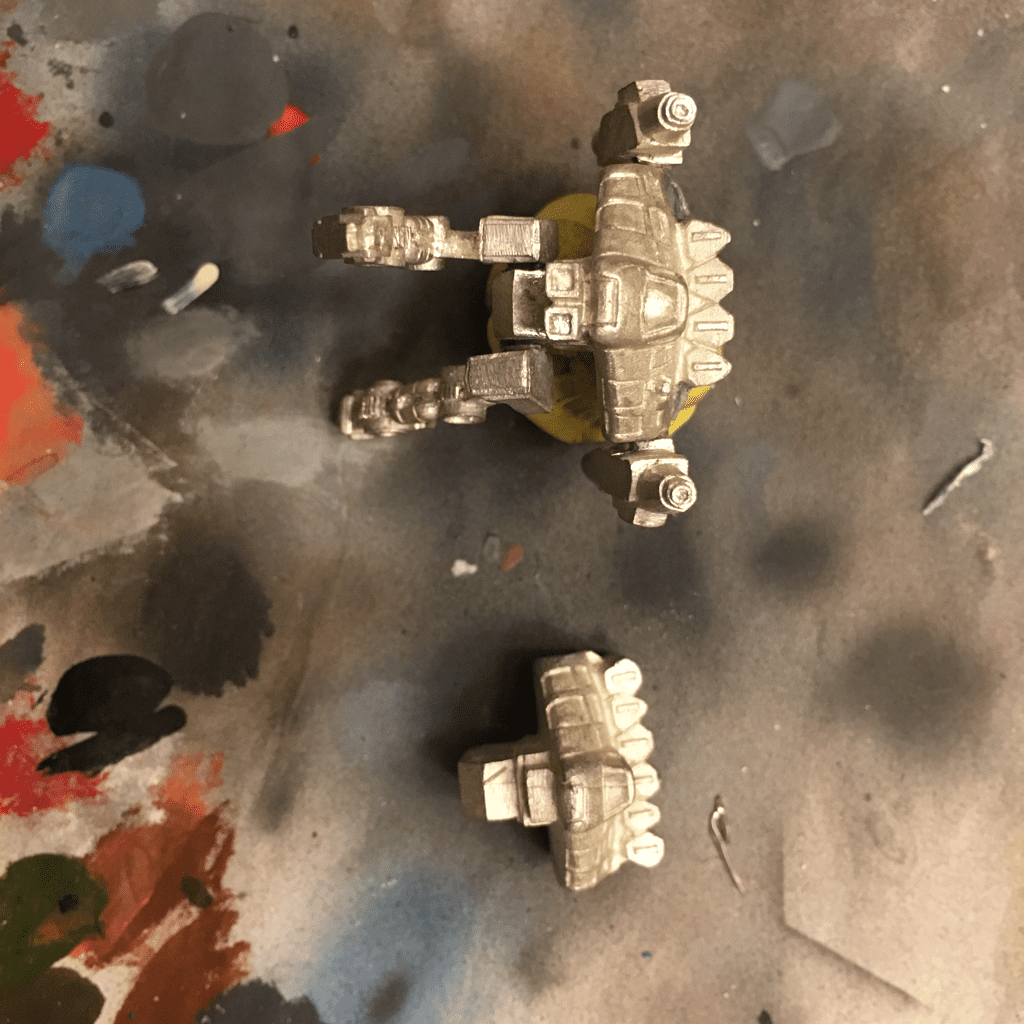 With a razor saw, cut across the top of the torso, under the nibbly bits that hold the missile rack in place and theory to under the first tube on either side. Tracing the slope of the tubes, the cut down the space between the outermost missiles and their closest neighboring tubes. (Keep these for your bitz box.) Wi h your files, file thee surfaces smooth. If you preserved the nibbly bitz, carefully align and reglue onto the torso. If you didn't--like this guy--you'll need to whom out and mix up some greenstuff to sculpt these. Don't worry if you're not familiar with greenstuff. The relative ease of sculpting two slightly slopped blocks is easy and a good starting point for your adventures into sculpting!  If you're also sloppy with your saw work, you may need to reconstruct some of the torso--like this guy.
With a little more work, you can turn a Nyx into a swift, C3 spotter to accompany your C3M Komodo from last week. Have Nyx mods of your own? Share them in the comments! This is the final Friday posting from Cap'n Ed's 'Mech Hanger. This project started only a bit ago--November, to be more vaguely precise. When I typed the first lines for this project, I was humorously suspicious that it wouldn't make it past the end of November. Now, on December 30 of this awful year, I'm typing a thank you to all of the viewers, readers, followers, and subscribers. Without your comments, feedback, link checking, and proof reading, I would likely have dropped this project long ago. Thank you. For the coming year, you can expect:
|
Cap'n EdTutorials and Projects Archives
January 2018
Categories
All
|
Cap’n Ed’s ’Mech Hangar


 RSS Feed
