 Welcome to Mod Monday! One of the best ways to make your force stand apart from the rank and file and attract new players to the table is with creative and unique game pieces. While Battletech and Alpha Strike aren't WYSIWYG (wee-see-wig, "What you see is what you get") like other games, modifications, reposes, and creative construction enhance the gaming experience. In Mod Mondays, we look at cool modifications and tutorials to build dynamic and different models. For this post, I'll walk you through the build of my Long Shot Stinger that was featured on Battletech Painting and Customs. Tools & Supplies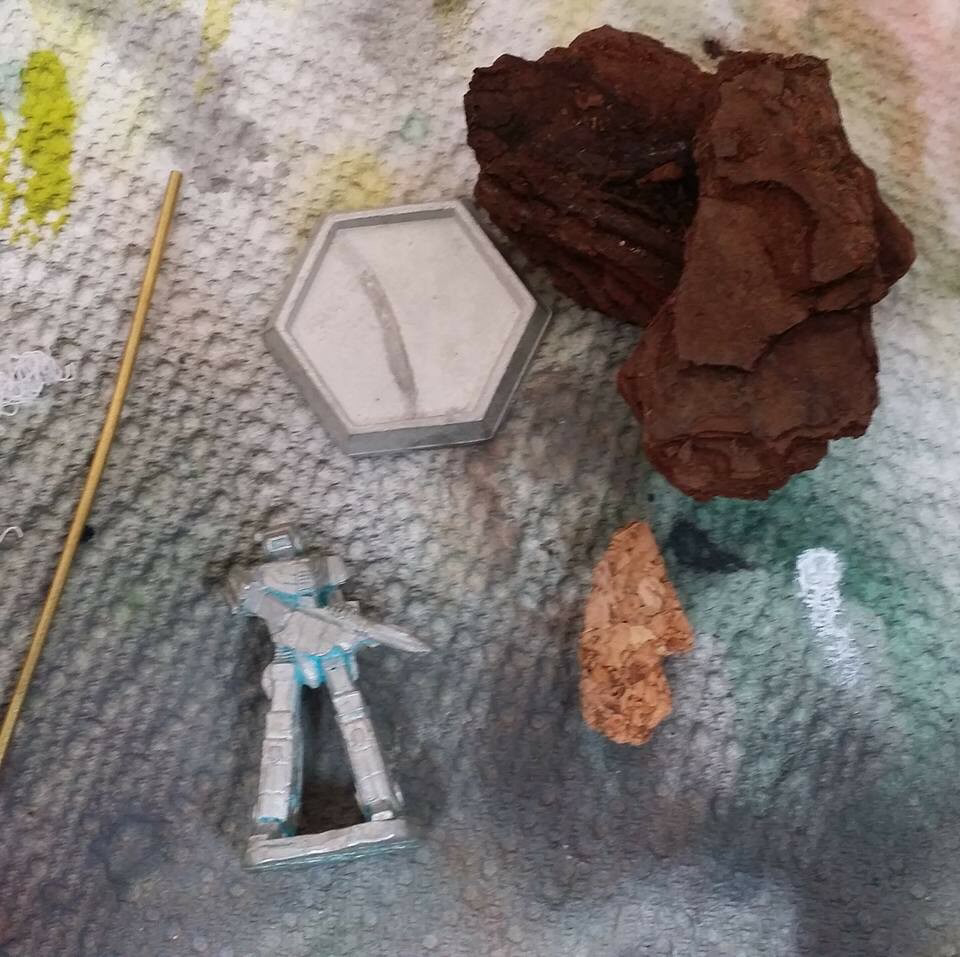 One reason I chose the unseen Stinger miniature for this build was because of the already interesting pose, the one-piece of the model being easier to work with, and the fact that I gave myself a 48 hour turnaround window from start to finish.
Initial Assembly
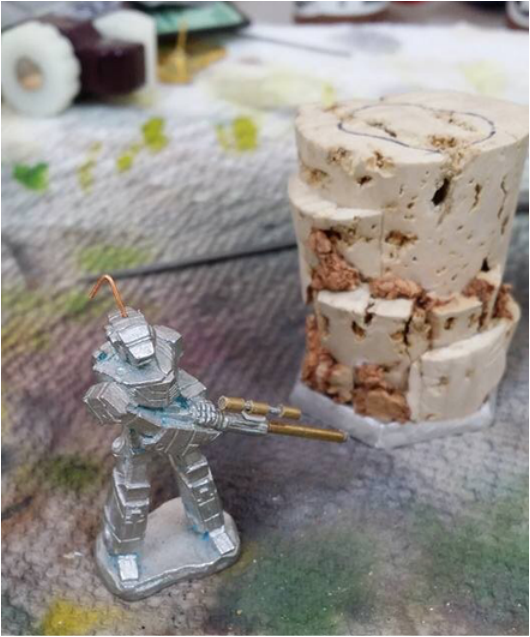
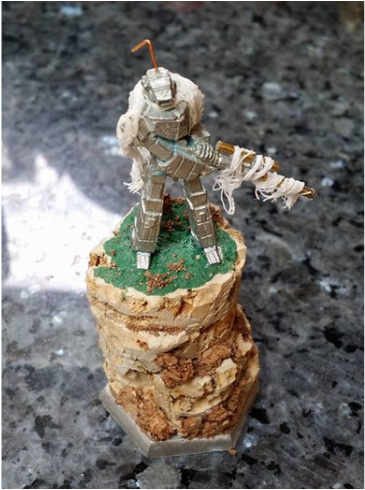
Building the Miniature Start by cleaning the mold lines and flash from the miniature with an X-Acto and files. This is one detail that I am very meticulous about and so I have several sets of files and sizes of razor blades. This piece was relatively easy to get into all of the recesses, fortunately, so I didn't use many of my special tools. Do be careful, however, when removing mold lines to not gouge and scrape lines into the piece. I drilled a small hole in the guide on the cockpit to add a piece of copper wire. Prior to gluing it in, I gave it a slight bent towards the top to resemble the antenna on Vietnam-era military radios. This, I hoped, with the final piece would give it an "in the bush" feel. To build the extended range laser, I first sawed the muzzle off the barrel very carefully. After that, I drilled a guide hole into both pieces. With the tube cutter, I cut a selection of brass tube to the length I wanted--not too long so as to not fit on the base, but not too short. With the section cut, I passed a paperclip through it to fit into the base of the laser and the muzzle--this was the pin to hold the assembly together. Once fitted, I clipped the clip with wire cutters and used superglue to glue the assembly together. The scope was built in much the same way: brass rod and paperclip. To give the scope a rail to mount onto the laser, I used a small scrap of plasticard. Finally, to give the appearance of lenses, I added small drops of superglue into the ends until filled. Building the Base The base was a relatively simple matter. First, I cleaned the mold line from the base--because all mold lines must go! To get the appropriate inverted cone look I was going for, I used the bottom of the base to trace a rough outline of the hexagonal dimensions.To make sure when trimming I didn't trim away the area the miniature would sit in, I also traced that footprint of the Stinger on the top of the cork. Next, to trim away the excess cork and shape it into a hexagonal cliff, I used the razor saw. After this, I used an X-Acto and other tools to hollow out the space for the miniature to fit. This may take a couple tries to get it deep enough. It was very important to save the scraps from all of this scraping and trimming--I glued these on lower setions to give a stair-step appearnce. With more scrap cork and modeling sand, I filled in the cracks and created an interesting, mixed media look. I filled in the space in the hex base with green stuff. Before it had time to set completely, I began pressing the cork into it to set. Once the base was set, I used superglue to glue the base of the miniature in the setting I created for it. With greenstuff, I filled the area between the base and the cork then spread a thin layer over most of the top of the piece. To create an uneven, earth effect, I pressed and removed pieces of cork into this. Finally, I added a touch of superglue to the top, dusted it with modeling sand, and scrapped away the excess before it was completely dry. 'Mech Sized Camo Net
Giving it Color
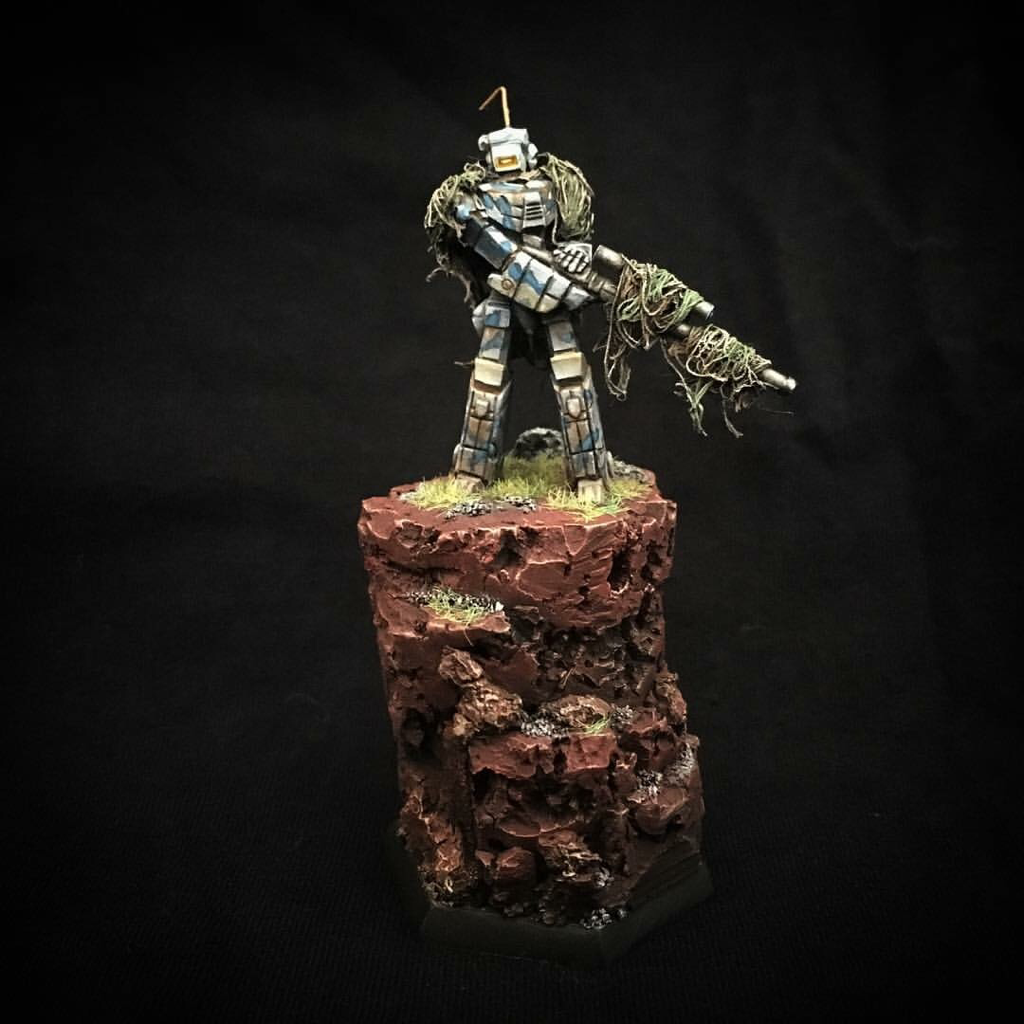
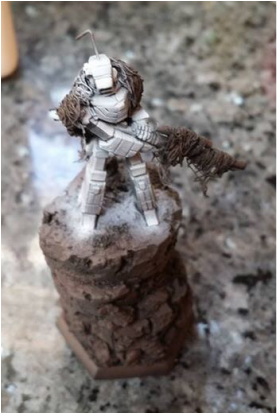
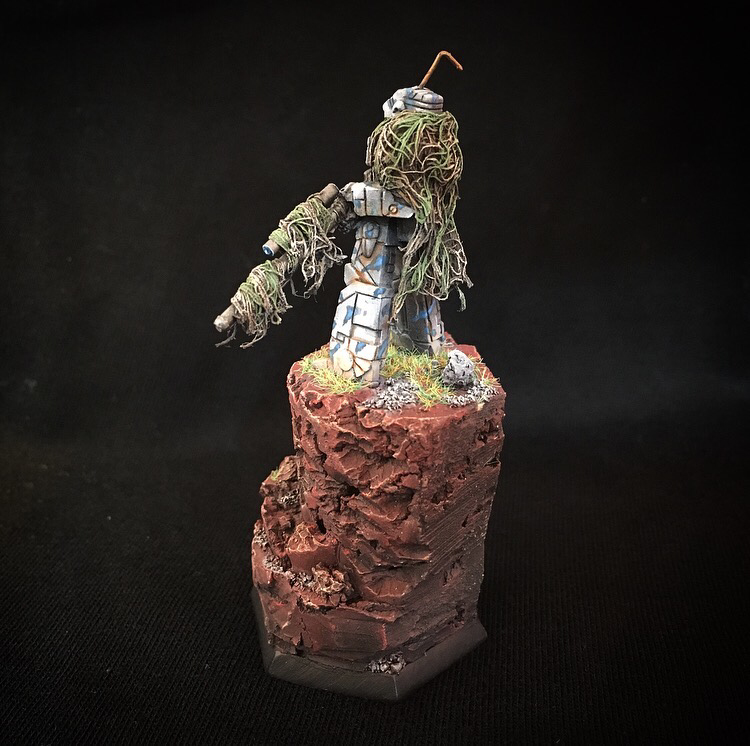
The method of the net was similar, but from dark brown to tan (45*), to bleached bone (0*). I used a series of dark to light greens for the camo stripes. To bring out some of the volume, I drybrushed some of the raised areas a bit with egg-shell white (whiter than bleached bone, but not white). It is important with every layer to make sure you leave a bit of the previous color layer visible in each subsequent layer to create a pleasing fade. Details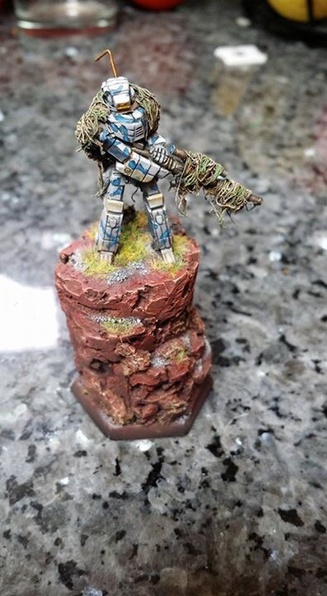 To justify the camo net, and make the piece overall a bit more interesting, I chose to work with a blue on grey camo apttern. The camoflauge was done by painting roughly-shaped striped in dark blue. On top of those, I layered medium and light blue. For the metallics, I reprimed the spot with brushed on dark brown for a gritty look. On top of the laser, I drybrushed gun metal, highlighted with a drybrush of steel. For the joints and moving parts, I used steel. To finish off the metallics, I washed the laser with black and the joints with sepia. The antenna is bronze becase it's bronze, that's why. It was an interesting compliment to the blue, so it gave the piece a bit of a pop--albeit not a field-approved pop. To complete the cockpit, I experimented with a glowing color. This was achieved by washing and painting thin glazes of successive layers of yellow to white over a white brush primed screen. For the base, I airbrushed successive layers of dark brown, deep red, and bright red. On top of that, I drybrushed an orange-tan color and a fine bit of bleached bone. The interesting gravel and outcropping, I made grey with layers of drybrushed dark grey, medium grey, and bleached bone. These touches of grey help to create an interesting and varied piece. A bit of static grass pulled it all together and justified the tan and green camo net. As a final touch, I added a bit of dust to the knees, legs, and elbows to give the look that the machine had been in a prone position--fiting for the overall pose. This was done with a mixture of Tamiya weathering pigments, very drybrushed paint, and careful washes in areas that would collect rust (like around the knees). Finished PieceThis was a fun piece to finish. In it, I put a lot of experimental techniques designed to push my skill and make an interesting, different, unique work. The thrill of competition painting is one of the surest ways to improve techniques. I have walked away from each event a better painter, no matter where I placed in the running. HAVE YOUR OWN COMPETITIVE PAINTING STORY? SHARE IT BELOW IN THE COMMENTS!
3 Comments
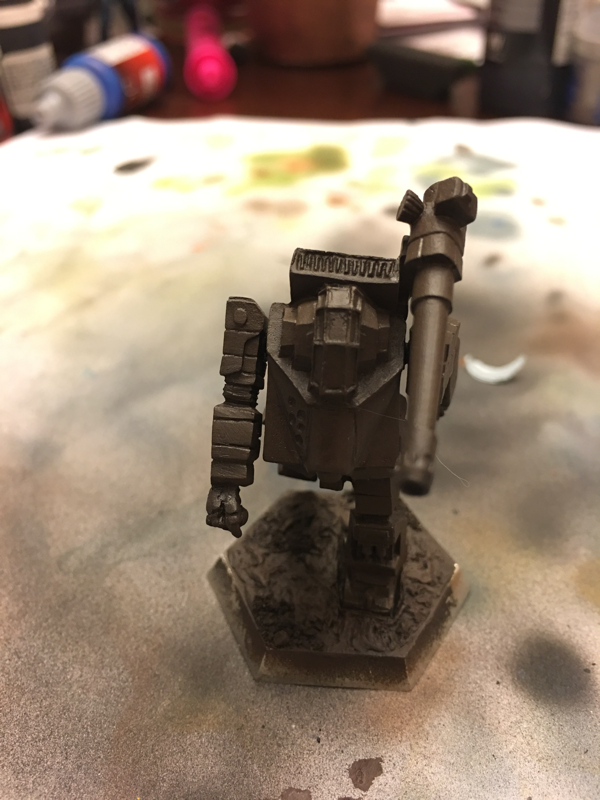
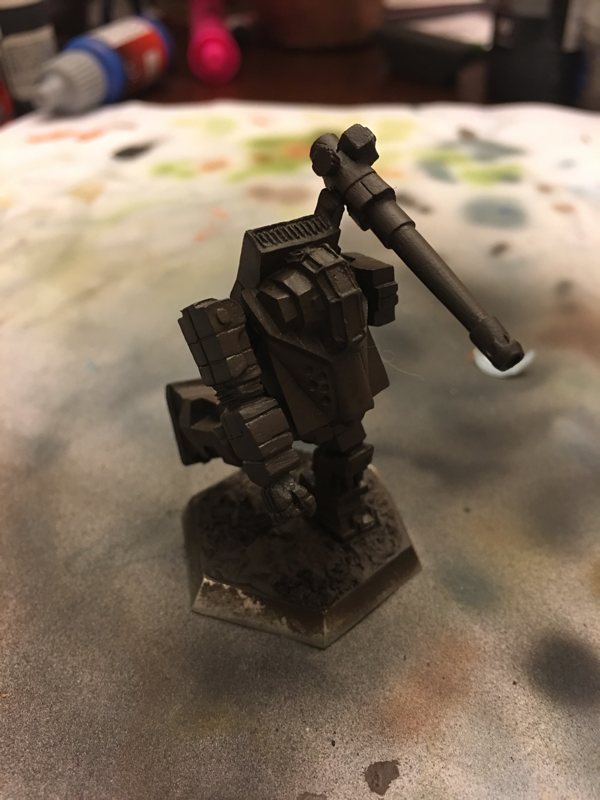
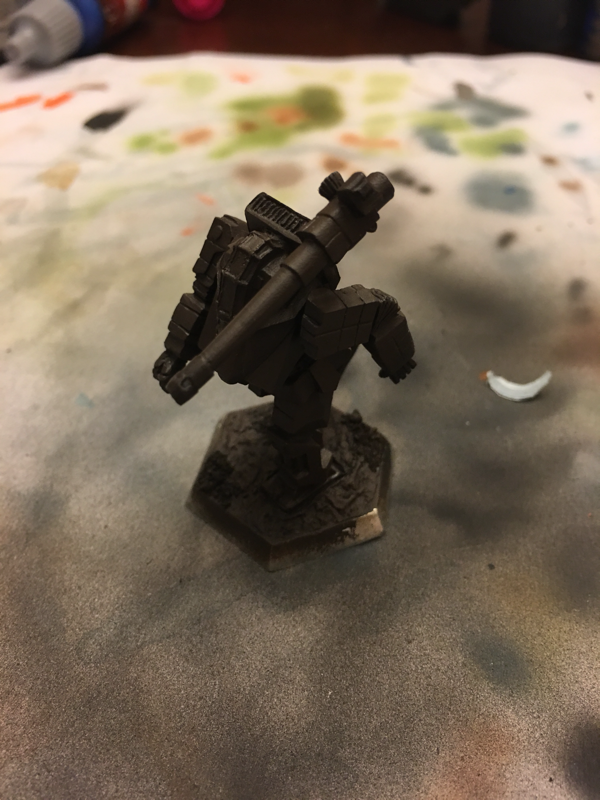
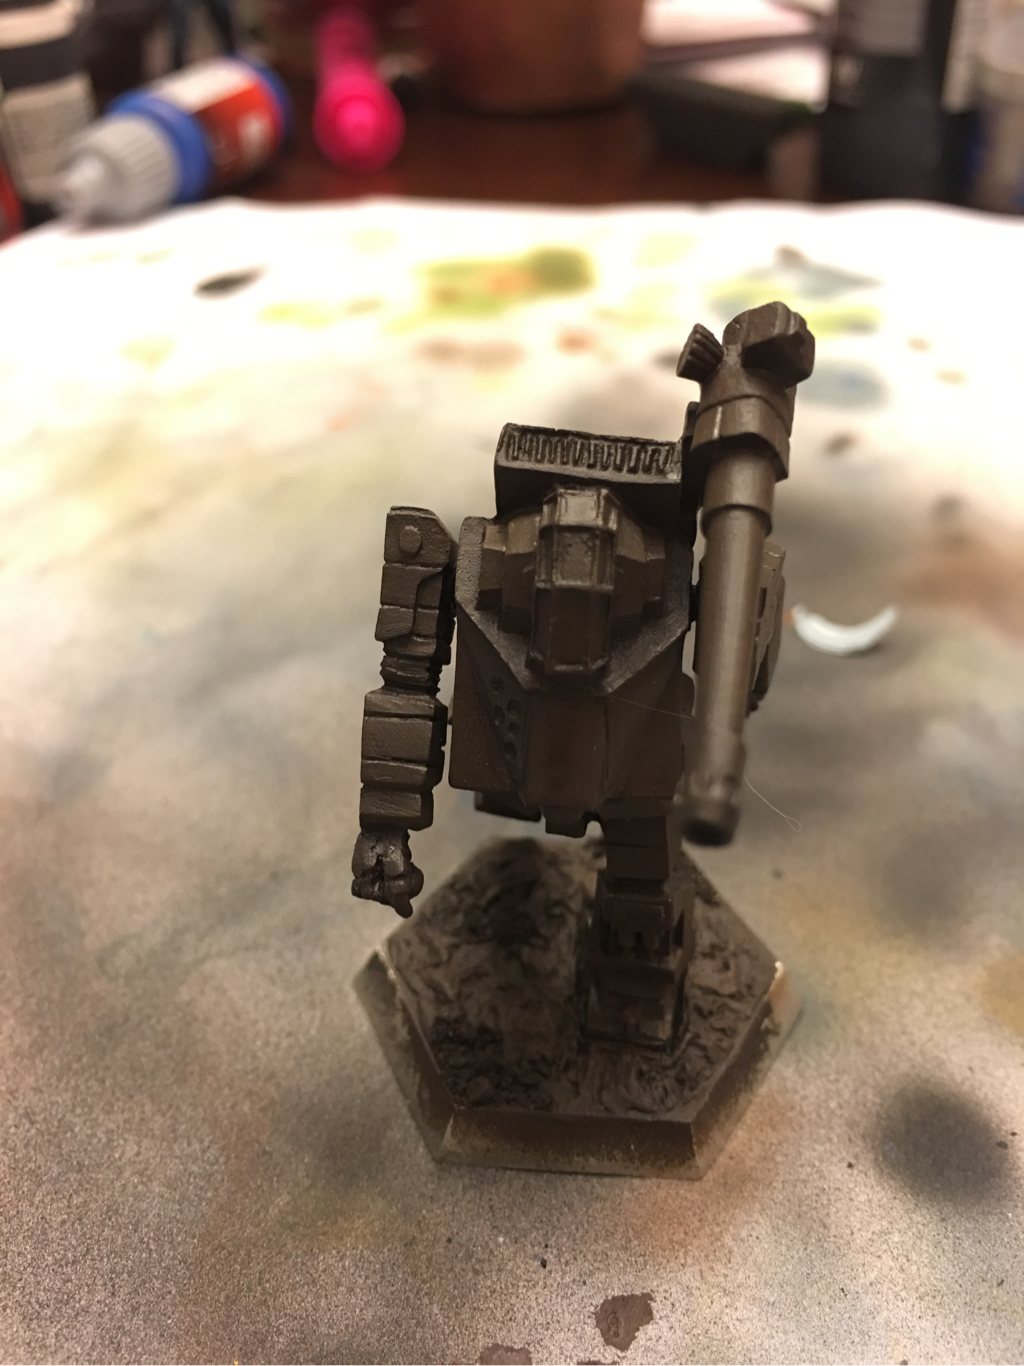 For this piece, I wanted a primitive -K mod. You may notice from the previous post that it still had the medium laser on the right arm--so that was amputated. The LRM-5 was added to the torso with careful drilling. To model the PPC, I carefully removed the muzzle break from a Black Knight (IWM 20-774). From there, I airbrushed black primer followed by dark brown. On top of this, I added two layers of chipping and wear fluid. Like the Primitive Griffin, this piece will have a worn look. Wanting to to make this an homage to the early days of Battletech, I decided on Night Stalker colors to match the Dougram Boxfacer colors.  Night Stalkers color panel from the Camospecs book ("Camospecs" Sarna.net). The airbrush scheme was: 1) Black re-prime 2) Grey at 45* 3) White at 0* 4) Blue glaze After this stage, I gently scrubbed away the layers with water and a toothbrush to reveal the brown under the chipping fluid. 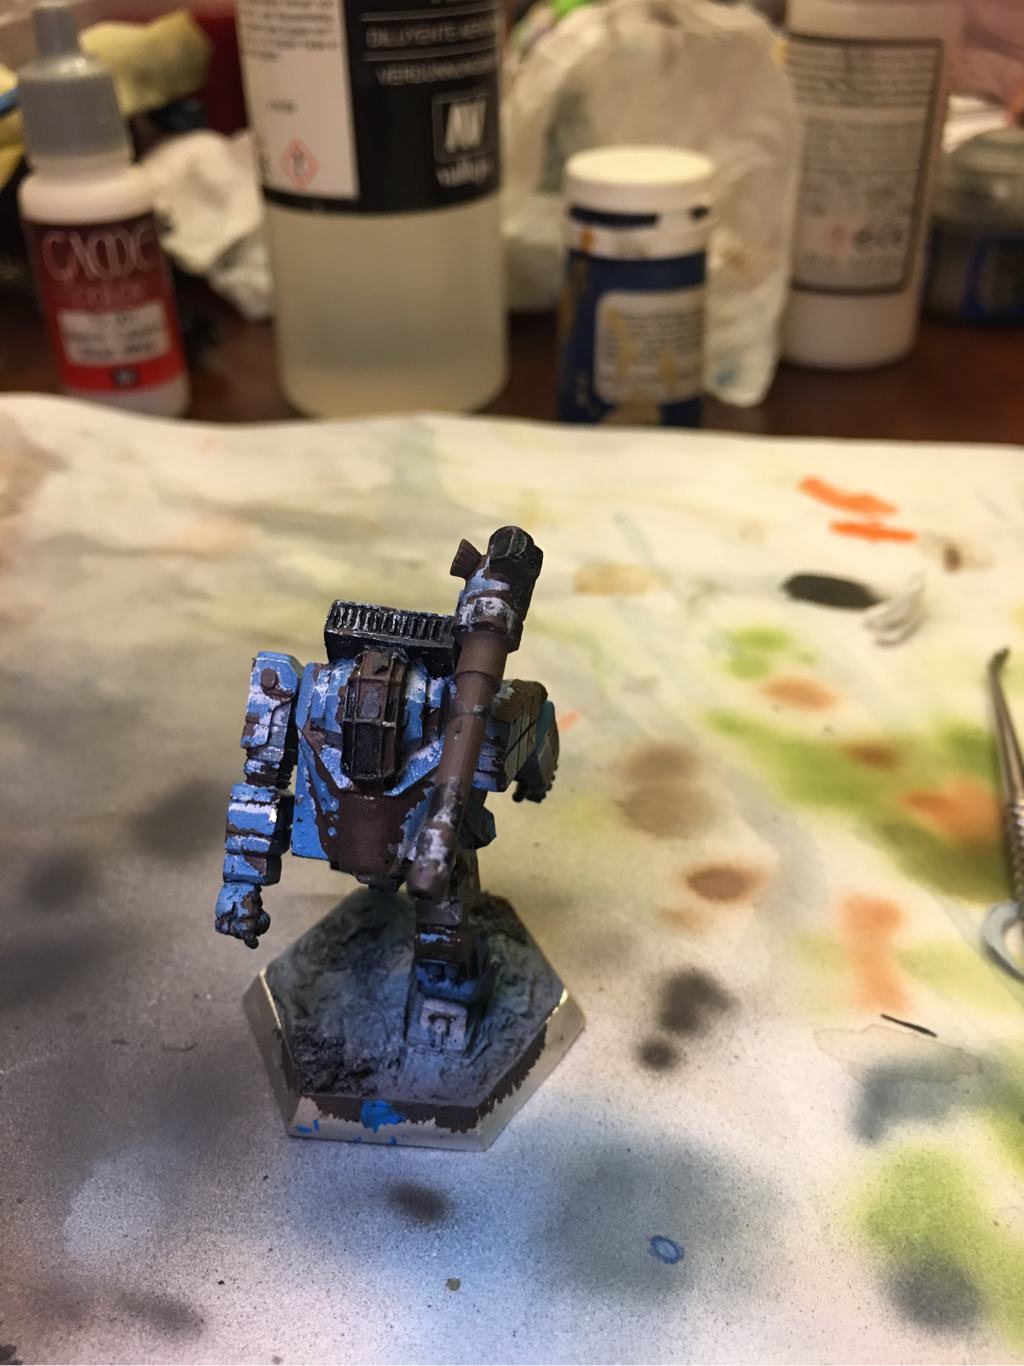 With the chips made, I added a few red highlights and touched up a few grey and blue spots.
To add to the rust effect, I sponged burnt sienna and bright orange onto the exposed brown. The final step to the rust effect was to wash sepia and bright orange on the rust. To give it a faded, streaked look, I pulled the fluid down with a dry brush. Don't forget to find my work on Instagram (some even before they receive a write-up here!): the_artist_known_as_capn_ed Also, be sure to join Battletech Painting and Customs on Facebook to see the work of many talented artists! 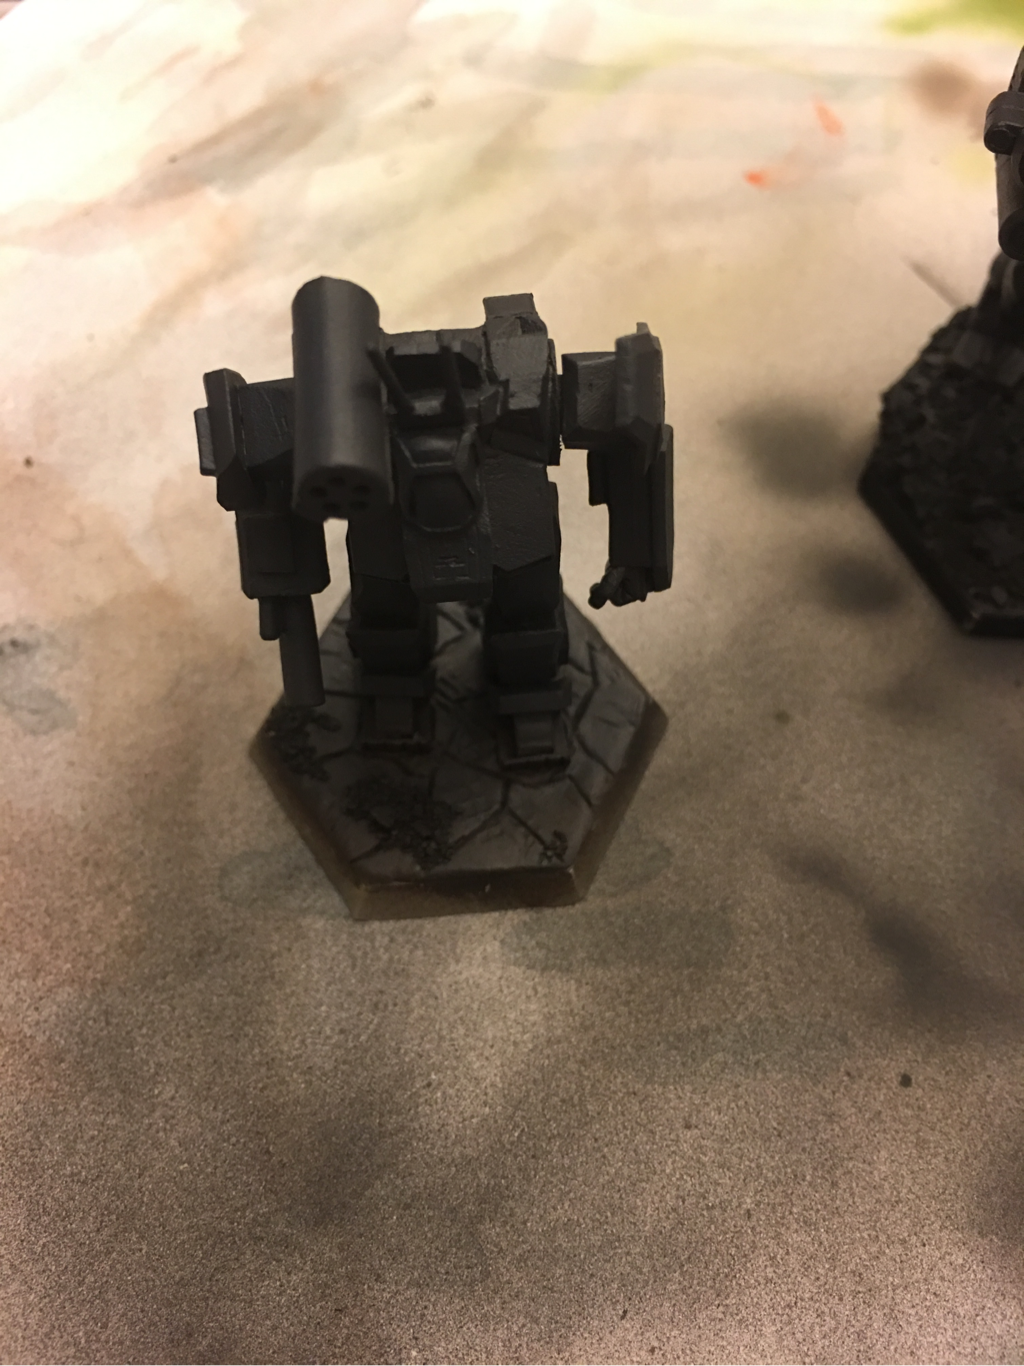 Going for a Donegal blue with an airbrush. Started with a 1:1 mix of dark brown and navy blue. Here is where things are a little more complicated... After sculpting the cracked earth on the base with green stuff, I mounted the piece and primed it black. Black is a good, safe airbrush primer to make great contrast with later colors. It does not, however, work so well for ultra-bright colors or if you intend to use preshading techniques. Because I wanted a rusty and worn effect, I covered the primer with dark brown sprayed from all angles. On top of that, I used a medium burnt sienna color in splotches here and there that seemed like they would be the most worn and rusted. On top of that, and leaving some of the previous layer showing, I sprayed a bit of bright orange. Since this is rust, it doesn't need to be uniform or even--overspray and mistakes are okay. 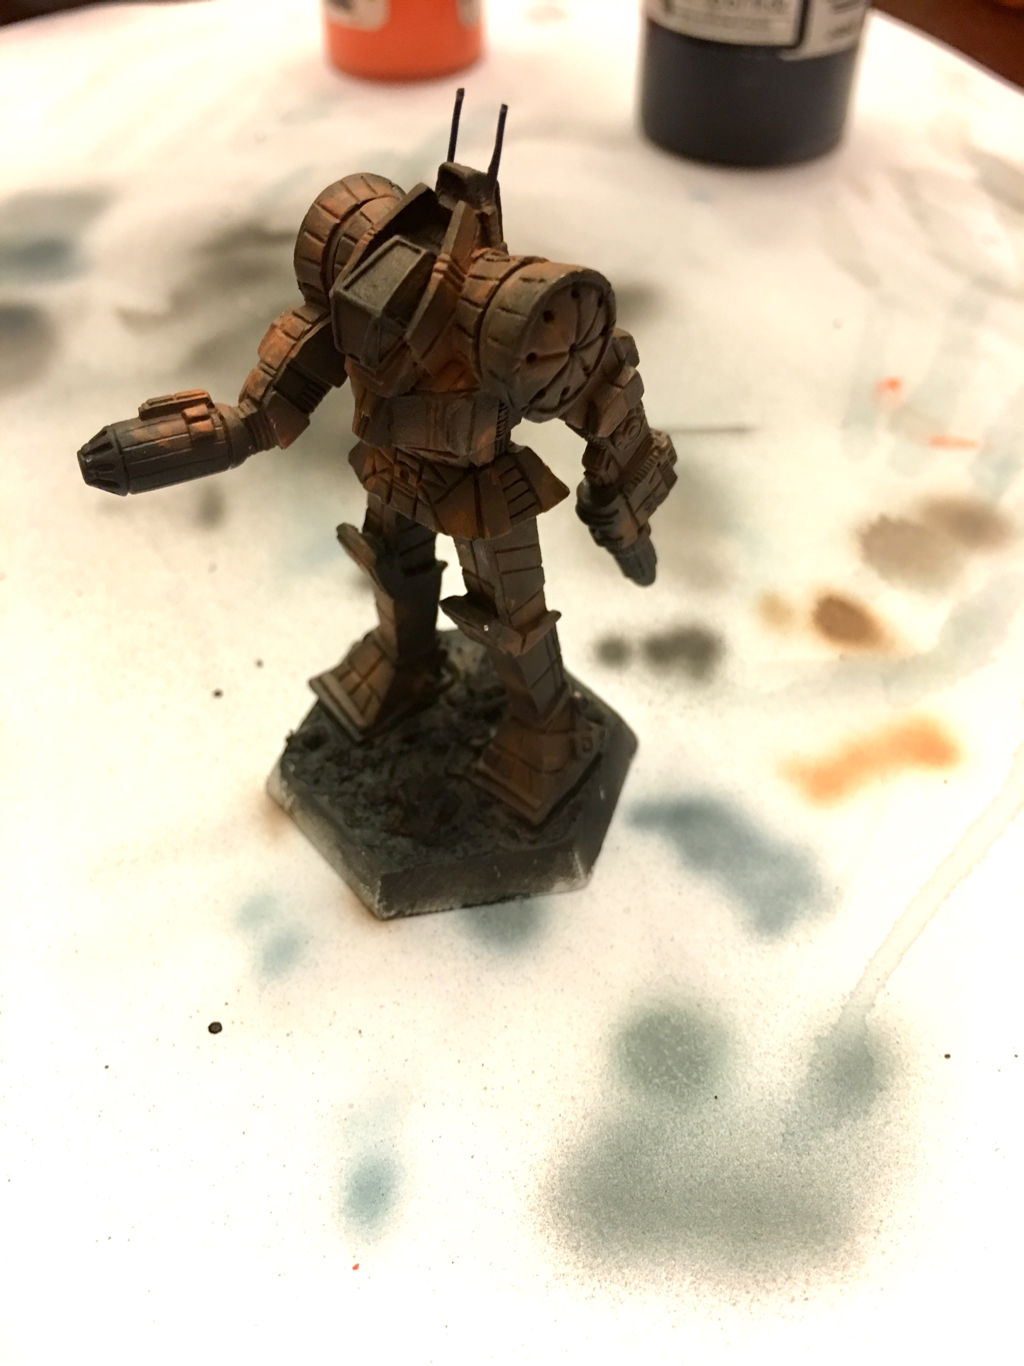 Different mini, but the principle is the same. Using the chipping effect (akin to the hairspray method), required me to seal the miniature with Matt varnish at the step. It's best to get a good deal and let it set over night before applying the chipping effect. After setting aside for an evening, I applied chipping effect liberally to the miniature. The more you use--in several coats--the greater the chipping effect will be. Once it dries, the base coating began. With an airbrush, contrast is key. The layering method was: 1) 1:1 dark brown:navy blue--sprayed from all angles and even coverage 2) 2:1 navy blue:medium grey--sprayed from 0* to about 45* 3) 2:1:1 navy blue:medium grey:bleached bone--sprayed from 0* to 45* or so, but leaving the other layer still visible 4) 2:1:2 navy blue:medium grey:bleached bone--sprayed from 0* to 30* or there about, with attention given to other areas that may have some highlight 5) 2:1:2:1 navy blue:medium grey:bleached bone:white--0* and highlights as necessary Each time, I diluted the paints with twice as many drops of airbrush thinner. After the last highlight, the chipping began! With warm water and a soft brush, I GENTLY scrubbed at the edges, knees, feet, and other areas that seems like they would be worn and rusted. Some of the underlying paint stripped off--though frustrating, this is okay. When I was satisfied with the results, I dried and resealed the mini. To enhance the rust effect, I dipped a corner of a packing Sponge in dark brown, wiped off most of the pint, then stippled it onto the miniature. With an old brush, I stipples burnt sienna into the center of the larger scrapes. To create streak, I mixed sepia wash and orange together, stipples one to the piece in strategic locations where rusty water would collect, and before it dried, take a dry bush and streak it. It takes several layers to get a good effect. The base was a similar method, but with desert sand tones. Don't forget to follow me on Instagram the_artist_known_as_capn_ed for more updates! |
Cap'n EdTutorials and Projects Archives
January 2018
Categories
All
|
Cap’n Ed’s ’Mech Hangar

 RSS Feed
