|
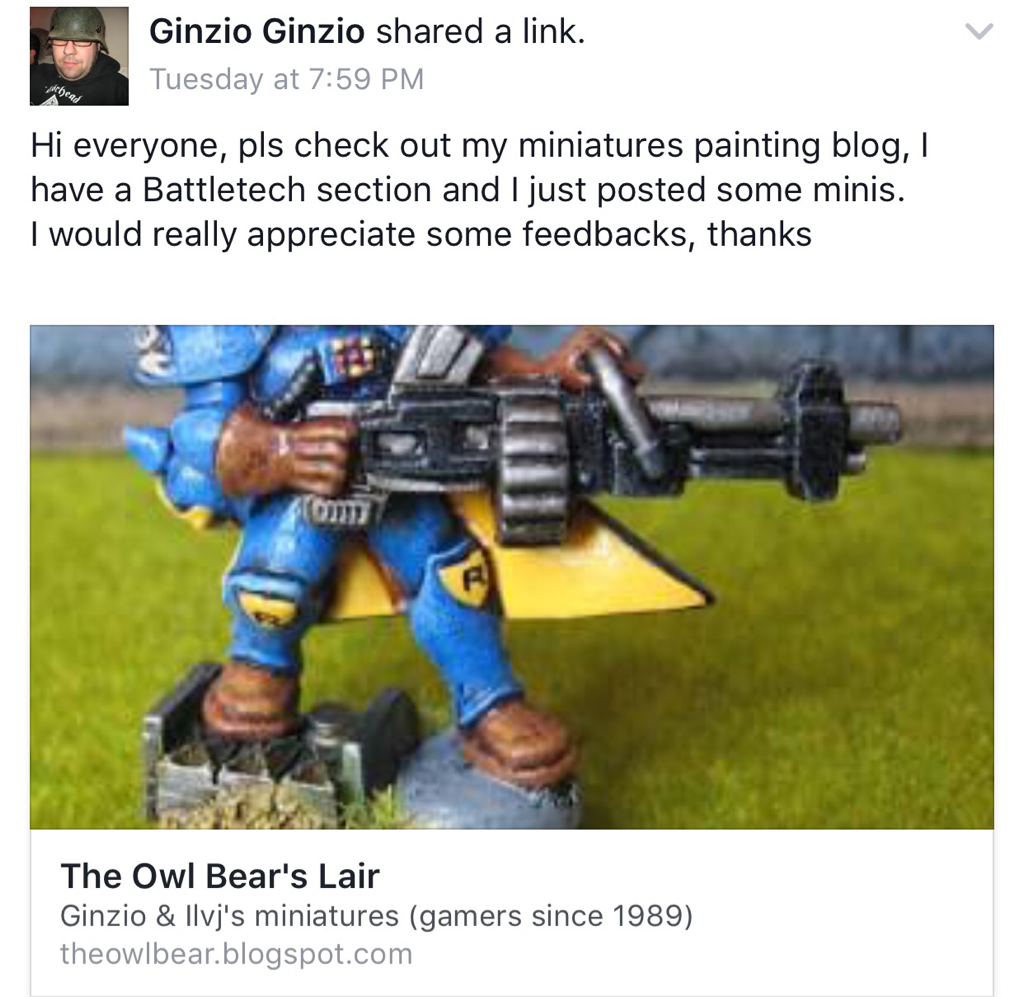
In Battletech Community, we examine and share the sites, pages, and groups of the mainstay of Battletech and Alpha Strike--the players and hobbyists. 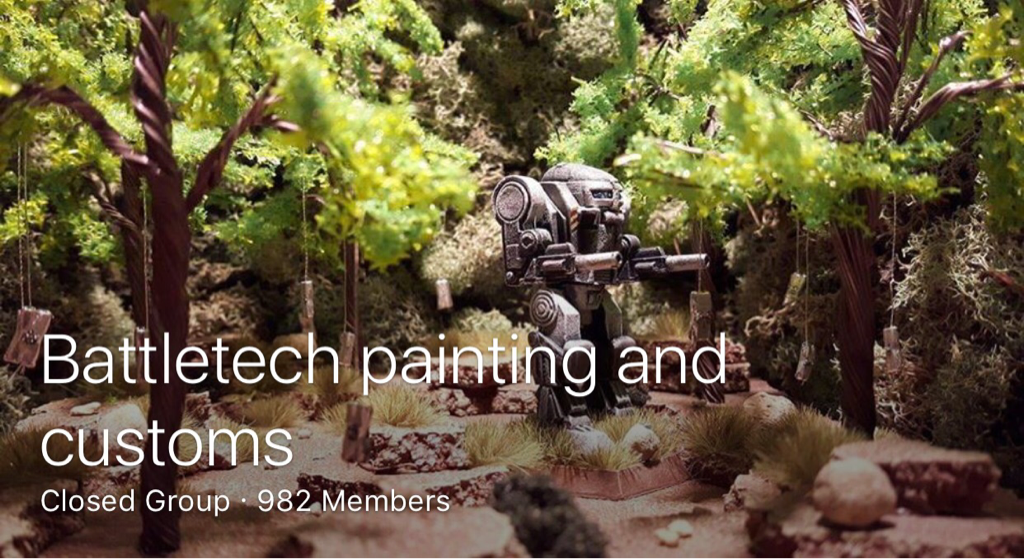 The cover photo of Battletech Painting and Customs. Admins change this weekly, highlighting the spectacular art of competition winners or outstanding, community posts. Facebook is one of the best tools to reach out to the global Battletech and Alpha Strike communities. With hundreds and hudreds of pages thrown back from a "Battletech" group search, its easy to lose a afternoon finding groups to join. For players, painters, and hobbysits, Battletech Painting and Customs stands as a leader for sharing the diverse world and work of miniature artists. With an active membership of nearly 1,000 'Mechwarriors, Battletech Painting and Customs has regular competitions, featured artist pictures, a rich and active work-in-progress and tutorial scene, and creative projects from sketching to sculpting! Battletech Painting and Customs doesn't beat around the bush--it is "a place specifically for painting tips, projects or jsut show off your stuff!" ContentAs the name implies, Battletech Painting and Customs has content for nearly any conceivable aspect of the hobby of painting and customizing miniatures. Two major categories of content keep this page moving: admin generated contests and member created art. Between these two contributions, Battletech Painting and Customs keeps the push notifications coming throughout the day. CONTESTS The admins keep the community pushing the envelope and improving their skills through contests. Contest guidelines always have clear rules and an interesting challenge, attracting great contributions from painters and modelers across the globe. The most recent, that ran from October through December 2016, challenged members to create a miniature diorama. With great work submitted from some notable artists, the victory went to Chris P. Bacon's "Battle of Wolcott" interpretation. More than just an oportunity to gamble on new techniques, these challenges carry prize support--and what's better than painting for free stuff? The current contest: paint a Marauder, Catapult, or Mad Cat! What's cooler than that? Find more details at the Battletech Painting and Customs Facebook page! 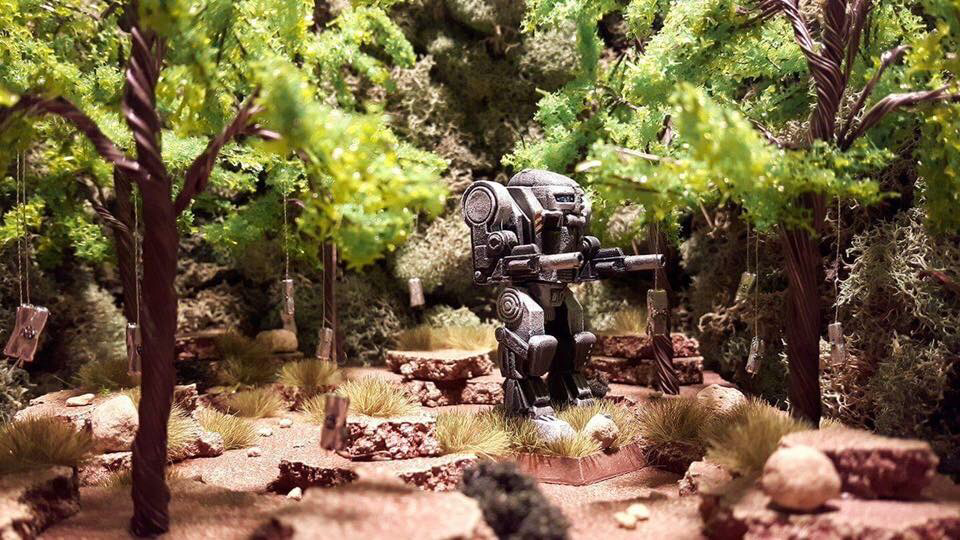 MEMBER CREATED ART When not creating spectacular dioramas, the members of Battletech Painting and Customs are working on finding long lost miniatures, sketching out ideas and form studies, modeling cool and interesting mods, and growing as artists. This page is a center for the artistic development of the hobby of Battletech. Member created art keeps this page alive and the hobby moving. 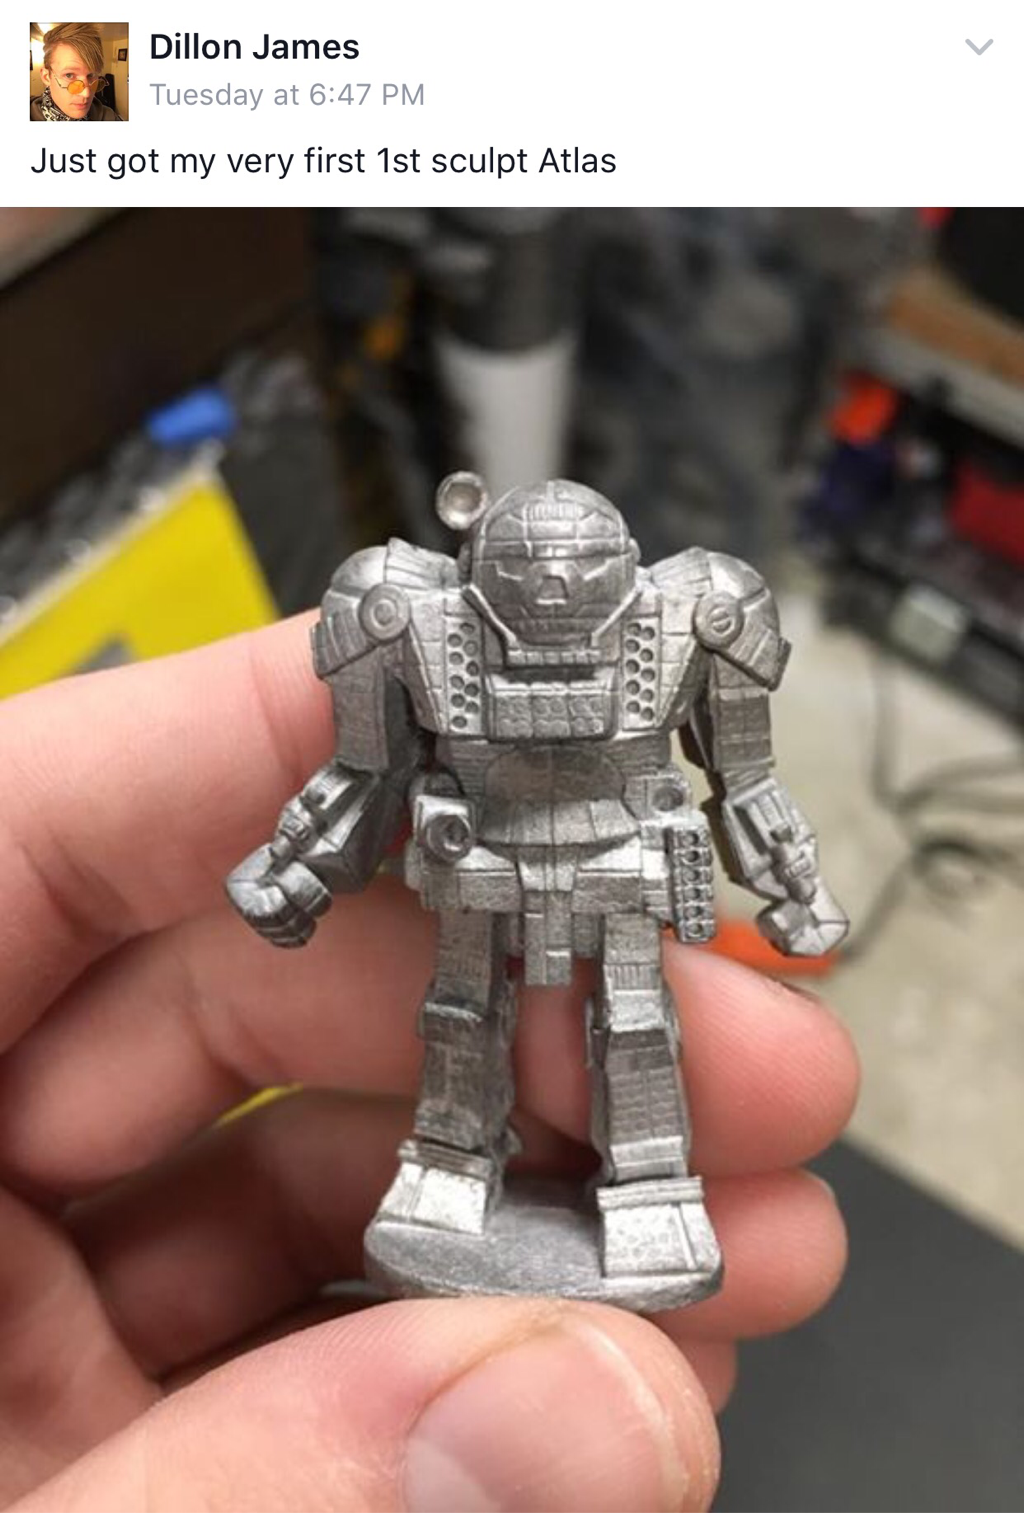 This post from Dillon James highlights the elation that we all feel when we come across that long sough after miniature that seems to only exist in memory. 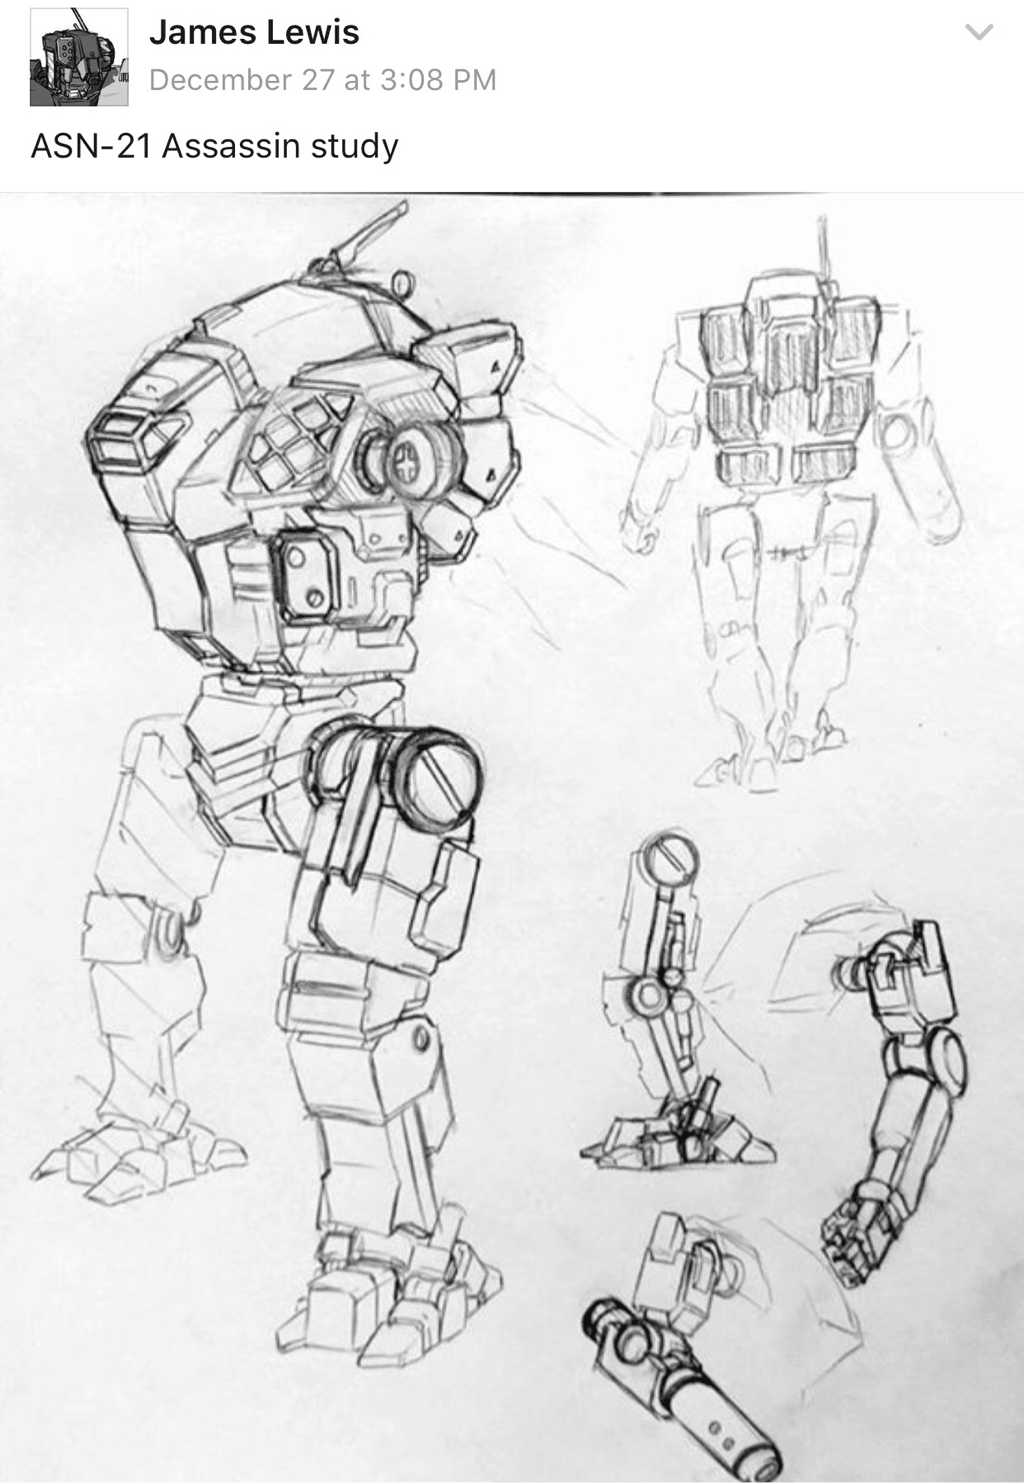 Sketches and studies like the work of James Lewis and other artists show that the big, stompy robots of Battletech continue to grow and evolve as artistic tastes change and provide inspiration for reposes, modifications, and resculpting. 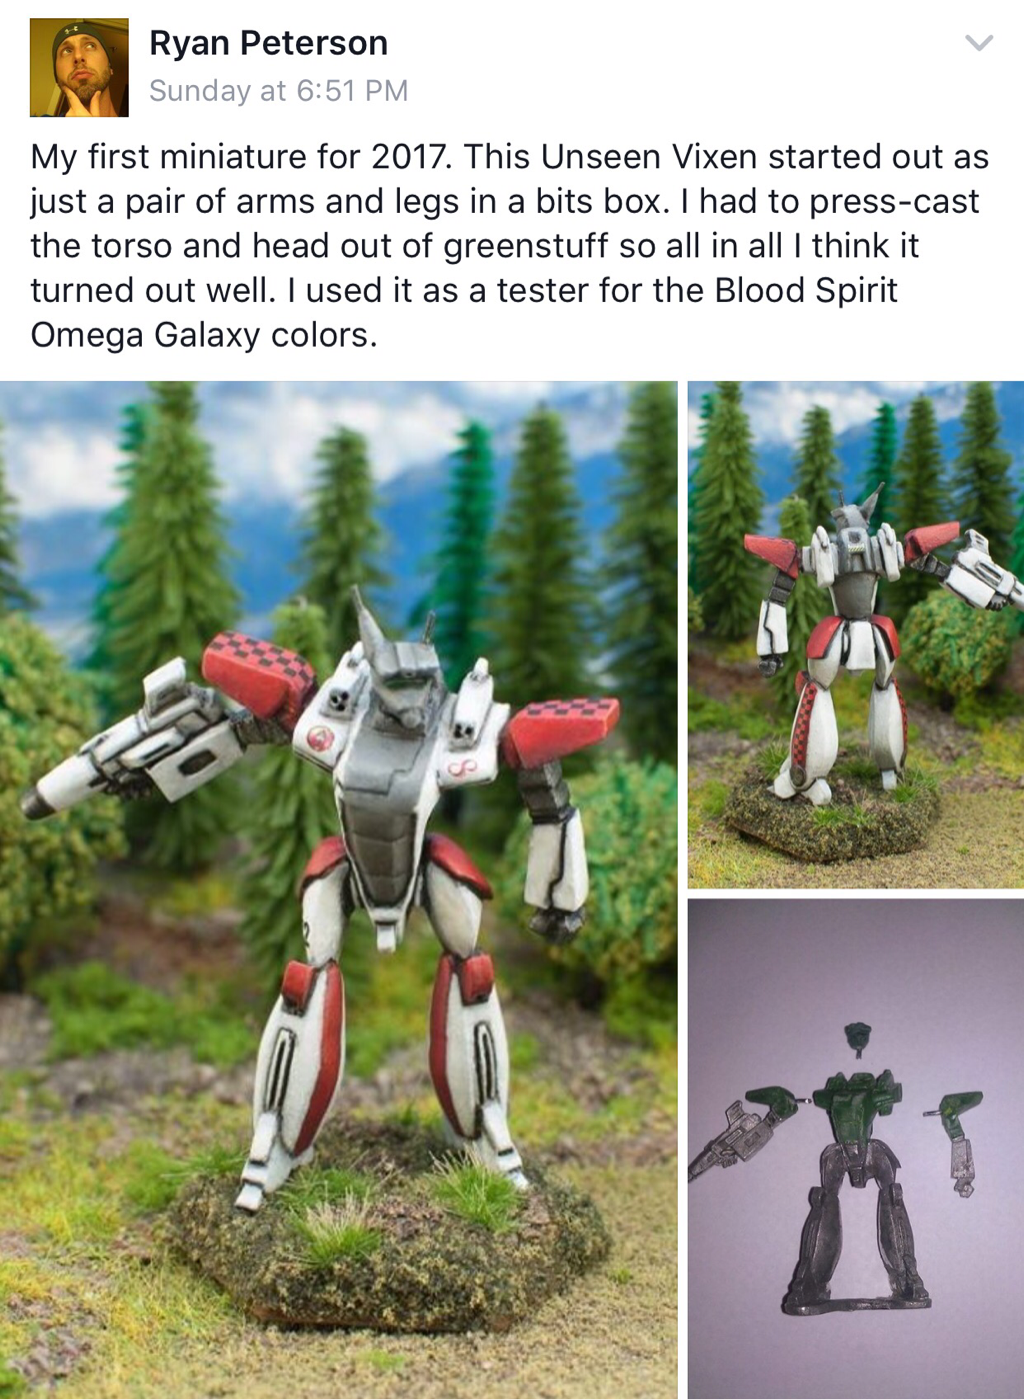 Multi-photo posts like this from Ryan Peterson show how artists can create an inspiring, complete miniature from spare parts and greenstuff! BLOGS AND TUTORIALS Several of the followers of Battletech Painting and Customs manage their own blogs and websites. With these awesome teams, both the page and contributors can help spread the hobby and, from time to time, give peaks into their craft secrets.
PHOTOBOMBS! What's more, users don't merely throw up pics of giant, stompy robots. Vehicles, tanks, VTOLs, aerospace assesst, battlearmor, even the lowly infantry trooper make their way onto the posts of Battletech Painting and Customs. 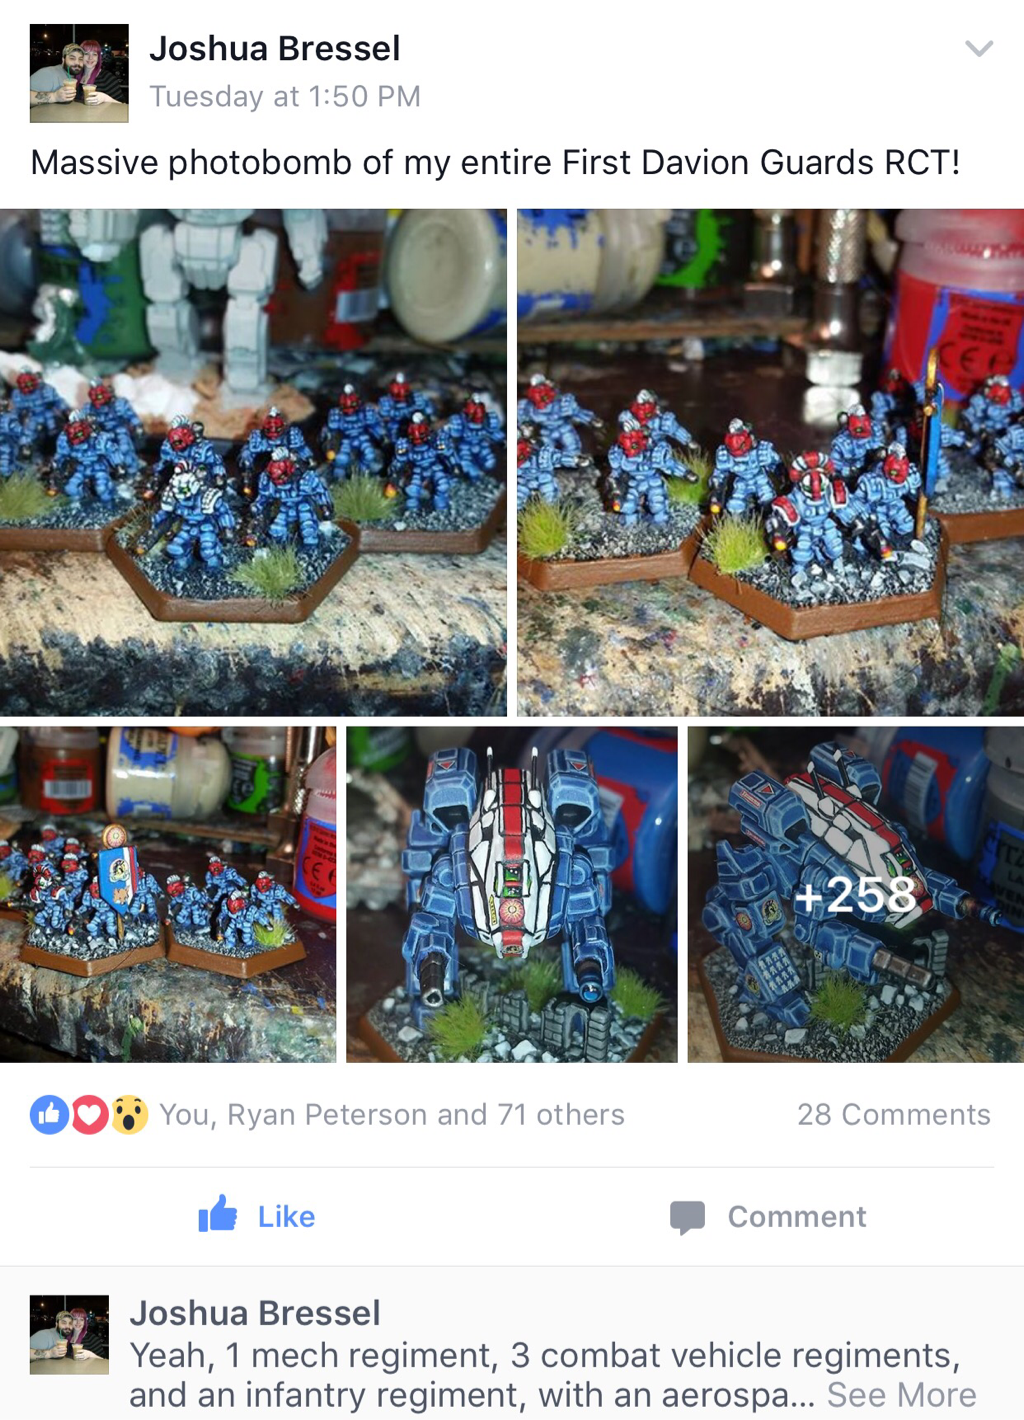 A prolific painter in his own right--I mean, just look at all that painted metal! Whose who?Nathan Pelchat is the owner/creator/admin for Battletech Painting and Customs. He built this page to "really focus on the custom, 'hobby' aspect of the rich [Battletech] universe." With aims to inspire fans to new levels of creativity and help teach the skills of the hobby to along the way, Pelchat aims for the page to continue to build mentor-mentee relationships are Battletech begins to build a player base with the next generation. And he's not just content with reaching across generations. Pelchat wants to conquer the globe! In the coming year, he hopes that Battletech Painting and Customs will "reach players from across the globe and...with others who share similar hobbies." He continues, "I have personally made several friends who I now converse with and houg out with outside of Facebook." This may be the most noble goal of Battletech Painting and Customs: to be a place for artists from across the globe to share their common bonds and overcome their differences--be they as minor as languages and citizenship or as major as faction alliances and fan-systems! A combination of his dedicated administration and the work of artists from Asia, through Europe, and into the Americas keep this page running and the community growing. 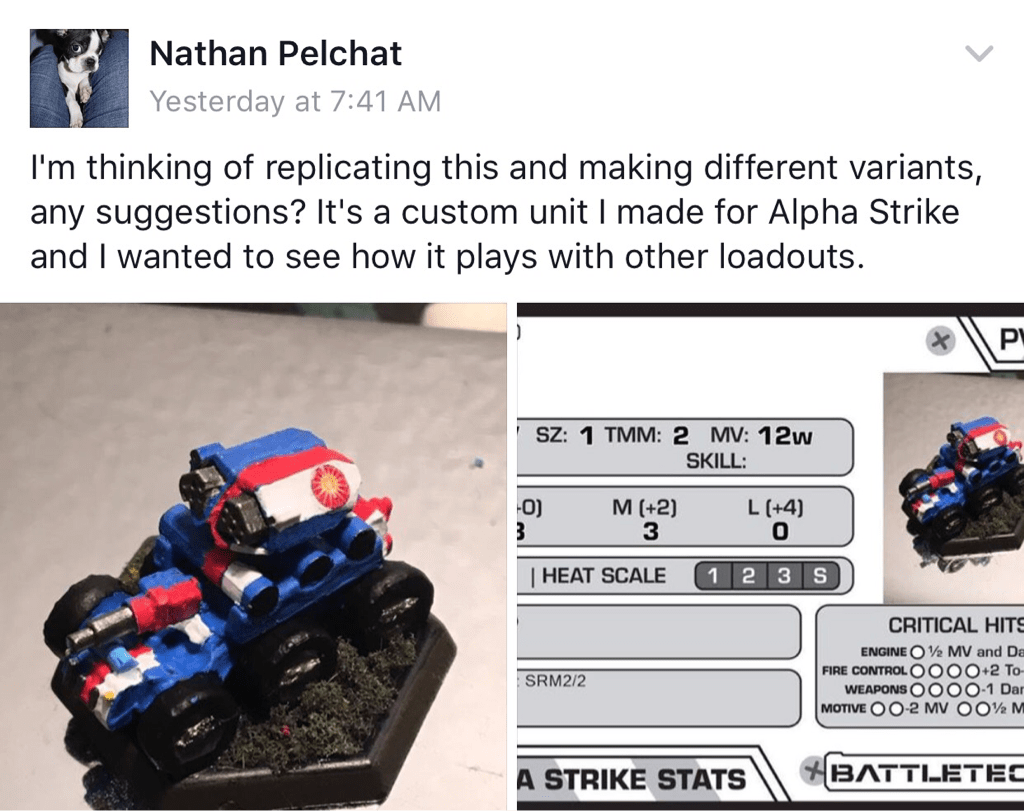 Nathan Pelchat, the creator and admin of Battletech Painting and Customs highlights the driving force of the page--to push the artistic envelope, create new ideas, and build a community of hobbyists. OverallBattletech Painting and Customs is a great--and unique--place for players, painters, and modders to come together, enjoy some friendly competition, and build 'Mechs and community. Its noble goals of continuing the game and hobby into the next generation and across the globe sets a standard of sportsmanship to rival the altruism of Rule 1 ("Have fun"). This is an excellent place for anyone in any level of modeling and painting to frequent and is one of my favorites.
Now...where did I put that Marauder...
2 Comments
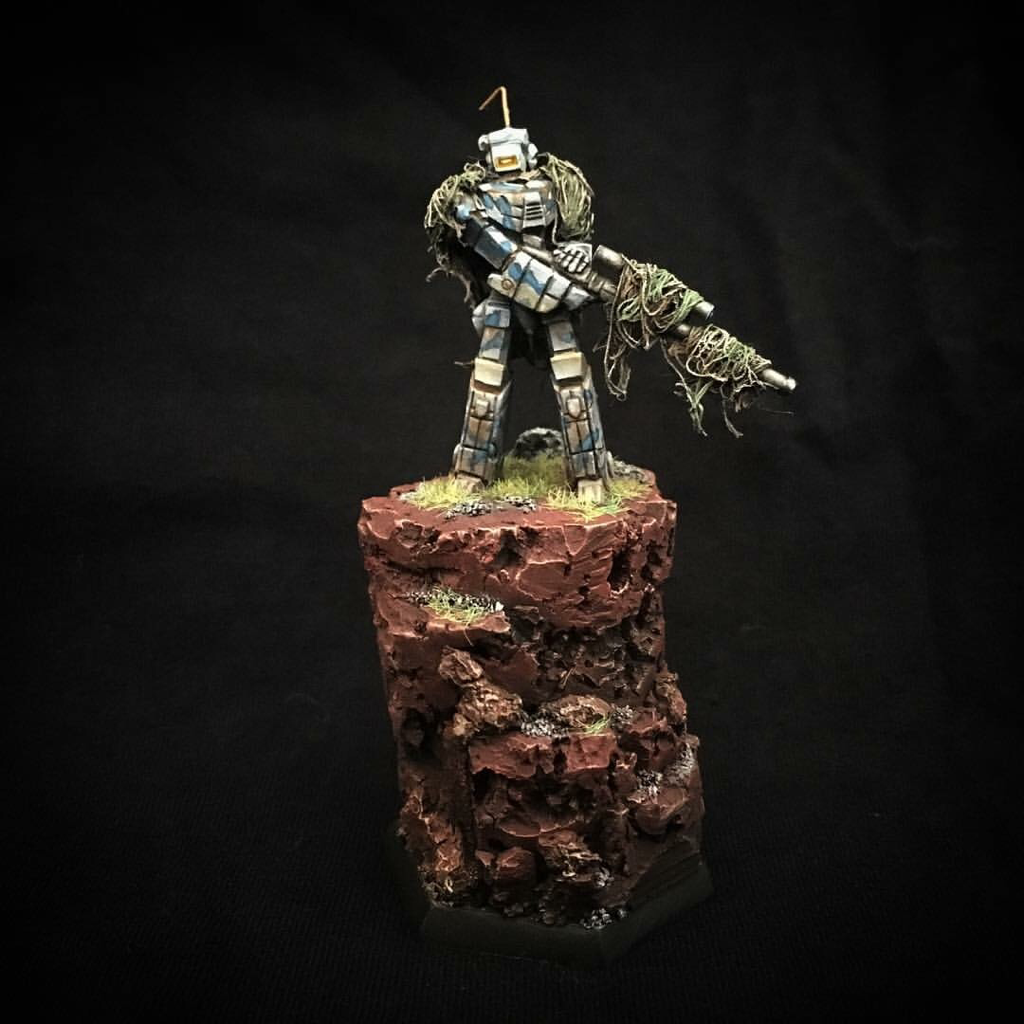 Welcome to Mod Monday! One of the best ways to make your force stand apart from the rank and file and attract new players to the table is with creative and unique game pieces. While Battletech and Alpha Strike aren't WYSIWYG (wee-see-wig, "What you see is what you get") like other games, modifications, reposes, and creative construction enhance the gaming experience. In Mod Mondays, we look at cool modifications and tutorials to build dynamic and different models. For this post, I'll walk you through the build of my Long Shot Stinger that was featured on Battletech Painting and Customs. Tools & Supplies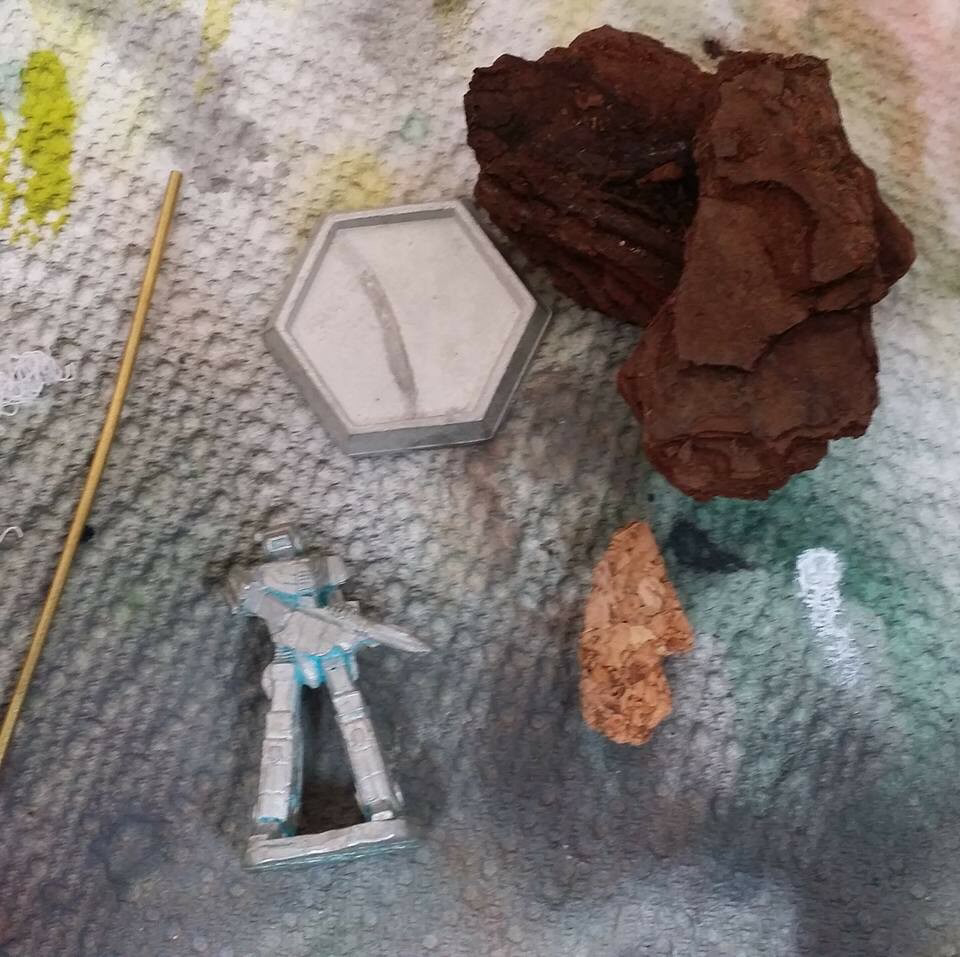 One reason I chose the unseen Stinger miniature for this build was because of the already interesting pose, the one-piece of the model being easier to work with, and the fact that I gave myself a 48 hour turnaround window from start to finish.
Initial Assembly
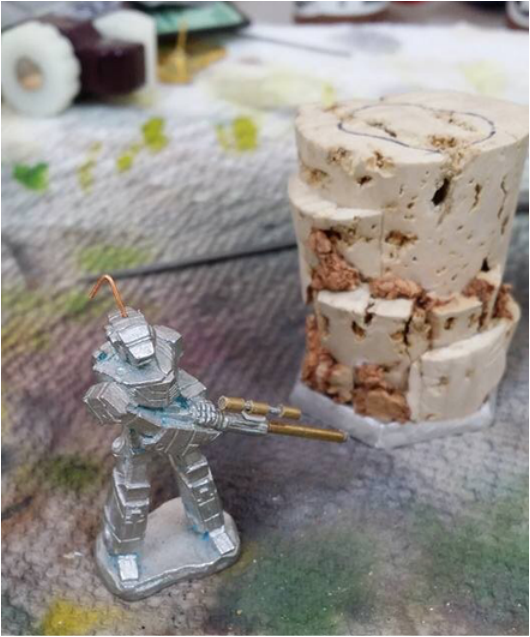
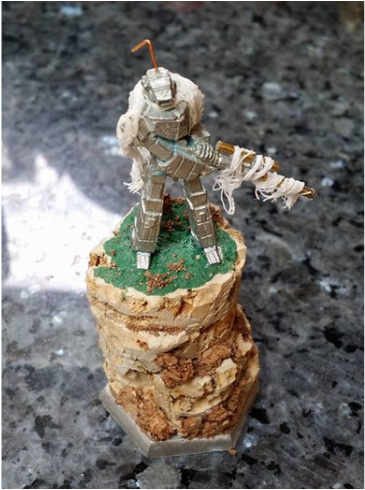
Building the Miniature Start by cleaning the mold lines and flash from the miniature with an X-Acto and files. This is one detail that I am very meticulous about and so I have several sets of files and sizes of razor blades. This piece was relatively easy to get into all of the recesses, fortunately, so I didn't use many of my special tools. Do be careful, however, when removing mold lines to not gouge and scrape lines into the piece. I drilled a small hole in the guide on the cockpit to add a piece of copper wire. Prior to gluing it in, I gave it a slight bent towards the top to resemble the antenna on Vietnam-era military radios. This, I hoped, with the final piece would give it an "in the bush" feel. To build the extended range laser, I first sawed the muzzle off the barrel very carefully. After that, I drilled a guide hole into both pieces. With the tube cutter, I cut a selection of brass tube to the length I wanted--not too long so as to not fit on the base, but not too short. With the section cut, I passed a paperclip through it to fit into the base of the laser and the muzzle--this was the pin to hold the assembly together. Once fitted, I clipped the clip with wire cutters and used superglue to glue the assembly together. The scope was built in much the same way: brass rod and paperclip. To give the scope a rail to mount onto the laser, I used a small scrap of plasticard. Finally, to give the appearance of lenses, I added small drops of superglue into the ends until filled. Building the Base The base was a relatively simple matter. First, I cleaned the mold line from the base--because all mold lines must go! To get the appropriate inverted cone look I was going for, I used the bottom of the base to trace a rough outline of the hexagonal dimensions.To make sure when trimming I didn't trim away the area the miniature would sit in, I also traced that footprint of the Stinger on the top of the cork. Next, to trim away the excess cork and shape it into a hexagonal cliff, I used the razor saw. After this, I used an X-Acto and other tools to hollow out the space for the miniature to fit. This may take a couple tries to get it deep enough. It was very important to save the scraps from all of this scraping and trimming--I glued these on lower setions to give a stair-step appearnce. With more scrap cork and modeling sand, I filled in the cracks and created an interesting, mixed media look. I filled in the space in the hex base with green stuff. Before it had time to set completely, I began pressing the cork into it to set. Once the base was set, I used superglue to glue the base of the miniature in the setting I created for it. With greenstuff, I filled the area between the base and the cork then spread a thin layer over most of the top of the piece. To create an uneven, earth effect, I pressed and removed pieces of cork into this. Finally, I added a touch of superglue to the top, dusted it with modeling sand, and scrapped away the excess before it was completely dry. 'Mech Sized Camo Net
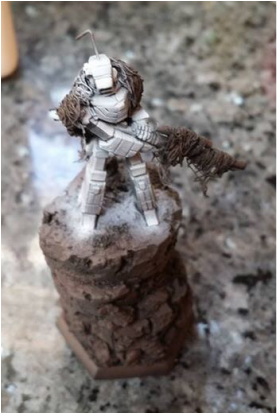
Giving it Color
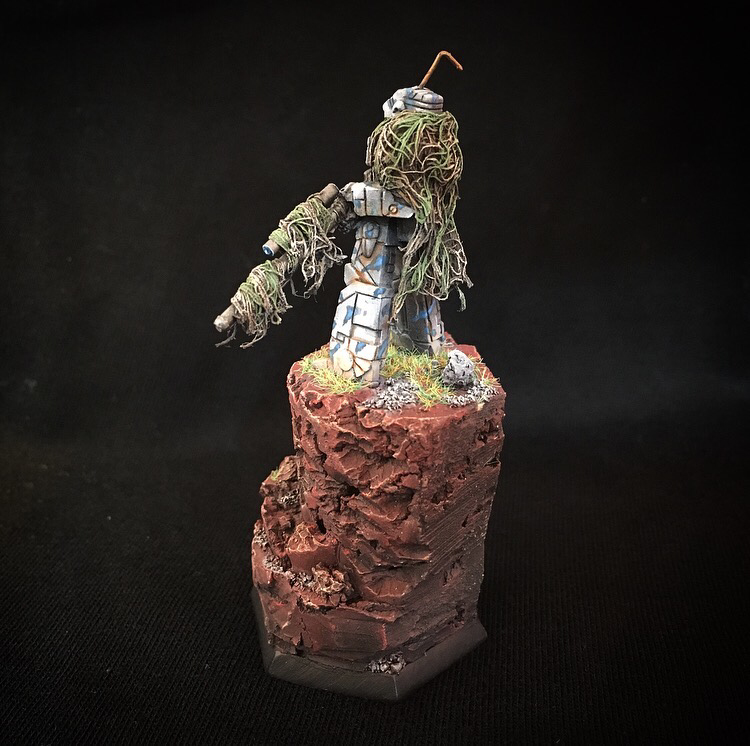
The method of the net was similar, but from dark brown to tan (45*), to bleached bone (0*). I used a series of dark to light greens for the camo stripes. To bring out some of the volume, I drybrushed some of the raised areas a bit with egg-shell white (whiter than bleached bone, but not white). It is important with every layer to make sure you leave a bit of the previous color layer visible in each subsequent layer to create a pleasing fade. Details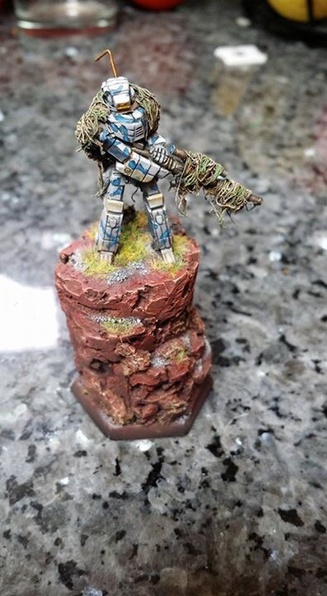 To justify the camo net, and make the piece overall a bit more interesting, I chose to work with a blue on grey camo apttern. The camoflauge was done by painting roughly-shaped striped in dark blue. On top of those, I layered medium and light blue. For the metallics, I reprimed the spot with brushed on dark brown for a gritty look. On top of the laser, I drybrushed gun metal, highlighted with a drybrush of steel. For the joints and moving parts, I used steel. To finish off the metallics, I washed the laser with black and the joints with sepia. The antenna is bronze becase it's bronze, that's why. It was an interesting compliment to the blue, so it gave the piece a bit of a pop--albeit not a field-approved pop. To complete the cockpit, I experimented with a glowing color. This was achieved by washing and painting thin glazes of successive layers of yellow to white over a white brush primed screen. For the base, I airbrushed successive layers of dark brown, deep red, and bright red. On top of that, I drybrushed an orange-tan color and a fine bit of bleached bone. The interesting gravel and outcropping, I made grey with layers of drybrushed dark grey, medium grey, and bleached bone. These touches of grey help to create an interesting and varied piece. A bit of static grass pulled it all together and justified the tan and green camo net. As a final touch, I added a bit of dust to the knees, legs, and elbows to give the look that the machine had been in a prone position--fiting for the overall pose. This was done with a mixture of Tamiya weathering pigments, very drybrushed paint, and careful washes in areas that would collect rust (like around the knees). Finished PieceThis was a fun piece to finish. In it, I put a lot of experimental techniques designed to push my skill and make an interesting, different, unique work. The thrill of competition painting is one of the surest ways to improve techniques. I have walked away from each event a better painter, no matter where I placed in the running. HAVE YOUR OWN COMPETITIVE PAINTING STORY? SHARE IT BELOW IN THE COMMENTS!
|
Cap'n EdTutorials and Projects Archives
January 2018
Categories
All
|
Cap’n Ed’s ’Mech Hangar

 RSS Feed
